So while I was over at Alex’s on Wednesday I borrowed his jigsaw to cut out the first loom iteration from some half inch plywood I had purchased a while back.
Lessons learned:
* Don’t use sharpies for lines, it’s a pain to “erase” since it seeps into the wood (I knew this, I just keep screwing up and need to remember this)
*Curved lines are easier, plan with this in mind
*Plywood will de-laminate. Need to figure out how to avoid this when cutting or drilling into it.
So with that part done, I put everything else I’d need for the loom into my car to wait for my next available time to borrow Rozi’s shop and drill holes for the pegs. Also I needed to cut pegs. And sand them.
When the snow today ended up not being that bad during the daylight hours, I emailed Rozi to see if I could come over and use the shop for a little while. She said yes and so I was off and running.
I had two dowel sizes to work with 3/4″ and 1/2″. Alex and I discussed my options and we thought it might be a good idea to use the larger ones on the outside corners since they seem to get more stress than the inside pegs on the loom, but when I got to the shop I failed to find a way of drilling 3/4″ holes, so I went with all 1/2″ inch holes.
I also had two choices, a regular drill bit and a spade bit. I tried both, both left splinters on the backside of the plywood. I’m still not sure what difference the two options made, but they both worked for my purposes.
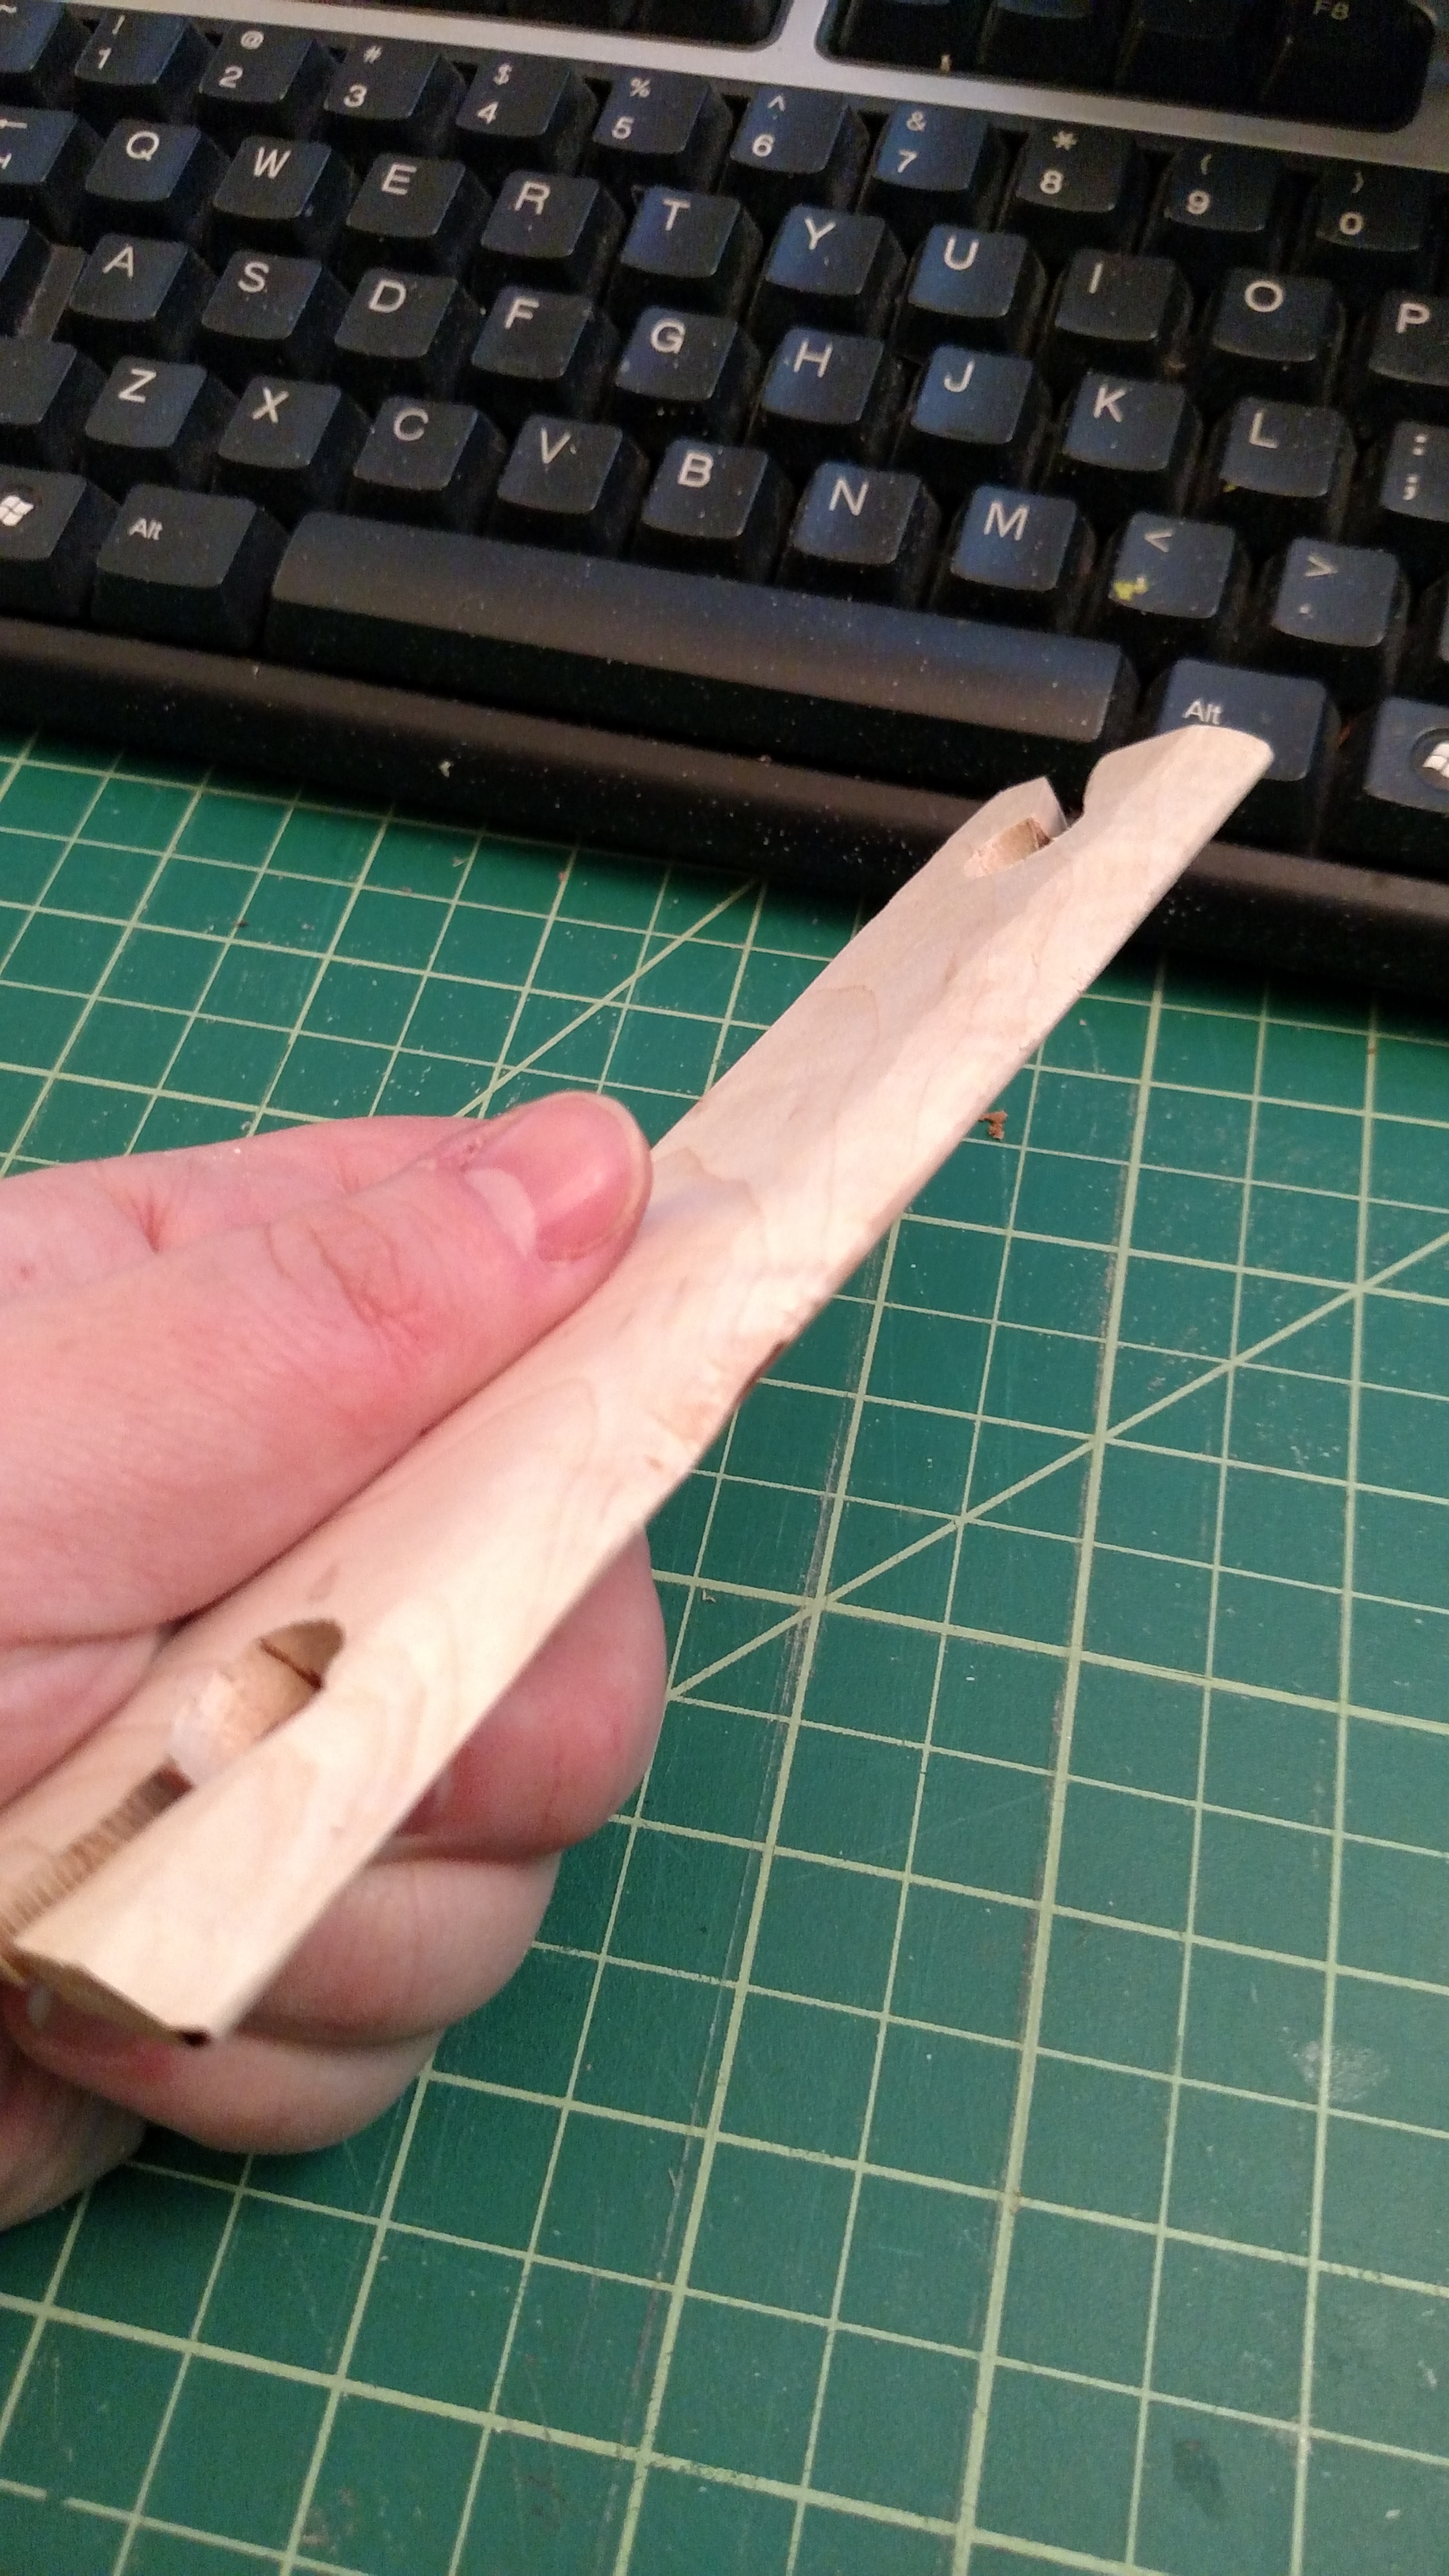
 Once I had all my holes drilled I cut my pegs and sanded off their sharp splintery bits on the ends. And then I remembered I had 4 shuttles to cut and drill also, so I went back and did that and then sanded them to be not spiky. Though at some point I need to put an edge on each of them as they currently aren’t terribly effective beaters since they are blunt. But I’m curious if my design for how the string goes on will work better for me since I have a hard time keeping the string from falling off. Also man Maple is pretty.
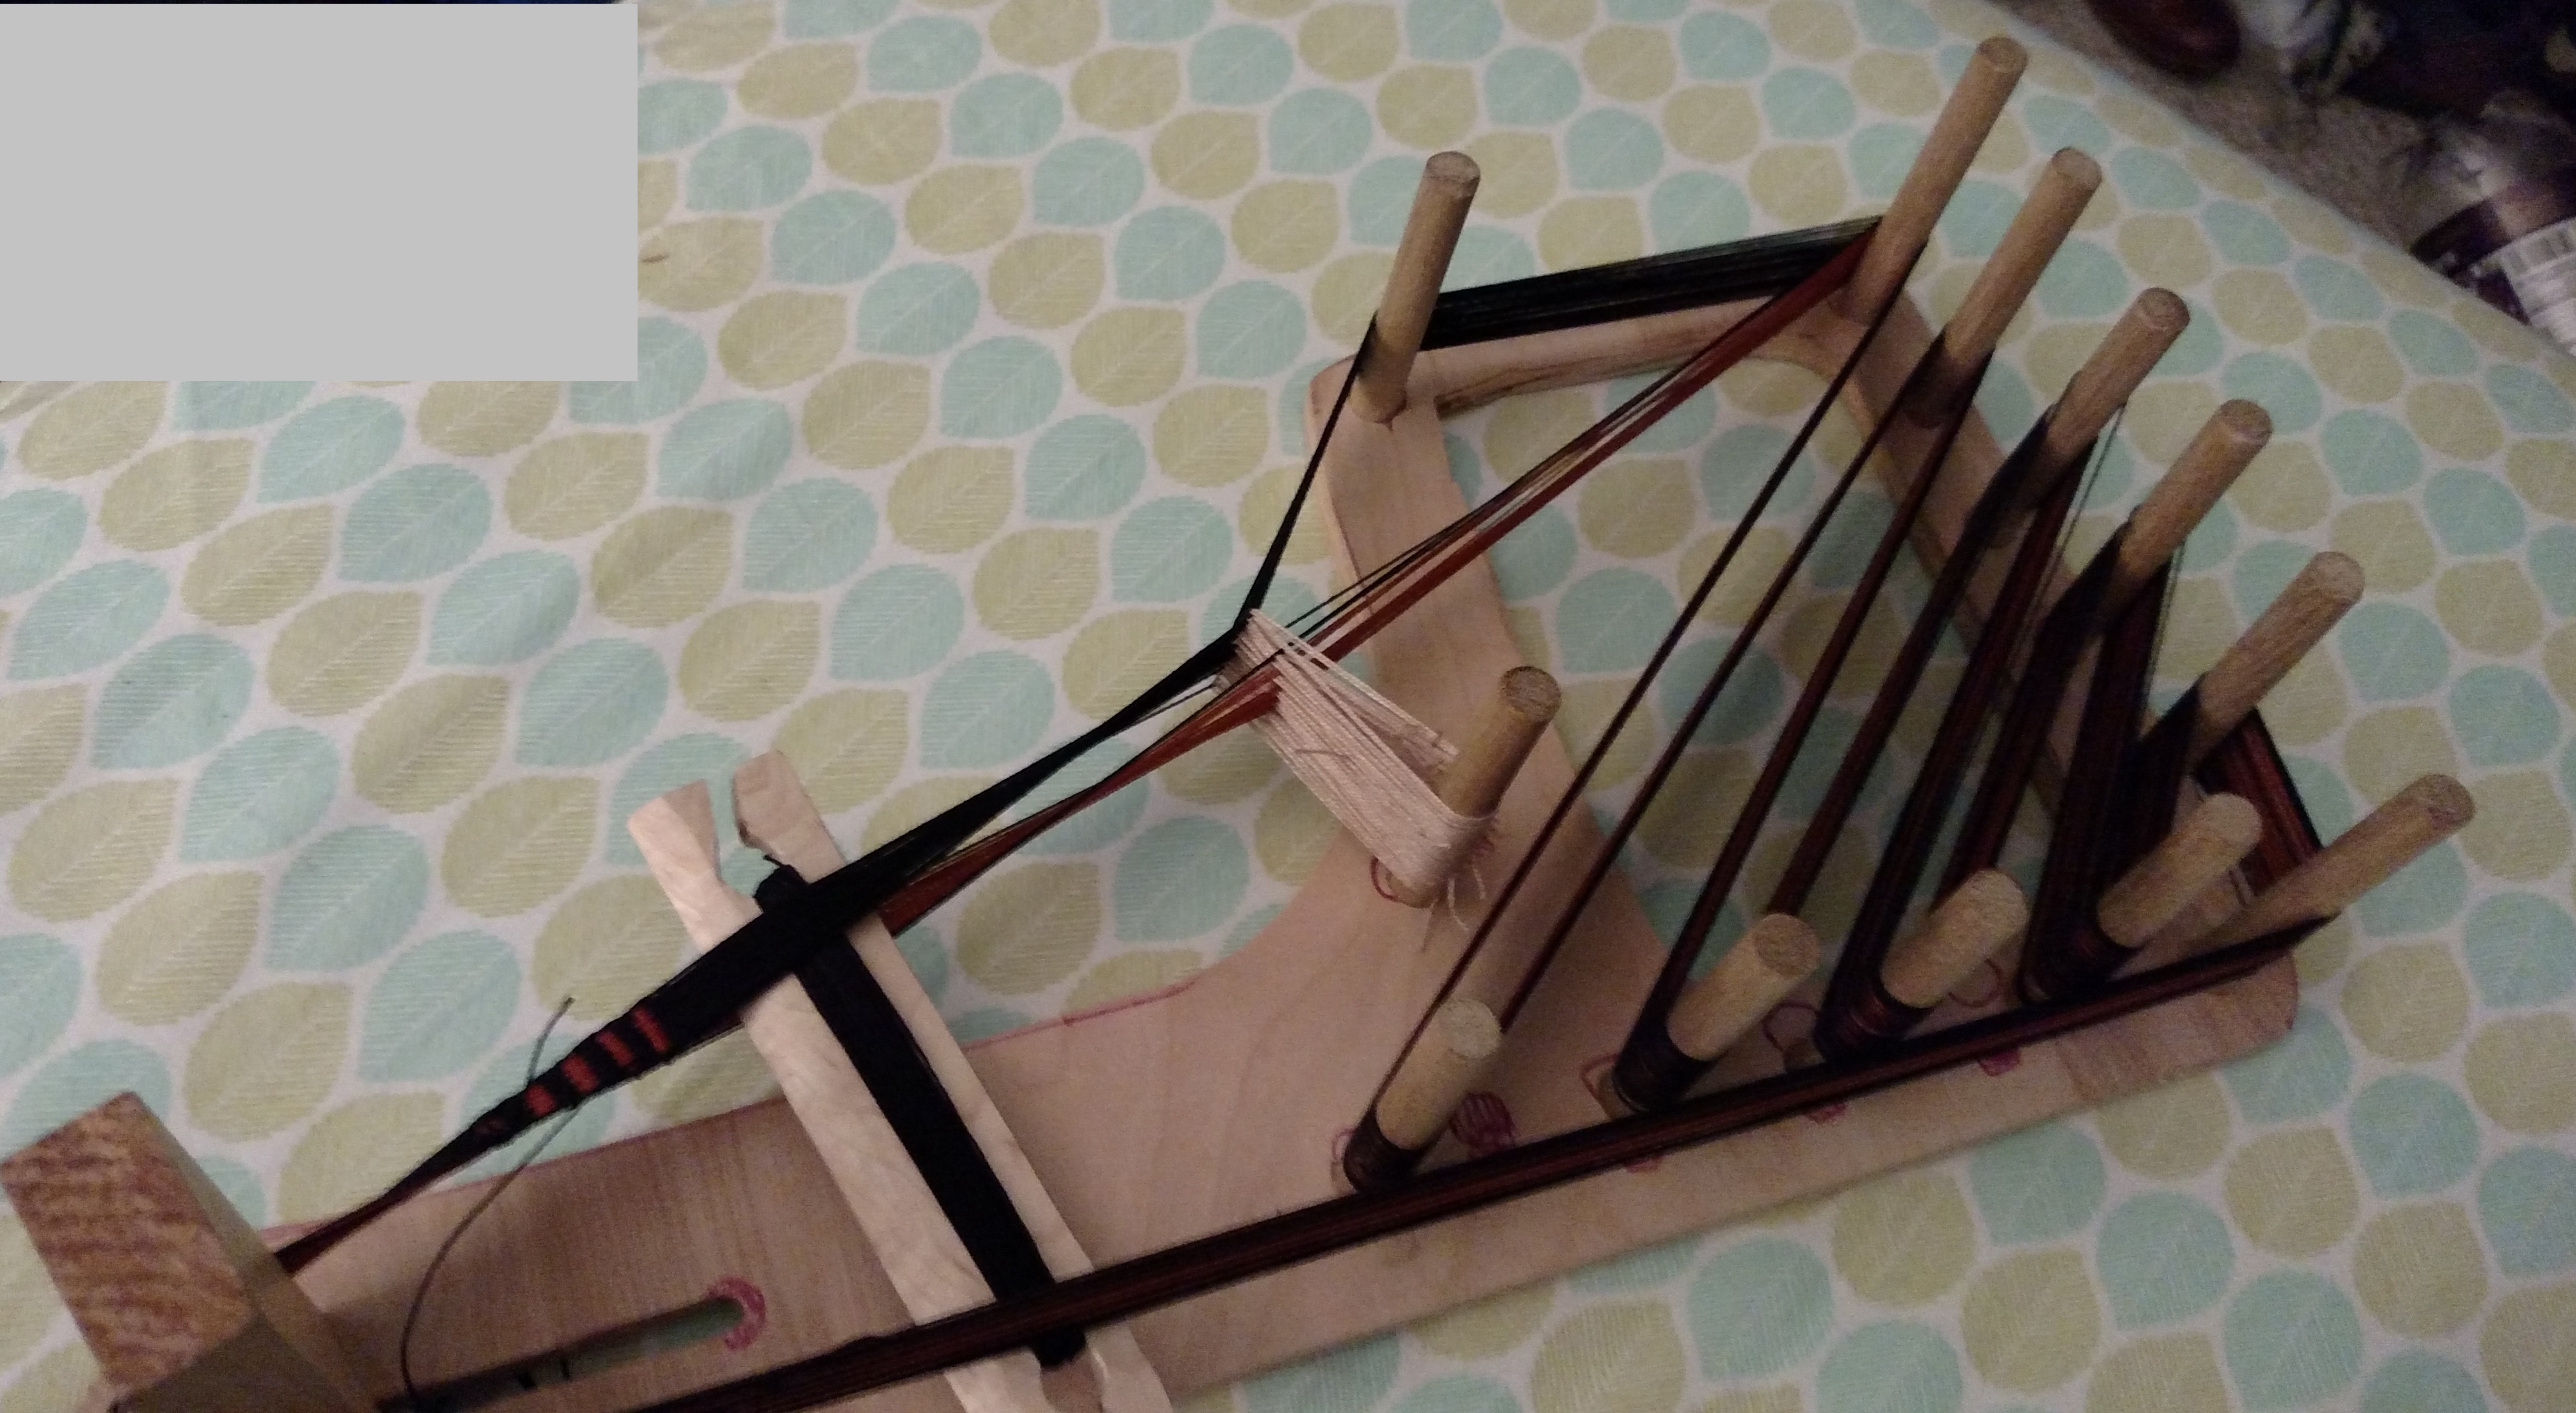
Then I headed to the hardware store to get a bolt for the tension peg, which is great and all, but I need to now make a tension peg and drill a hole in it for the bolt.. Perhaps Wednesday.. Or I might just use the one from my big loom for now. And then home to glue it all together.

I expanded the tension peg hole a little with hand tools and softened the sharp edges of the peg holes with my hand tools. I then put gaffer tape (it was what I could find, I wanted masking) on the back and put some wood glue in each hole and then put the pegs in, twisting them up and down to best distribute the glue. It’s sitting on a shelf now drying. We’ll see in 24 hours if it’s good enough. I really should have cut holes slightly smaller than my pegs and then forced them into the holes, as it was they slide in easily and I’m not sure if the glue will be enough to hold them properly.
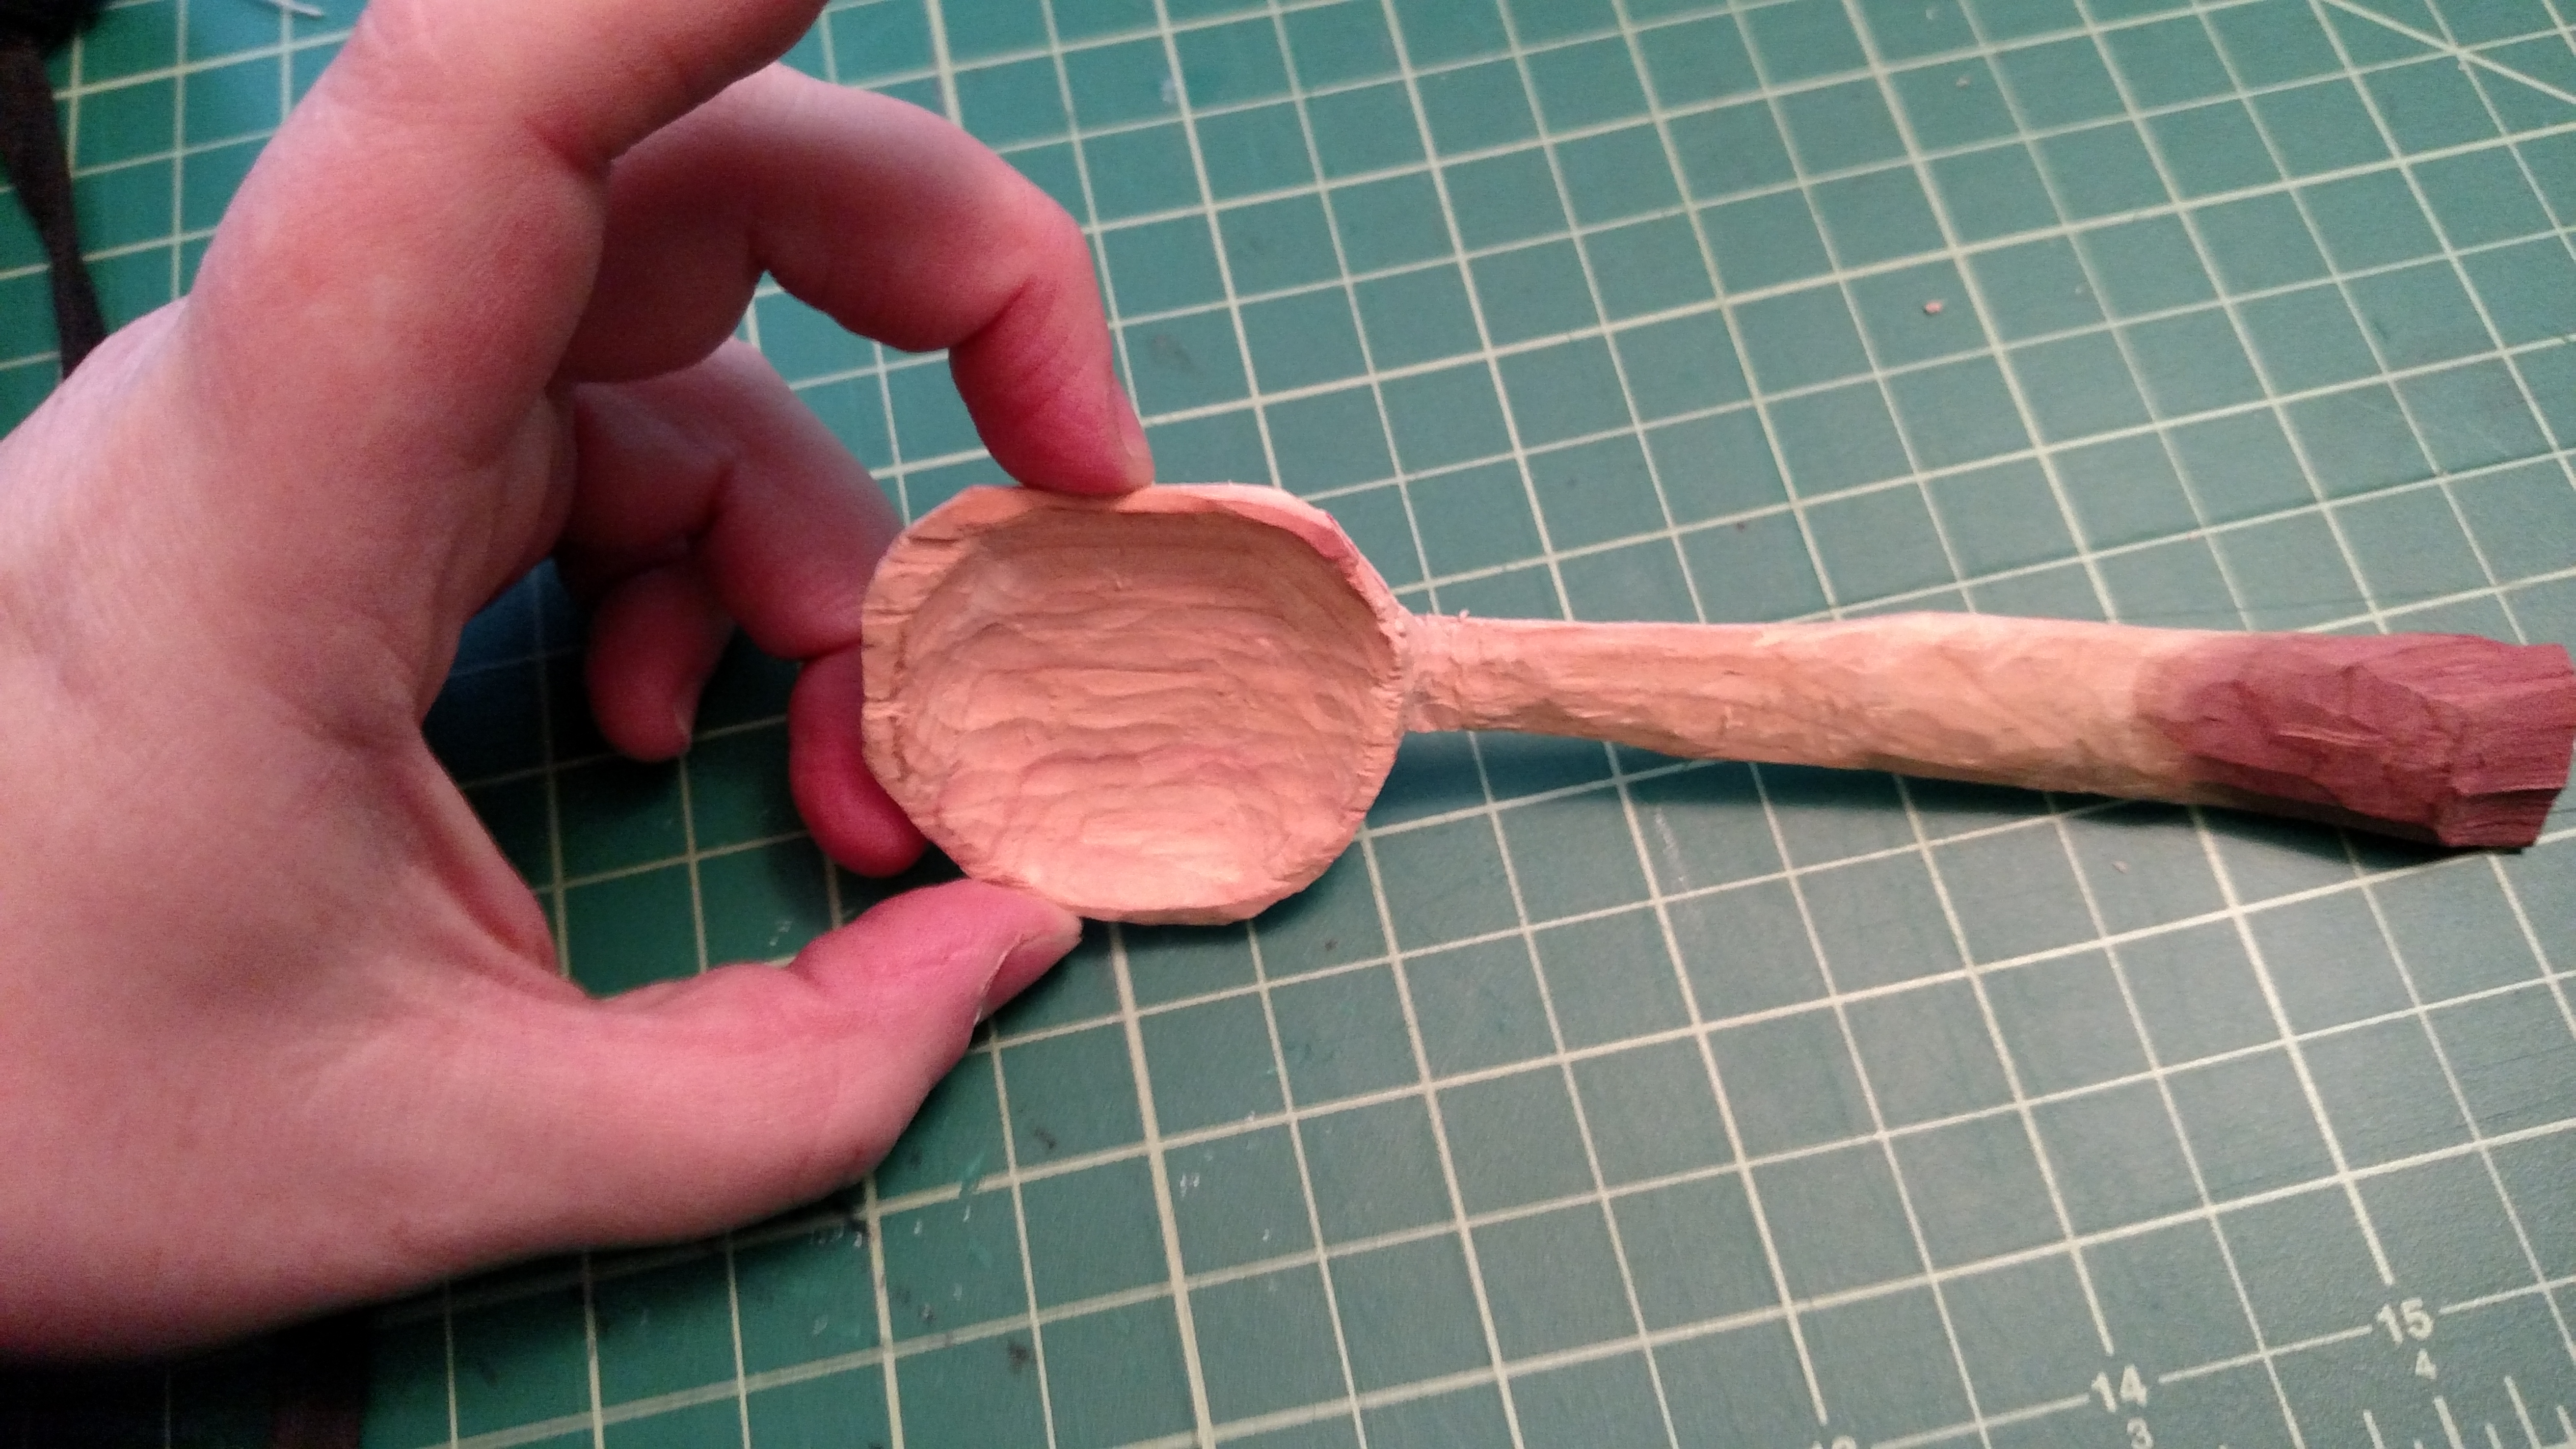
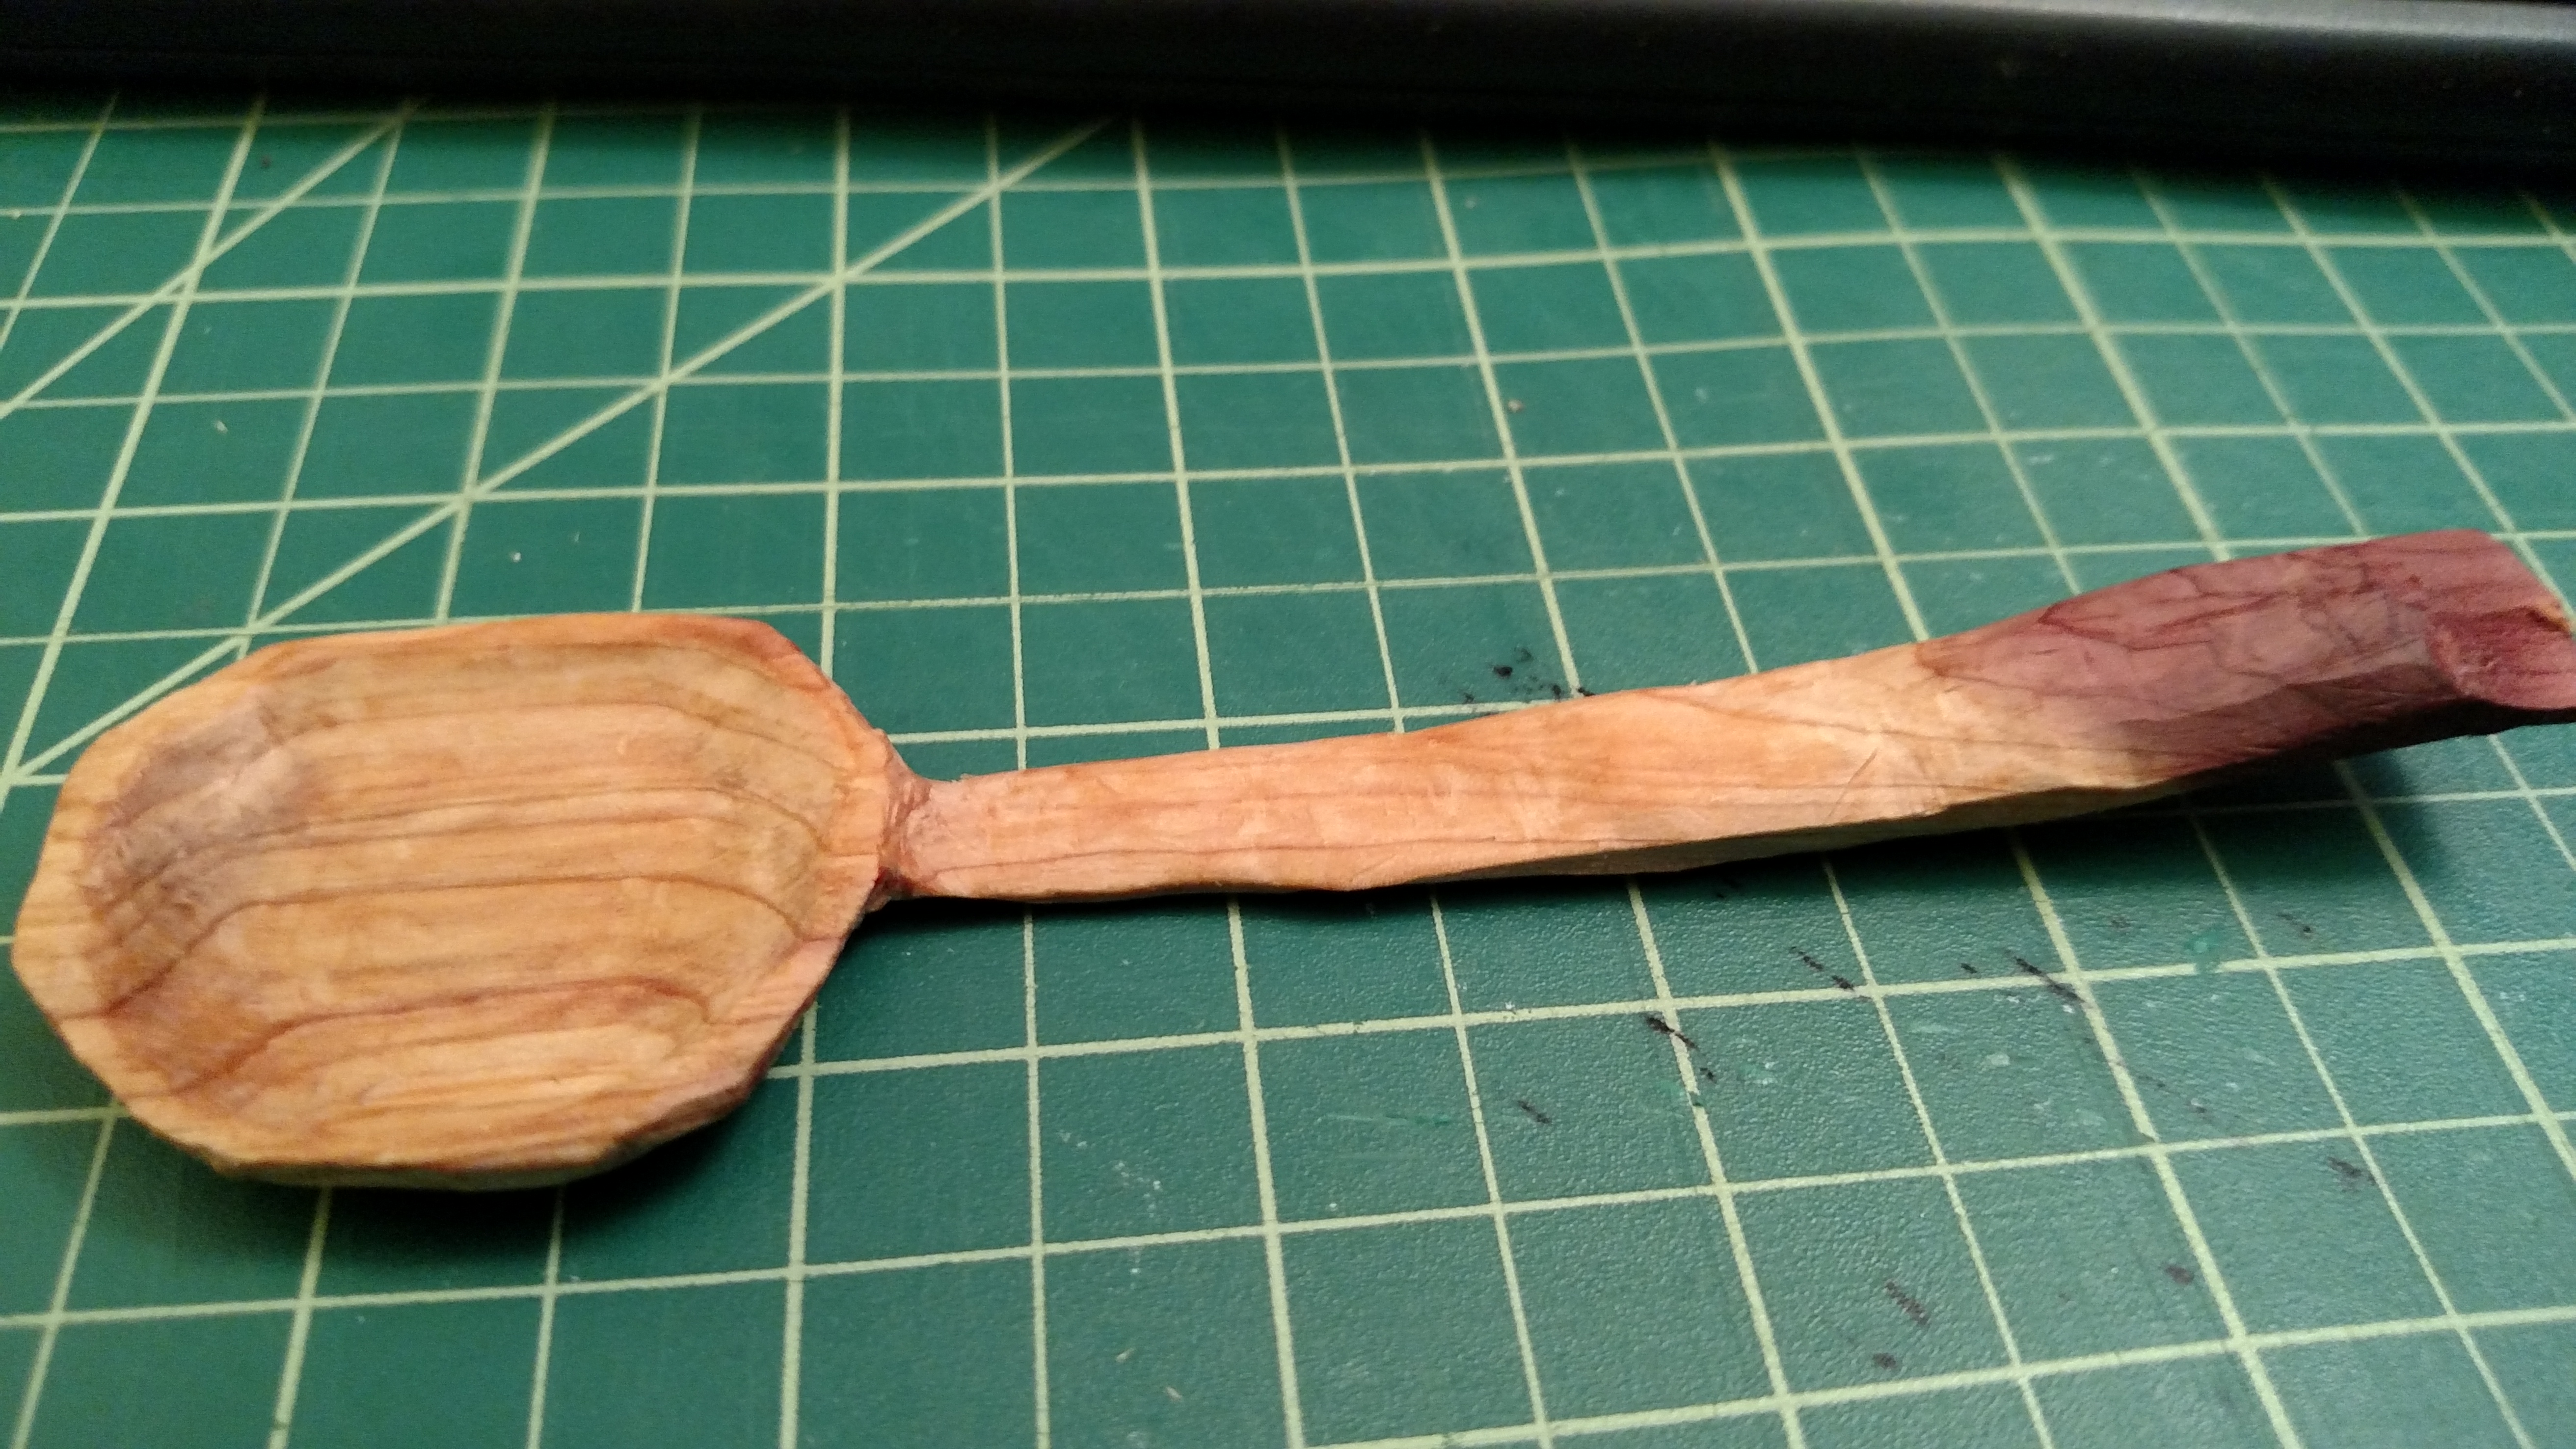
While I had my hand tools out I worked a bit more on my ceder spoon. It’s coming along beautifully. It’s so light and petite. The bottom picture shows it with some butcher block oil on it, and a bit of burnishing work on the bowl to make it smooth and remove all the tool marks. It’s amazing how much adding the oil and burnishing makes it feel more substantial and sturdy. It weighs about as much as a soda bottle cap, but no longer feels like it would break with use. The bend in the handle is based off of one of the Uppland finds, and it really makes for a rather comfortable eating spoon.


Recent comments