Light desk

For a very long time, probably since I first saw one around age 12, I’ve wanted a light box for tracing. Since I was already making a drawer to replace one that had rotted out in our kitchen, I figured it would be a good time to try my luck at making a light box since it’s pretty much the same general skills.

I bought poplar “craft wood” from Lowes, which is nice to work with and some luan plywood, which I haven’t worked with since my theater tech days when it was what we made in to practically everything. I designed it to have a desk top that is approximately 14×14″, which should allow for most sizes I’d want to work with, and should be big enough for water colors.

The angle of the writing surface is around 20 degrees, which is a bit shallow for calligraphy but is pretty comfortable to work on in general, I figure I can raise it up a bit using something to prop it up if I find need. The plexiglass top comes off entirely, which will make it easy to set things up using painter’s tape to adhere securely. (The painter’s tape is also along the edges of the plexiglass to make it safe)

2013-11-17 16.41.07

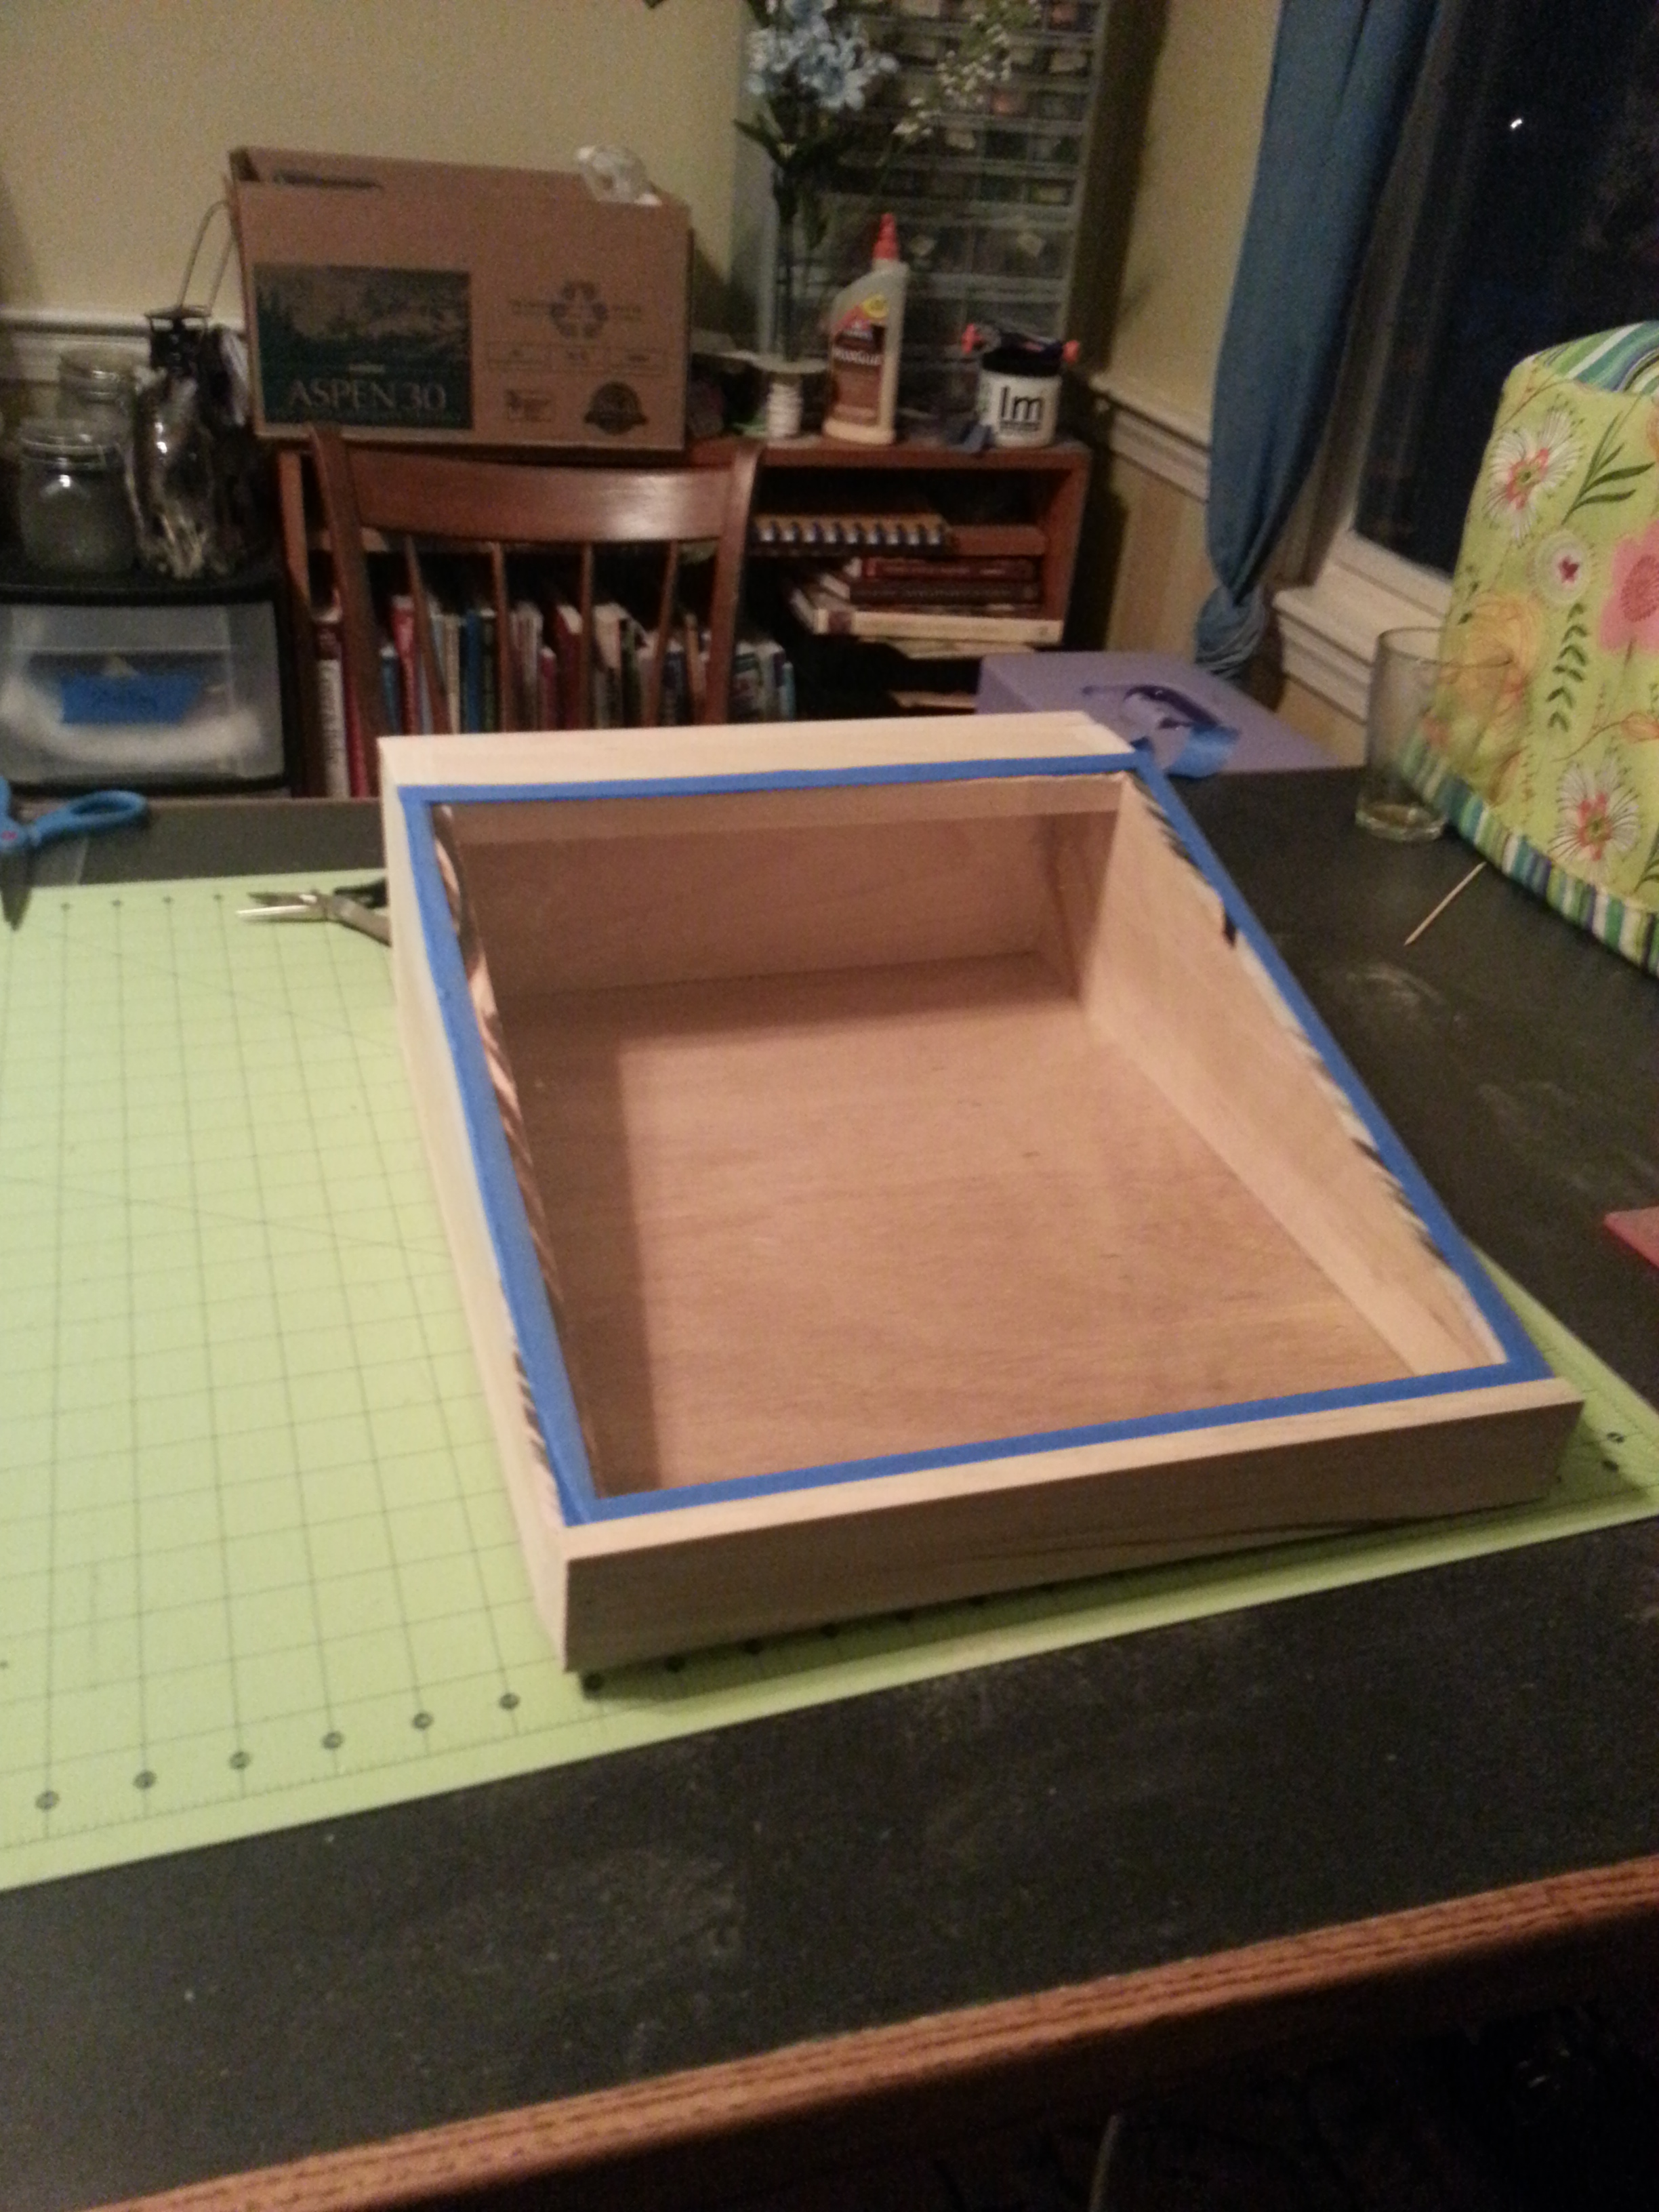
The bottom is channeled in like a drawer. The 1/4 inch luan turned out to be about two blades width of the table saw, which was convenient.

2013-11-17 16.41.30

I plan to eventually carve some grooves into the top flat bit for resting brushes and pens. Also perhaps an opening for water or ink containers. I also need to drill a hole in the back to put in the the light. And finish it with wax to preserve the wood.

2013-11-17 16.41.17

Spoon progress

2013-11-17 17.01.13

Four attempts of  “cutting out” from left to right: Band saw, hatchet, knife and gouges. By far I have the most control with the gouges, and now that I have better gouges I can make a fair amount of progress in a short time, but it’s still a very slow process.

The knife lead to a more smooth process, though still very very slowly, though this was before I had managed to get the knife sharpened properly!

The hatchet was a pretty good option, reasonably fast, reasonably accurate, and it leaves the edges choppy, which makes it easier to carve it later into the final shape.

And by far the fastest is the bandsaw. That took about 3 minutes. But it wasn’t as accurate and and it will be harder to carve I suspect, though I haven’t tried yet.


Sewing from the Toronto trip

I made a little leaf enclosure for a USB stick I wanted to send to Peter, I think it came out rather well. I’m tempted to make a great many more little leaves like these and sew them to things. this picture really shows the pattern stuck in my head of late.

2013-11-08 22.28.31


And I also made one of my little chickens and sent it to Peter’s aunt and uncle as thanks for letting us stay with them:

2013-11-08 22.28.41It’s pretty cute. I really need to make a bunch and fill them with rocks for pattern weights as they are a good size and they make me happy.

2013-11-09 20.08.07I also finished this Queen’s favor while I was waiting in the many lines that are a film festival. I also worked on a couching project:

2013-11-09 20.12.15


I am trying to get the purple outline out from the design so that it only shows the threads that have been overlaid and pinned down. I’m not sure what I’ll do with it, but it would make a cute cover for a notebook.


I’m going to use the term “art” loosely

Today’s art is that I got another gallon of unpasteurized and un-preserved cider, and I also figured out what was wrong with the first batch (no clue why it’s turned yellow, but I added the preservative at the same time as I added the yeast, which killed off all the yeast, so today I got it a new packet of yeast, and its happily bubbling away.) The new cider gets its yeast tomorrow, as the camden tablets take 24 hours, which is the part I didn’t know last time!

Image

More progress on queens’ favors.

image

Image

Today was an embroidery day as well..

I actually started this yesterday, but today I finished the outline stitching. I am planning on using couching to weave a thread in 3D across the shape. I haven’t quite decided what I’m going to use for the under thread as it will need to be rather large as the channels are about half an inch wide.Image

And since I was at a guild meeting I decided I might as well bow to peer pressure and start working on a queen’s favor. Yay for reverse chain stitch. We had a hilarious discussion about why anyone would ever teach regular chain stitching considering how awesome reverse is.Image

Finally finished my populous badge

I also finished my marshal badge, but I forgot to take a picture.

This has been many months in the making, don’t start with 28 count for your first counted work! It’s about an inch and a half across.

2013-11-02 20.59.12

Yay for getting my competency on counted. Also got working knowledge in couching for the marshal badge. WooHoo! I’m now a journeyman!

Birch leaf

Birch leaf

I plan to make a stamp of this soon, or perhaps carve it onto a box.

Image