Maple blunt end spoon? Spatula? Saute tool?

I’m not really sure what the technical term for this kitchen tool is, but it’s my favorite go to tool. It’s wooden with a nice sturdy handle, a blunt end, curved inner surface and open ended. It’s great for sauteing in pans where you are concerned about scratching the non-stick surface. It’s capable of “scraping” up the edges and getting the crispy bits, while also being useful for flipping and not terrible for serving. (Though it is often pointed out that we have many better tools for serving)

This I made from a maple board I bought at home depot. The wood is quite nice, hard but carvable, and very pretty when oiled. I cut the general shape out on the bandsaw and then carved it down to size using my knives, gouges and sweeps. I then made the surface smooth by scraping it with the cabinet scrapers, which were perfect for removing the tool marks without sanding the wood. They also leave the surface with a bit of a burnished feeling, which I quite like, particularly on this soft maple.

The neck is offset by a bit to make it easier to use, and to provide better control.

2015-02-26 20.42.292015-02-26 20.26.572015-02-26 20.34.25

wooden spoon – beginning to almost end


This has been a long process (mostly due to weather), and I’ve only gotten one spoon thus far, but I figured including all the pictures would be a way to show the process.

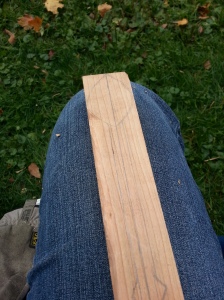
So I started out with a slightly warped Cherry turning block, which I cut in half, and then in half again horizontally, making 4 spoon sized blanks. On these I sketched the design:

Image

From there I started to remove the wood, using some cheap gouges I had bought on amazon. It was a very slow and painful process:


Image

So I started to look at my options, cut by band-saw, rough out using a hatchet, whittle or gouge. The rest of this page follows the gouged one. I’m going to probably start working on finishing the other three at some point in the near future as my new knives (flexcut) and gouges (Lee Valley) are significantly better.

Image

Taking the one on the far right above, I then used my knives to finish roughing it out:

Image

I then used the new gouges to make it pretty and thin. Today I sanded it down and used a tack cloth to remove the saw dust. I forgot how magical tack cloths are.


Image

It still has a few nicks that became apparent when I got the saw dust off, so it’ll have to be be sanded a bit more in those spots. Also I can’t figure out how to sand the inside of the bowl.

Image

But it is certainly spoon shaped and theoretically could be used to eat from right now! Though washing it would be a real pain with that rough wood in the bowl.


Image

Finally made the pewter spoon that started this odyssey

Image

Little fox for size comparison. It still needs to be filed down and sanded, but in comparison to the first 4 pours, this one is nearly perfect. The bowl is so smooth and thin! I think I’m going to fill in the knob on the end though as it’s really heavy. I had originally  made it with the knob so it would sit better on the table, but it’s pretty strange looking and feels wrong.

Image

And on the backside you can still see the leaf pattern, though not as distinctly as I had hoped. I may try to carve in the spine a little more to give it more definition.

Here’s the original wooden version, it sadly did not make it out of the mold in one piece. But it’s neat to see how close they are to each other. Its come so far from its first day. I can’t believe it has only been six weeks in the making. I feel like I’ve been obsessed with spoons for much longer!

Spoon progress

So I got some cherry turning wood from woodcraft, and used a terribly dull band saw to cut it in half (See blackening on the back).

Then I drew on the shape I wanted to rough out:

2013-10-19 15.12.44

Then using a wood carving knife from my deceased grandfather (Along with his sharpening stone) I started to rough it out. This didn’t go so well, so I switched to my Niji set which are way too small for wood this dense, but I did eventually make some progress. And along the way I snapped one v-blade and pretty much dulled all the gouges, and somewhat successfully resharpened them. After about 2 hours of work I ended up with this:

2013-10-19 18.21.36 2013-10-19 18.21.43

So I asked around and was told of the marvels of hatchets for roughing out work. So I went to sears and got a sportsman’s axe We’ll see how that performs tomorrow. I’m a little scared it’s going to take off way too much wood. I also got a new pair of leather gloves as apparently mechanics gloves don’t have leather in the spots where I keep stabbing myself. (Which includes my right thigh, the new gloves won’t help with that)

Wooden spoon

2013-10-05 19.28.00 2013-10-05 19.27.56 2013-10-05 19.27.53
after much sanding and carving and then covering in beeswax and burnishing

Image

spoons

So last week in pewter class I tried to make a sculpy spoon, but it broke in a few places when it came out of the oven. So this week I started to whittle a spoon from a piece of basswood. It’s coming along, it really needs a lot of sanding currently, then perhaps some more carving. I also need a gouge of a slightly different shape, but I think I have one in my kit.

20131002_193540

I can’t decide if I want to use sandpaper or my dremel to sand it.. I like the control of the sand paper, but it is hard to get round shapes to come out right.

Once my spoon is done, we are going to cover it in Vaseline and put it in a little Lego box and pour bondo around it to make a mold for the pewter spoon.

Back of wooden Spoon Front of wooden spoon