So I decided that I wanted to try some relief carving for this round’s East Kingdom Artisan Exchange project. My matched person wanted a “chest”. This leaves a lot of room for interpretation. I mean in period, a chest could be anything from a tiny casket for ritual items to a large sideboard like item where you’d keep the china. Clothing/Blanket chests existed, but are relatively rare in museums because they were more utilitarian objects. There are a few marriage chests available to study, but they tend to be pretty simple.
So looking at the chests at the Met that are within time period (roughly) and of the materials I have at hand we have these five beauties:
(1) A local, slightly out of period chest – http://www.metmuseum.org/collection/the-collection-online/search/1997
(2) A 16th century wooden chest that shows its construction methods (Dovetail) – http://www.metmuseum.org/collection/the-collection-online/search/463014
(3) Another 16th century wooden chest, this one in the panel style – http://www.metmuseum.org/collection/the-collection-online/search/197174
(4) A 15th century wooden chest with amazing relief work – http://www.metmuseum.org/collection/the-collection-online/search/467789
(5) An early 16th century wooden chest done in the panel style – http://www.metmuseum.org/collection/the-collection-online/search/467748
Given time constraints, my budget, my current skill level and the needs of the modern Scadian, I decided to go with a simplified version of (1) and (3) that would be big enough to put a coronet inside, along with other precious items, but not so big that it couldn’t be brought along to an event. I was specifically inspired by the wooden mirror boxes I saw at gulf wars. I then contemplated various pre-made box options that I could embellish, and discarded them all as not right.
So I’d have to make my own box! I then found this fascinating website about early joinery (the act of making boxes, cabinets and other things like that) – http://www.buildingconservation.com/articles/earlyjoinery/early_joinery.htm and decided that the best technique for this project would be frame and panel. The carving design is based on strapwork images from the late 1500s.
The easy way to do this is with cope and stick joinery. The way we see this most often in our daily lives is through IKEA: pegs and holes are used in place of nails. This made up the frame portion of the box. After fitting the whole thing together, I marked all the pieces and then took it apart so I could carve it.
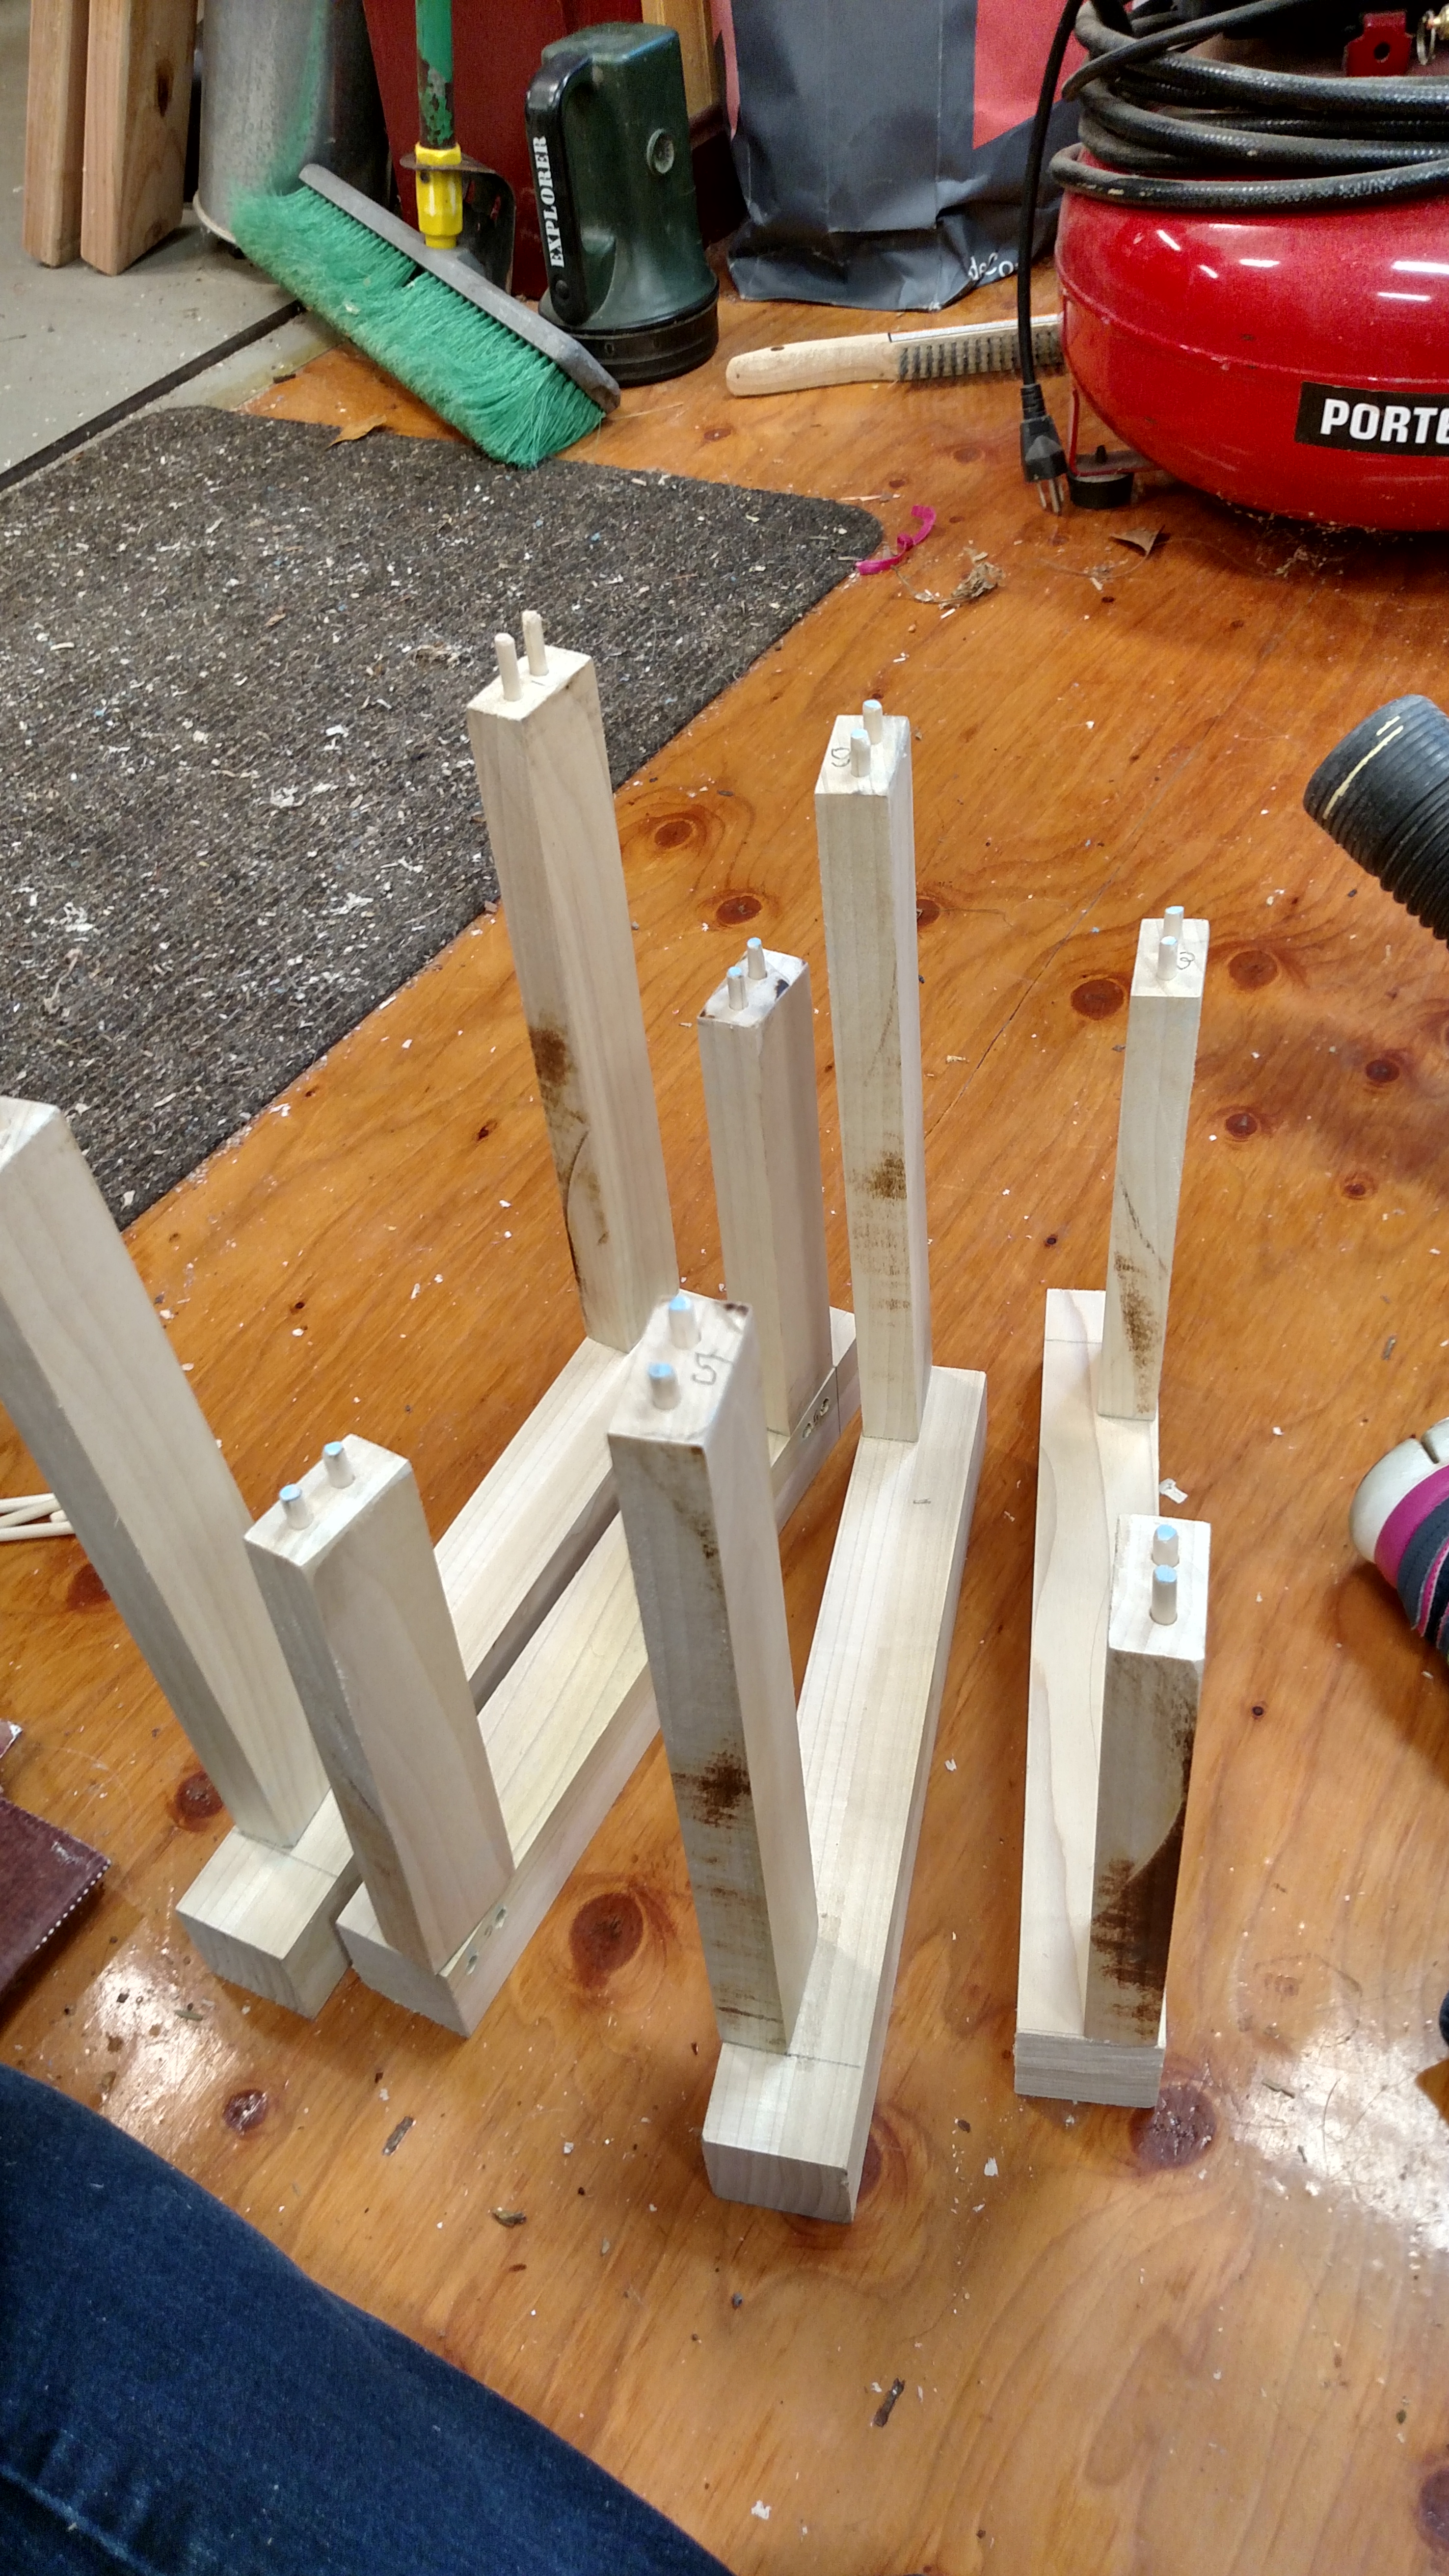
 One of the nice things about this method allowed me to take the uprights with me to various events and such to work on them in any spare time I managed to find. I went with a simple quatrefoil tracery design that would have been common in period on a middle class person’s small chest.
Despite having much better tools, most of the carving done on these frame pieces were done with my cheapest knives, the ever helpful Niji knives. I ended up using them so much that I had to round the end of them to be more ergonomic because I was using them for so many hours every day. But in comparison to all the rest of my much nicer knives, these were the ones that were small enough to get into the tiny spots and were best suited to incising the design and then  removing the extra material.

The individual flowers are approximately an inch across, and have about a 1/8 of an inch of space between the flower and the 1/8 inch border. I had originally planned on carving the front panel and the top and bottom frames on the front, but I ran out of time. I think it ended up looking good in the more simple form. (Which is our modern fashion speaking) I had also planned on carving out each petal and the center bit, and my test piece shows this option, but it just proved too time intensive. I definitely want to a similar project again with more relief carving, but let’s remember this was my first time doing this. The first upright took me about a week, the second a weekend, the third two evenings and the fourth took most of one day. And most of my increased speed was due to realizing that it worked much better to incise everything first and then do one whole side assembly line style – cut out the top bar on all seven, then cut out the bottom bar on all seven, then cut out the side bar on all seven, then the other side, then the triangles on the edges of the flowers and then smoothing the background into a unified surface. 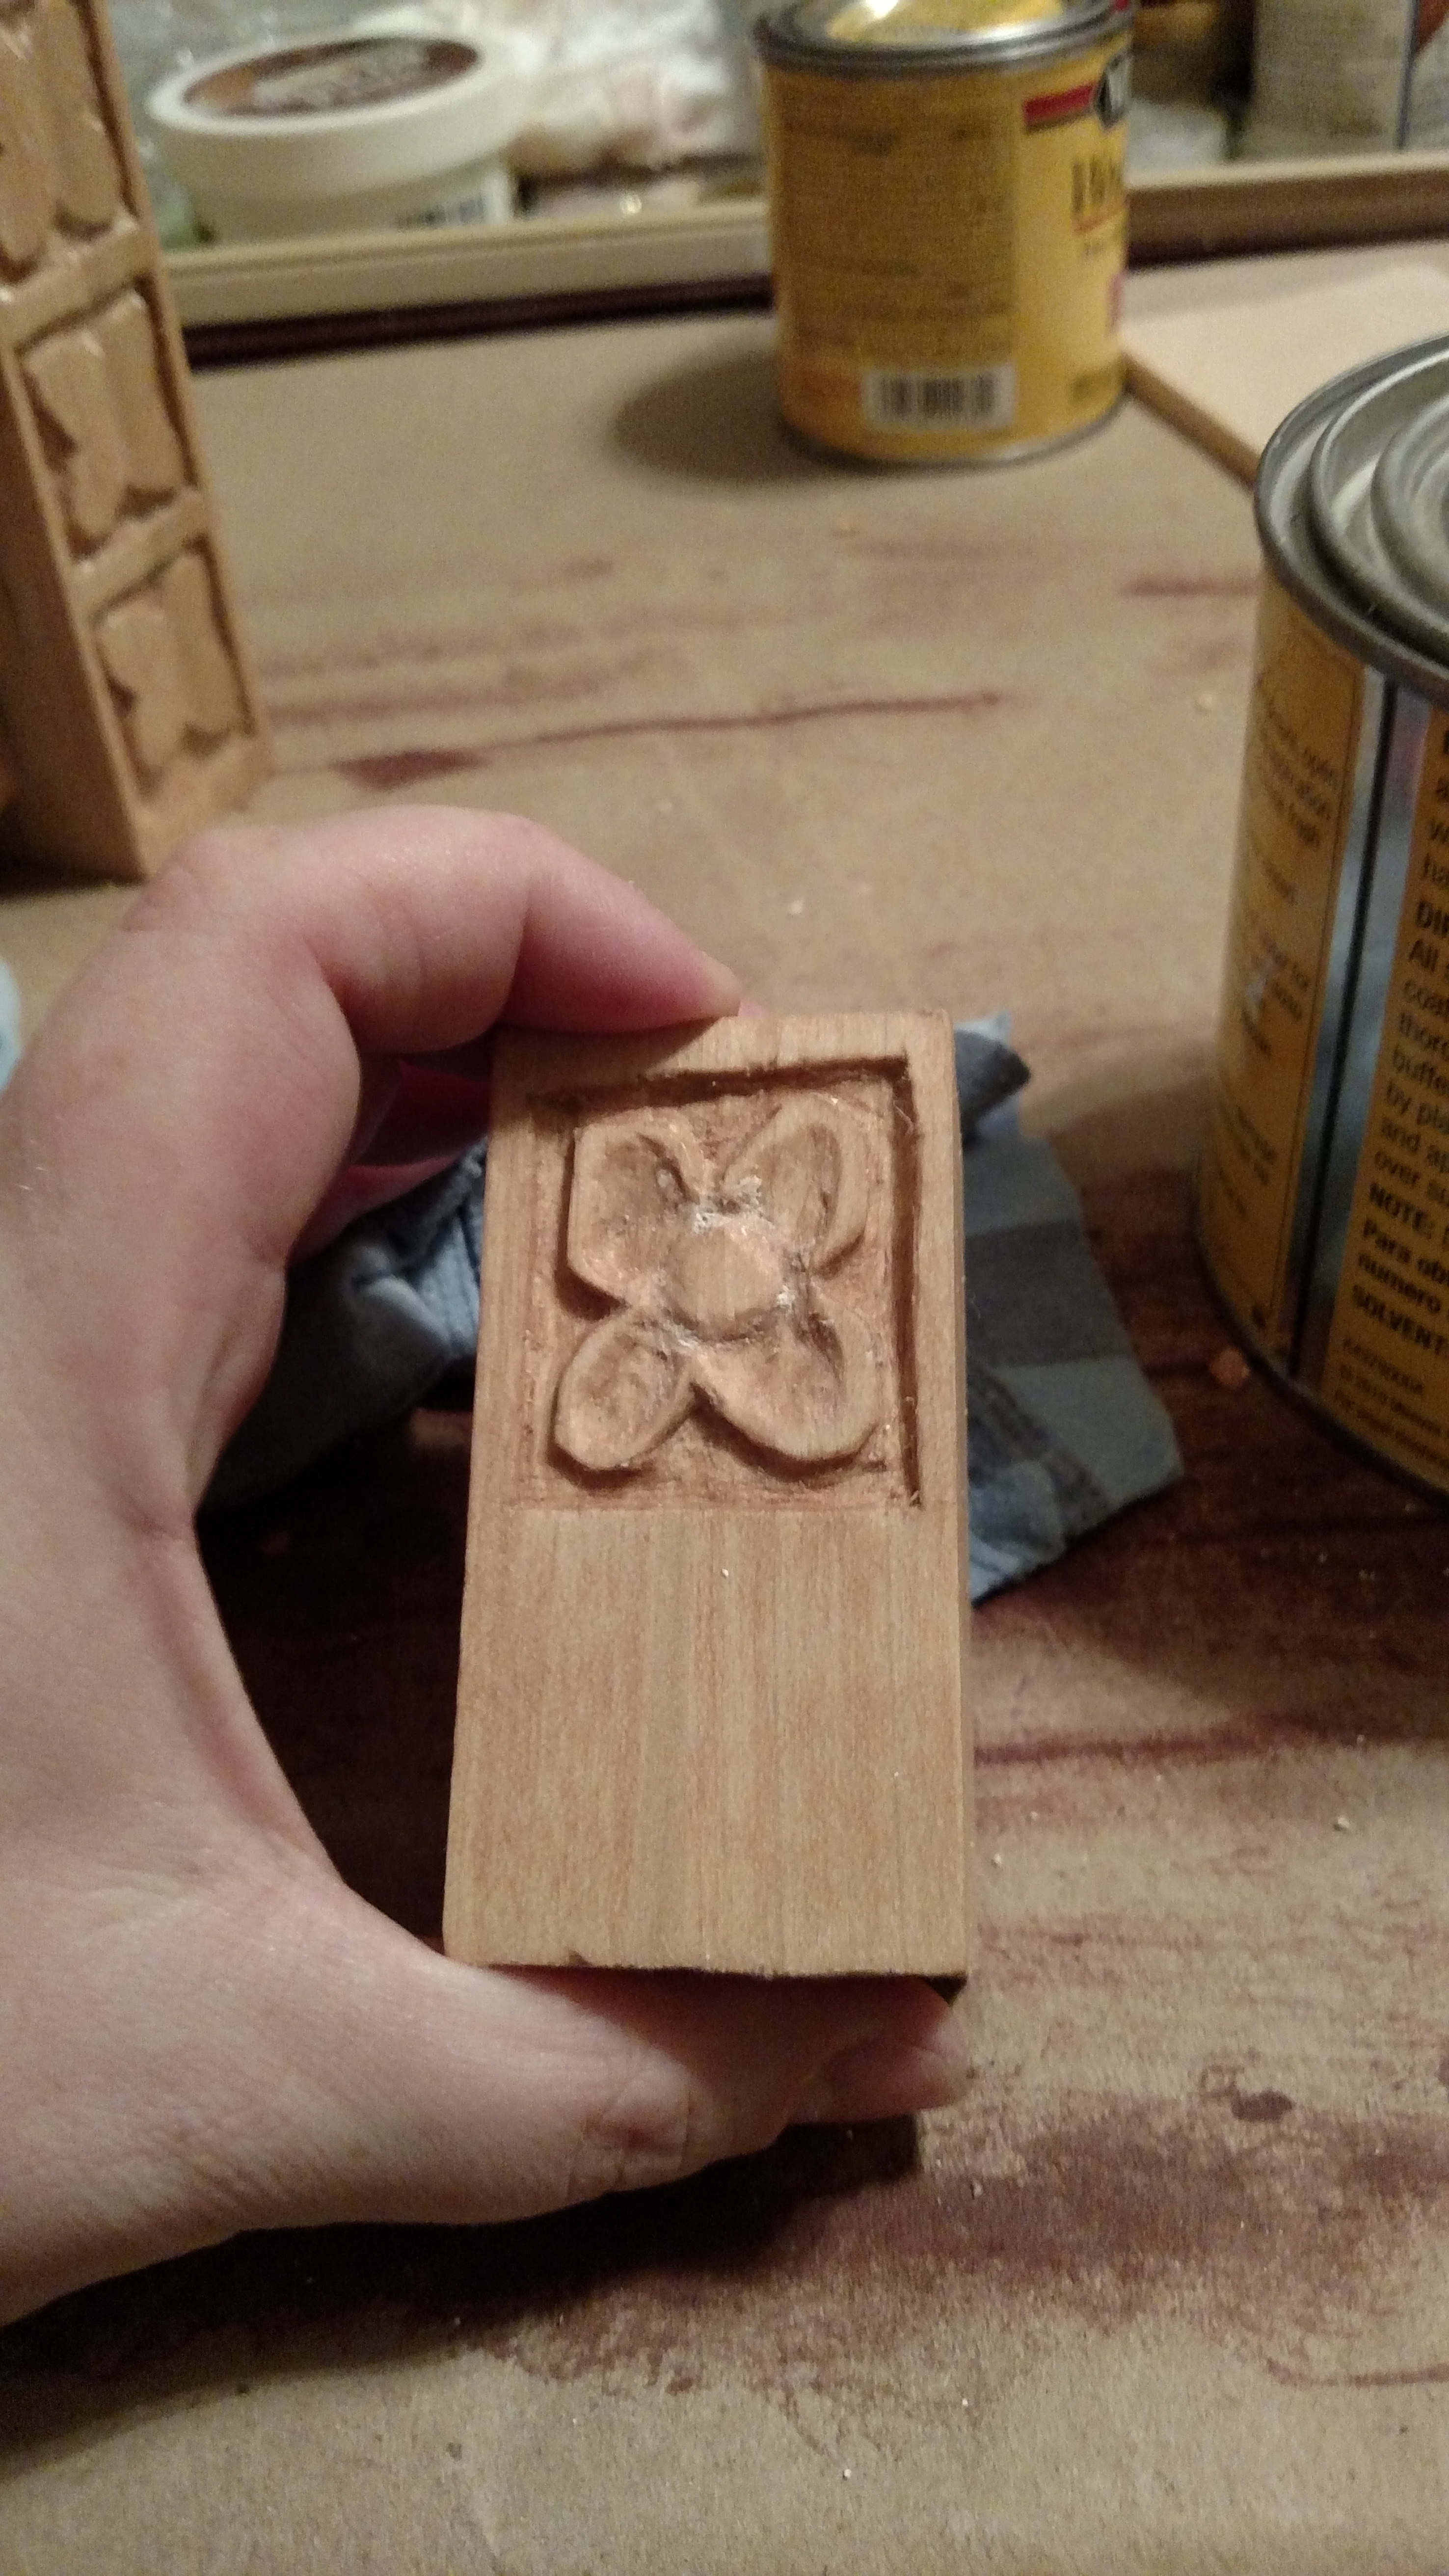
Luckily we learned a very important skill during the reign – always complete everything to the same state before going on to more detail – that way if you run out of time (And boy did we ever run out of time, over and over again) you have something that is balanced rather than one highly ornate sleeve and no collar, cuffs or hems done. So I built the frame fully, then I built the panels fully, then I did the incising, then the bulk of the material removal, then a few rounds of detailing and smoothing, and then I put the whole thing together and stained it. Then I applied the wax finish to protect it.
Though I did leave one big detail out- the lid!
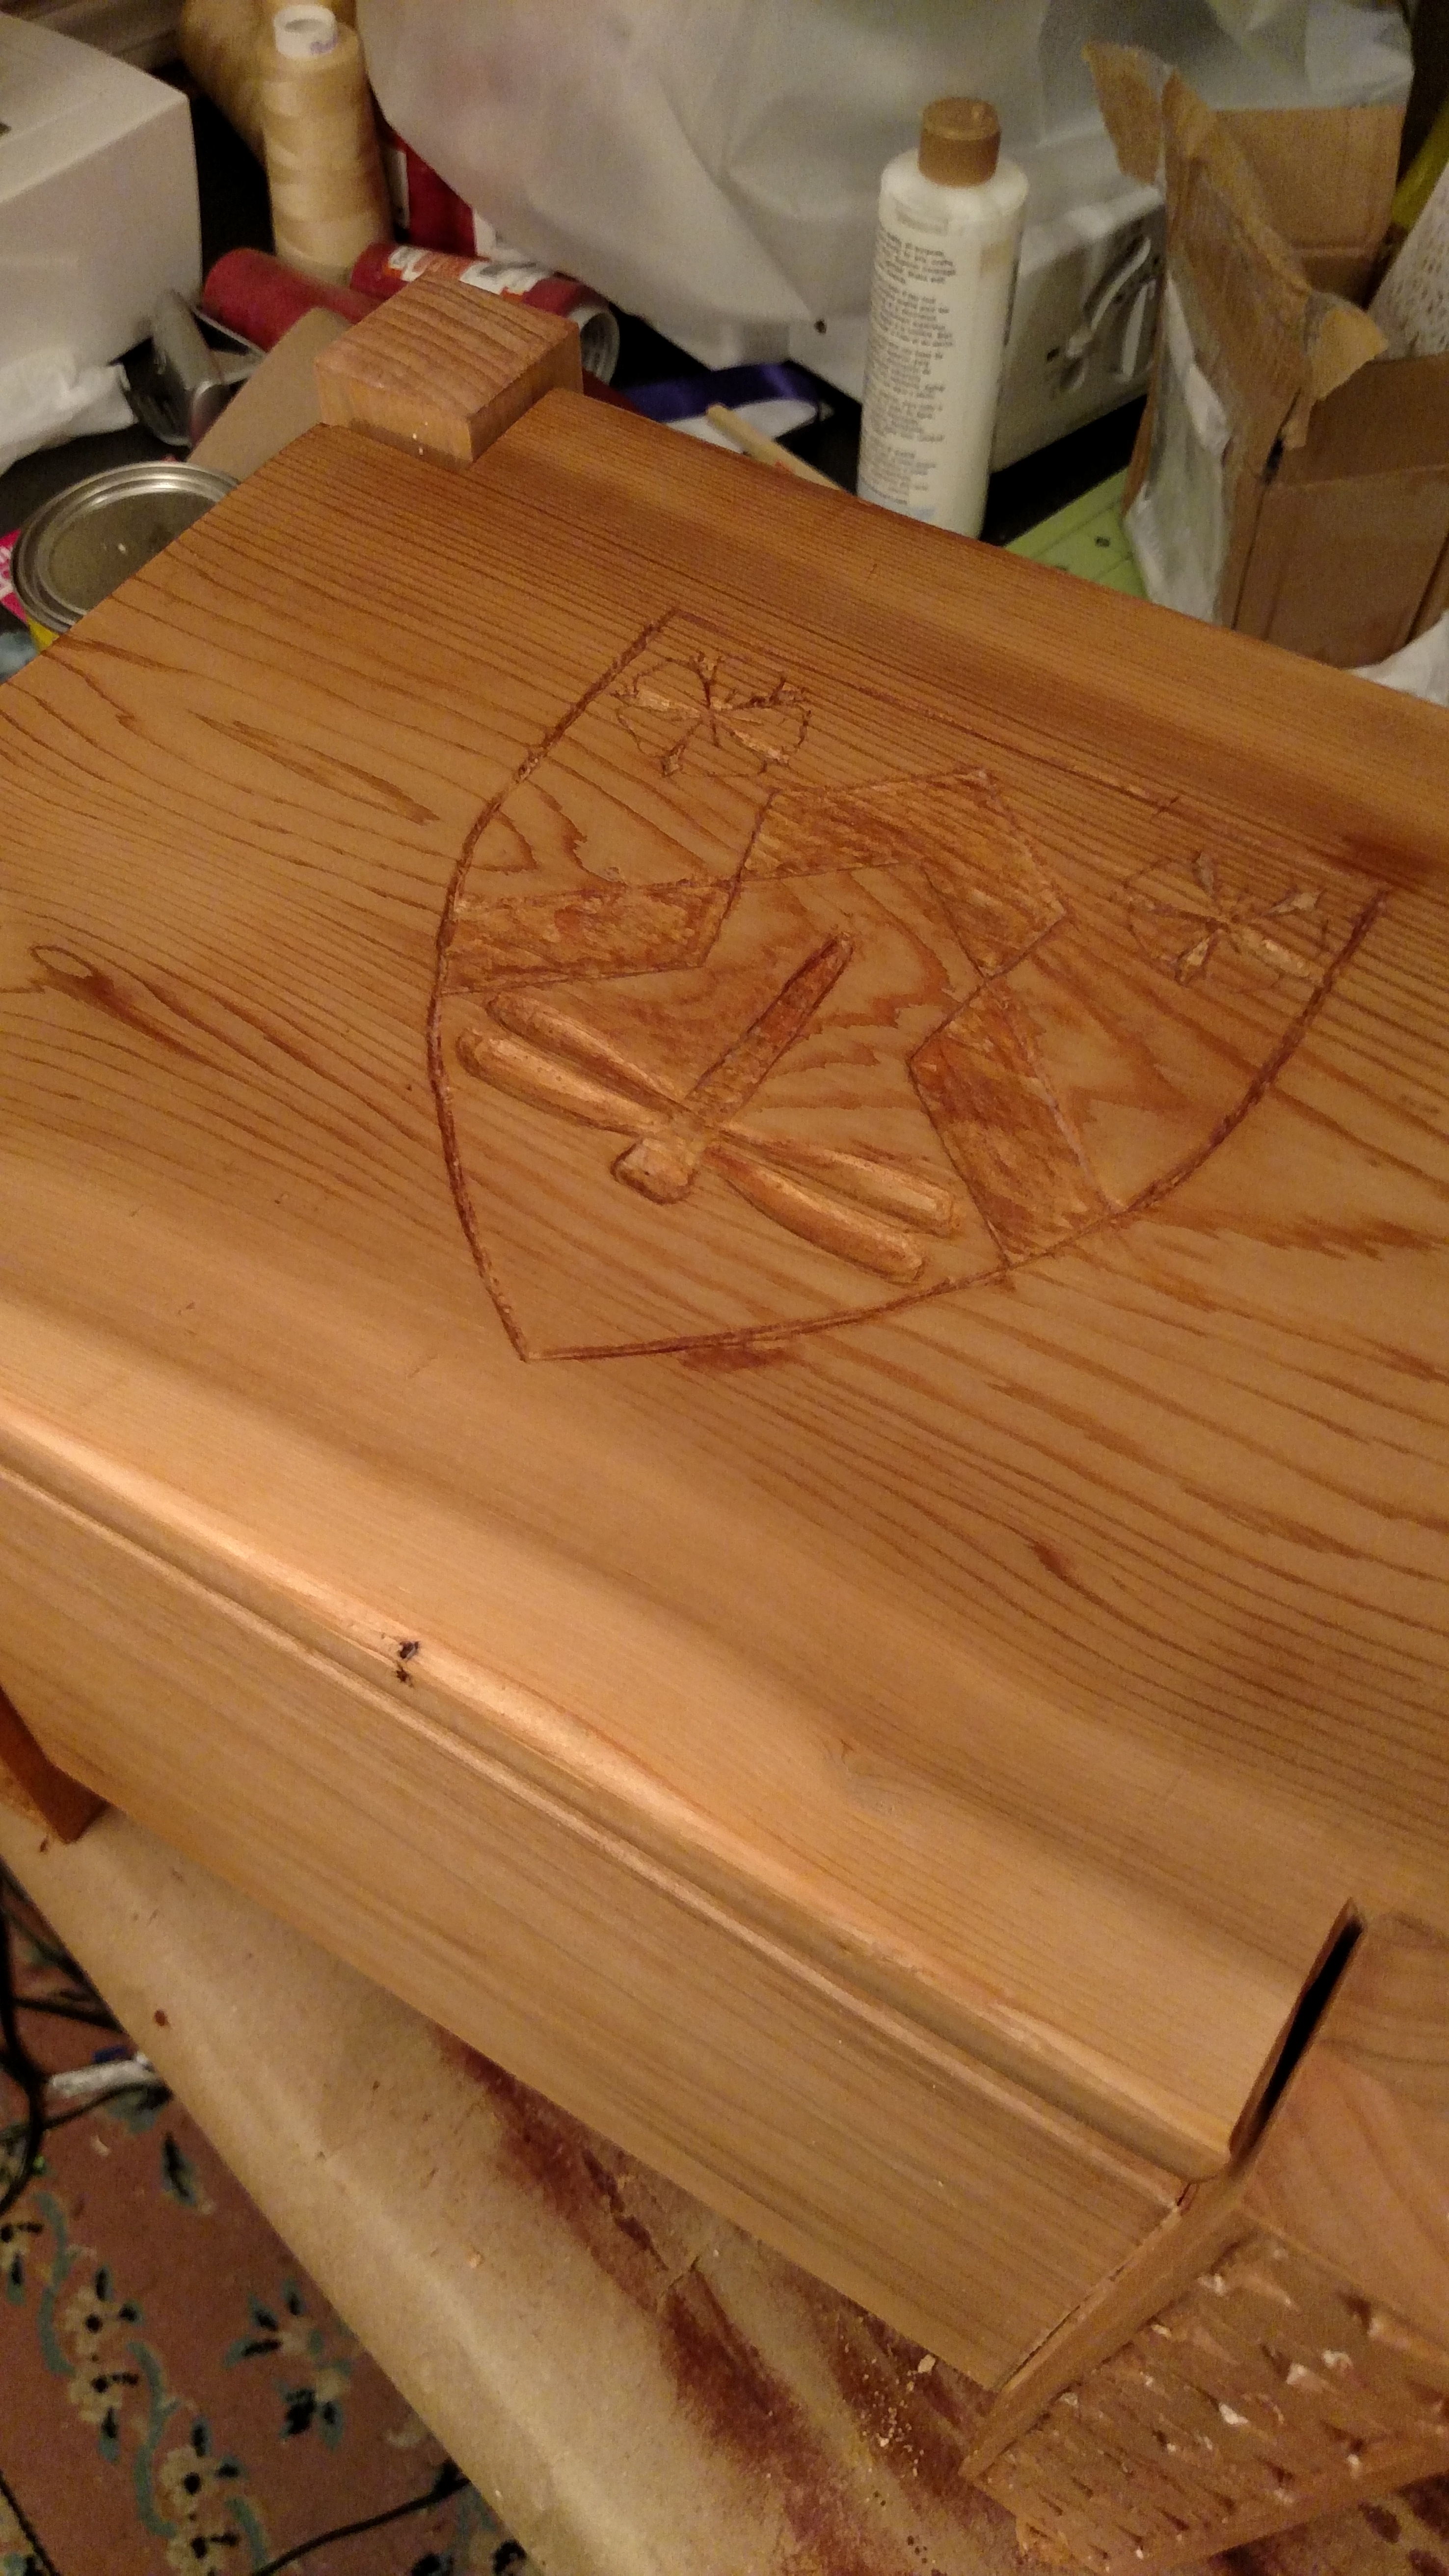
Due to the nature of poplar trees (they aren’t very big) I was unable to get a board that was wide enough to be the lid on its own. My initial plan had been to biscuit join to boards together and then cut out the lid from that larger piece, but I was reminded by my laural that that would take quite a bit longer and there were plenty of pieces of scrap wood hanging out around the shop that I could use instead. I climbed up to the wood storage and found a lovely piece of cedar that was exactly the right width. I then pieced the whole box back together again and glued it in place using wood glue (Animal glue was used in period for small wooden things (and cabinetry) like this as the pieces are too small to use just wood expansion to hold everything in place, and the glue made it much more stable in a variety of weather conditions.) and a framing jig to keep everything square while it dried.


Once it was dry I took it home and fitted tiny carved splinters of wood into all the holes and gaps to improve the structural integrity and make it more secure for use. I then sanded it down and went over all the flowers with a fine finishing tool to make sure there the surface was ready for staining. I chose to use a light stain over the poplar to make it “match” the cedar a bit better. I decided to stain it in general because the wood has an interesting grain pattern and it would make the color more even, while providing it with a finish that will help the wood age more evenly. In period this box would probably have been varnished. But varnish is a pain to work with and requires chemicals to clean up afterwards, so I finished the whole box with a light coat of wax paste and buffed it out, leaving a finish that seals the wood’s pores and makes it more durable for every day use. Here is the finished box with the cedar lid with the arms of the recipient on the lid. 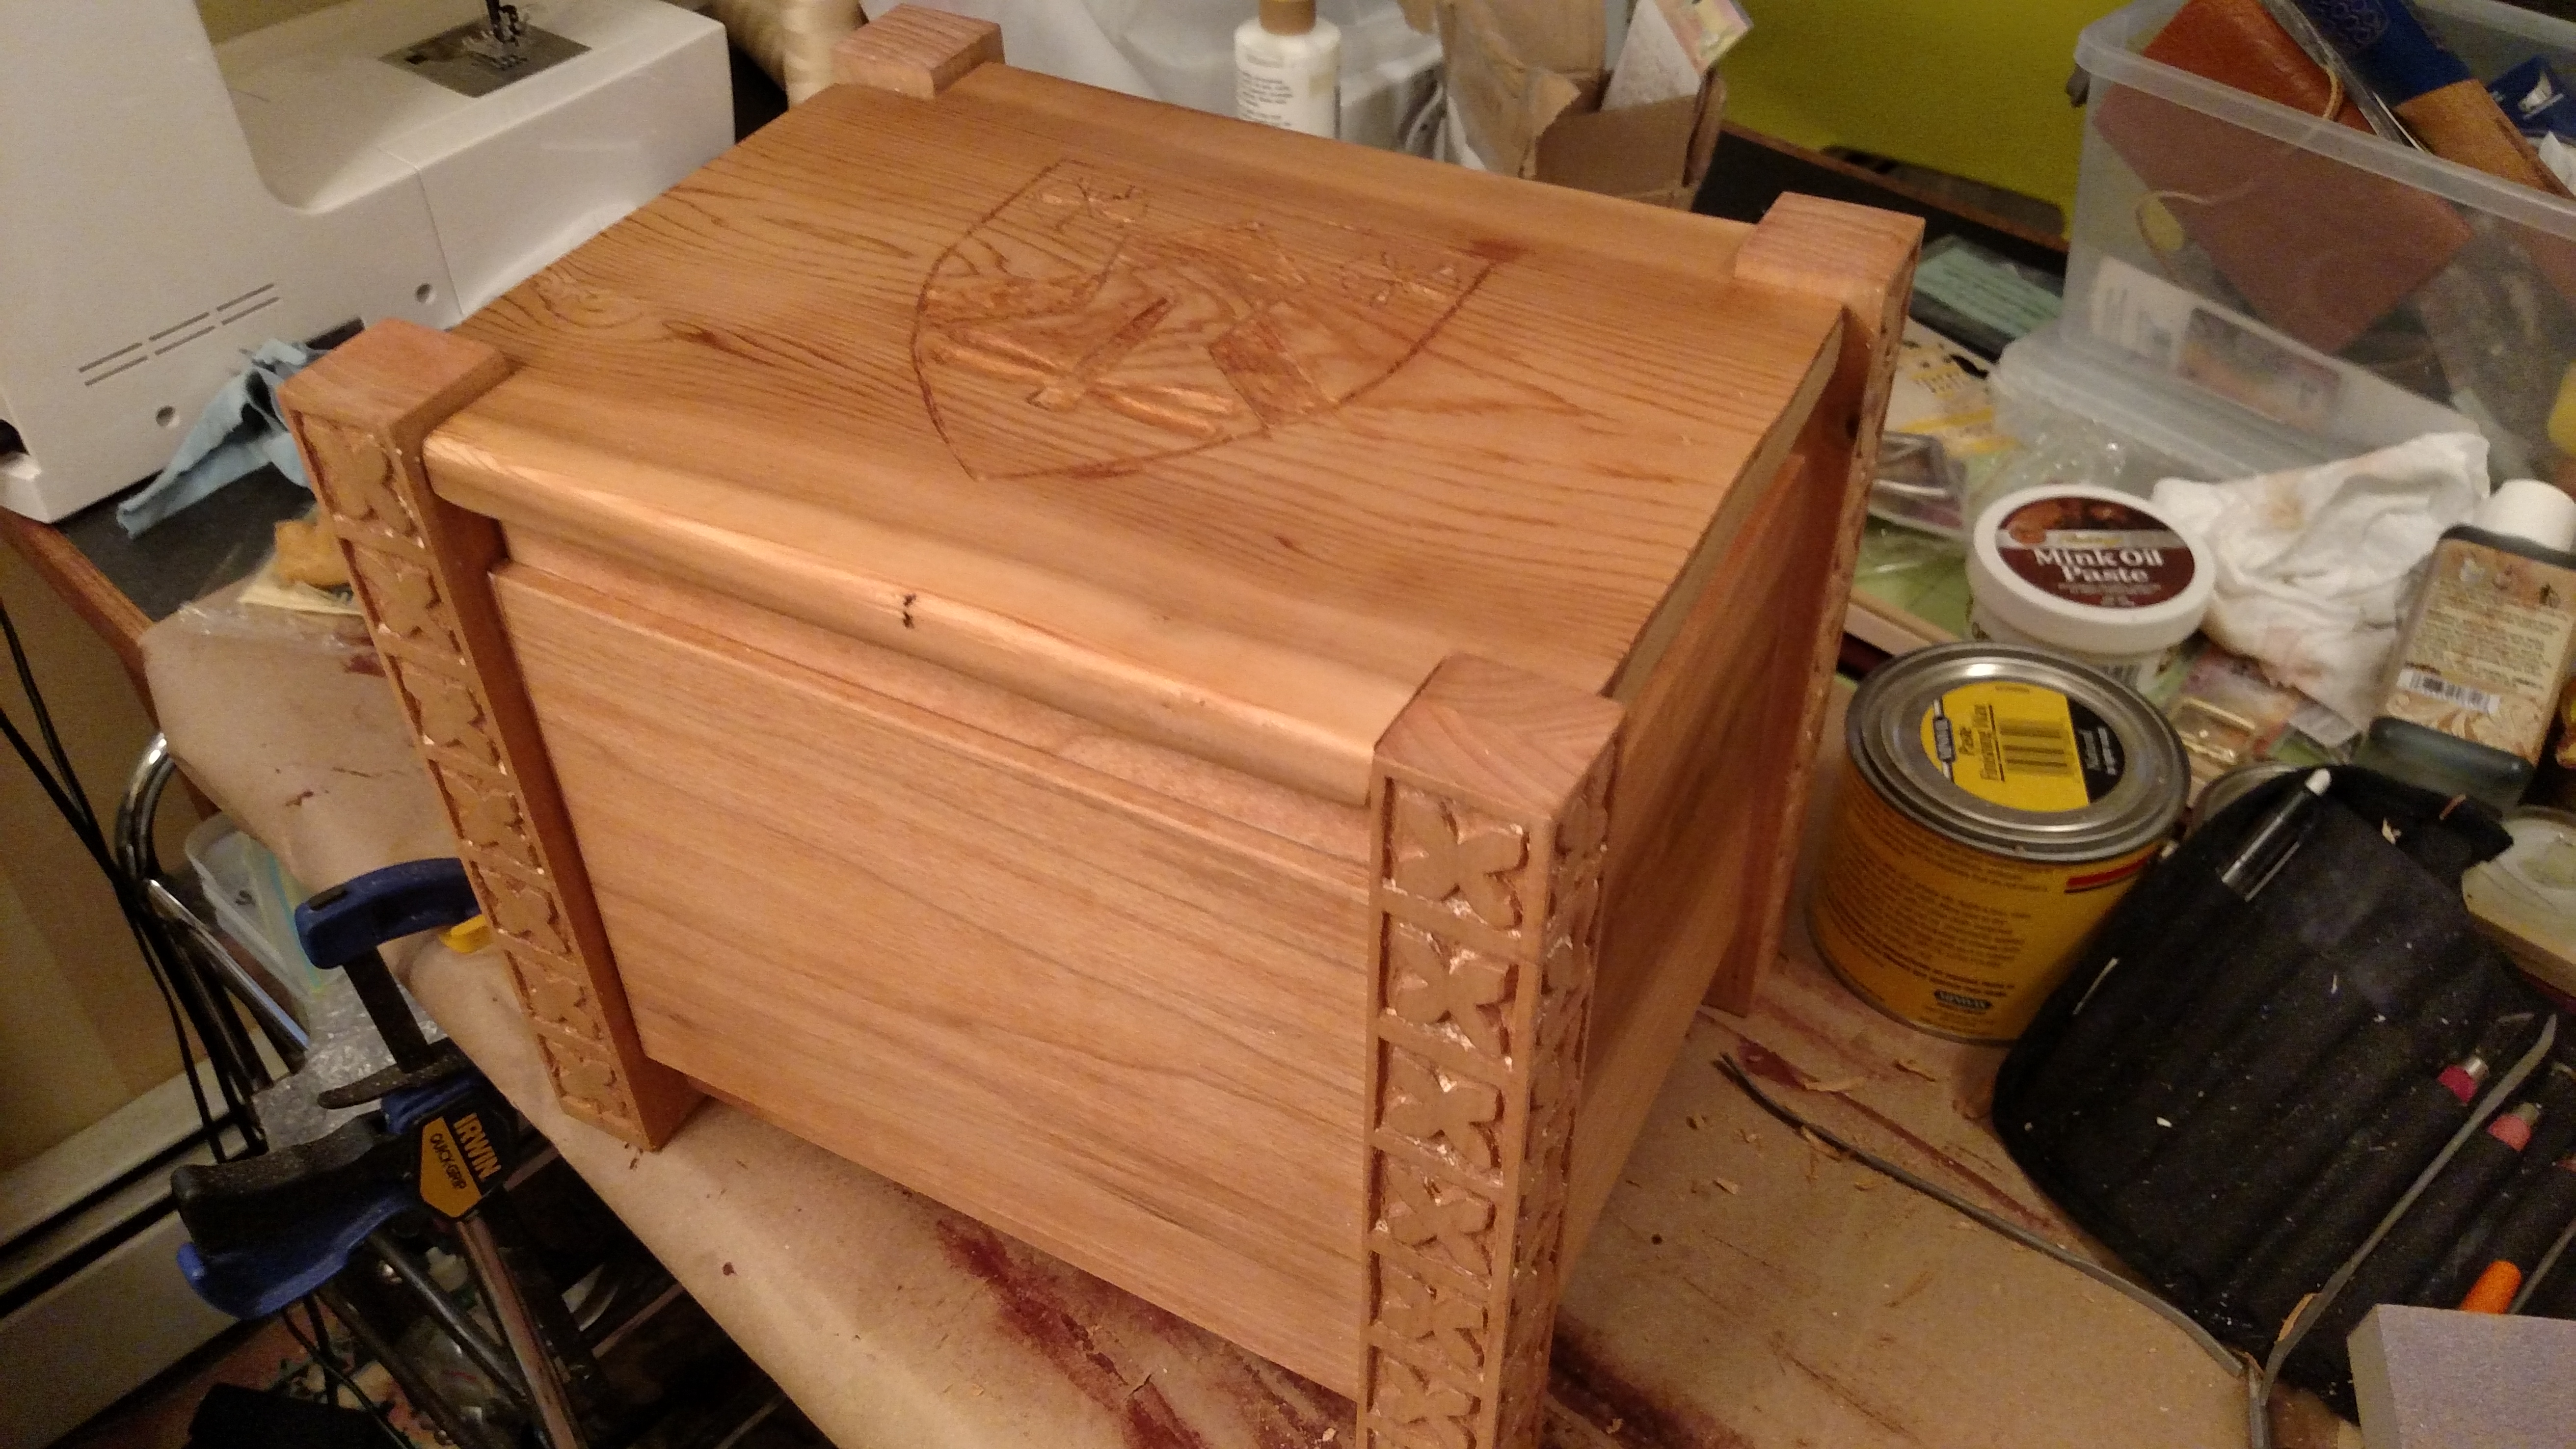


Recent comments