Incubation chamber

Incubation chamber

So we had a sturdy Omaha Steak cube just hanging around, but this would work in any cooler. I filled it with warm tap water, and then added an aquarium heater and popped in a thermometer just for curiosity’s sake. It works wonderfully and keeps the water between 85-95 degrees perfectly, and it’s entirely cat proof with books on top.

IMPORTANT FOLLOW UP – THIS WAS A TOTAL DISASTER
So er, water weighs a lot, and the pressure of having a few gallons of water in this cube caused it to crack and then the water seeped through the wood floor into the basement, ruining the ceiling of the basement and rotting some wood molding below. If I were to do this again, I’d use a plastic bin with a foam cooler inside it.

Image

My First Romano Adventure

romano-finished

I used the recipe from Ricki Carroll’s Home Cheese Making book with some minor modifications.

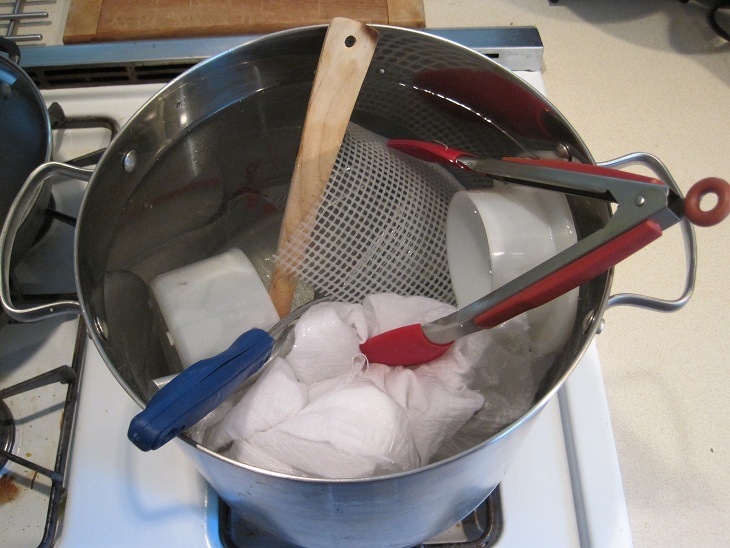
First, I gathered everything I thought I would use, put them into my cheese pot, and boiled them for sterilization. (Inevitably, I forget something. That’s what bleach spray is for.) This is a wooden spoon, wire basket, cheese mold & follower, cheese mat, butter muslin, a 1-cup measure, curd knife, and tongs.

romano-sterilize

While this was boiling, I cleaned the counters and put down paper towels to put all the clean stuff on when it came out of the pot.

Using other tongs, I extracted the sterile tongs. When the sterile tongs were cool, I used them to take out everything else. Then I emptied the nearly-boiling water out of the pot and waited for the pot to cool.

When it had, I added 2 gallons of good whole milk and stirred in 1/2 tablespoon of calcium chloride diluted in a half a cup of non-chlorinated water.

I heated the milk to 88º in a water bath, then sprinkled a packet of thermophilic culture on the surface, waited two minutes for it to rehydrate, and stirred it in. I covered and let the milk ‘ripen’ for 20 minutes. Then I added 1/2 tsp. of rennet diluted in 1/4 cup non-chlorinated water and stirred gently, covered and left it alone for 30 minutes. (There are no pictures of these steps because the visuals are really boring.)

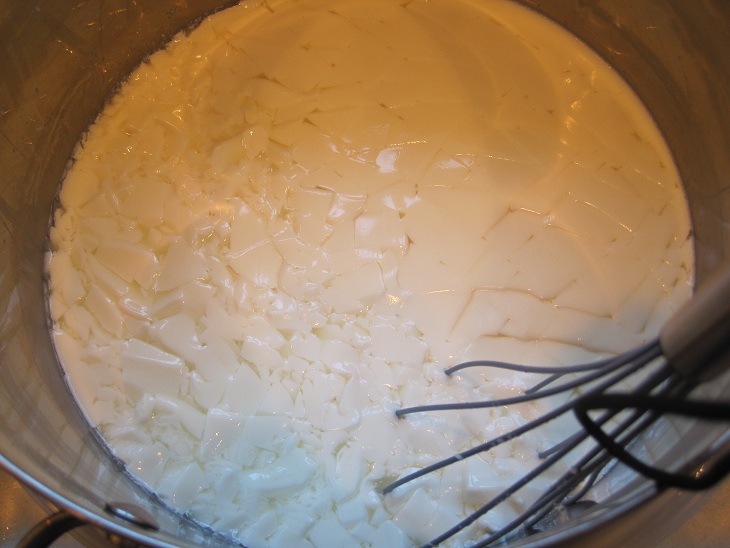
Then, behold the magic of cheese with this clean break:

romano-cleanbreak

Here, the instructions said to cut the curds into 1/4″ cubes. This is pretty hard to do. I started with the knife and cut them up further with a silicone whisk (note to self: boil that next time). Here’s a picture with half of the pot cut and the other half whisked (soon to be entirely whisked):

romano-cutcurds

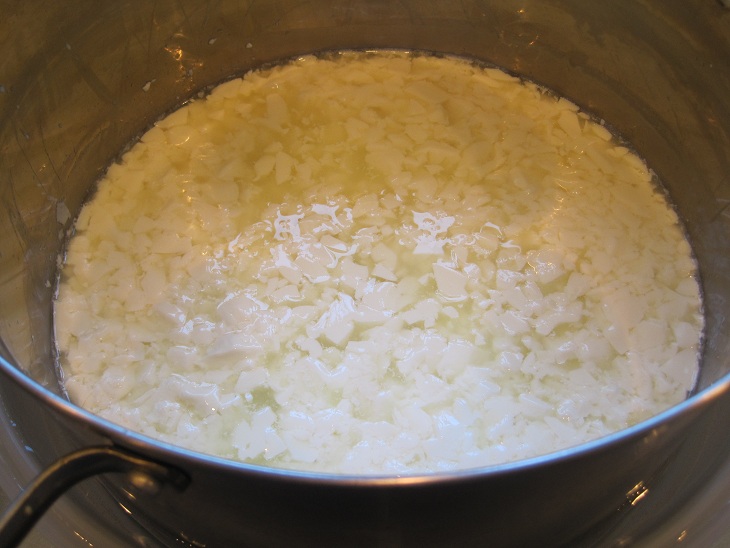
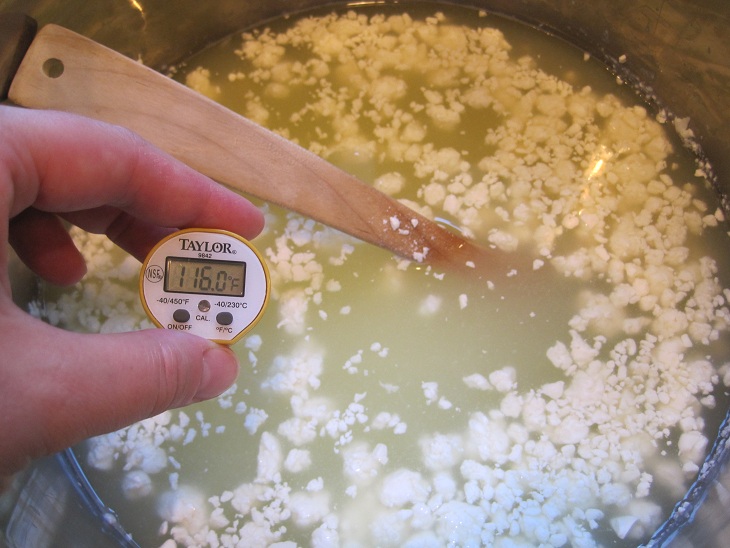
Now, the exciting drama of very slow heating. The goal is to heat the curds slowly at first — 1º every two minutes. Eventually you want it to get to 116º at around the 45-minute mark. I tried not to stress about it too much, just set a countdown timer for 45 minutes and got a feel for whether it was heating too quickly or slowly to hit the desired temperature as time went on. The curds changed in appearance as they cooked, pulling apart and showing more whey between them:

romano-cookcurds

The recipe didn’t mention stirring, but I stirred slowly most of the time to distribute the heat evenly and discourage clumping. And eventually, ta-da!

romano-maintaintemp

I lined my cheese mold with muslin and transferred the curds into it using a wire basket.

romano-packmold

With previous cheeses, the curds first go into the muslin to drain for a period of time, then salt is added before they go into the mold. This type of cheese just goes directly into the mold — which means it is very wet and not at all compacted. I ended up packing the curds into the mold over the sink and pressing them in with my hands so they would all fit, while a lot of whey drained out.

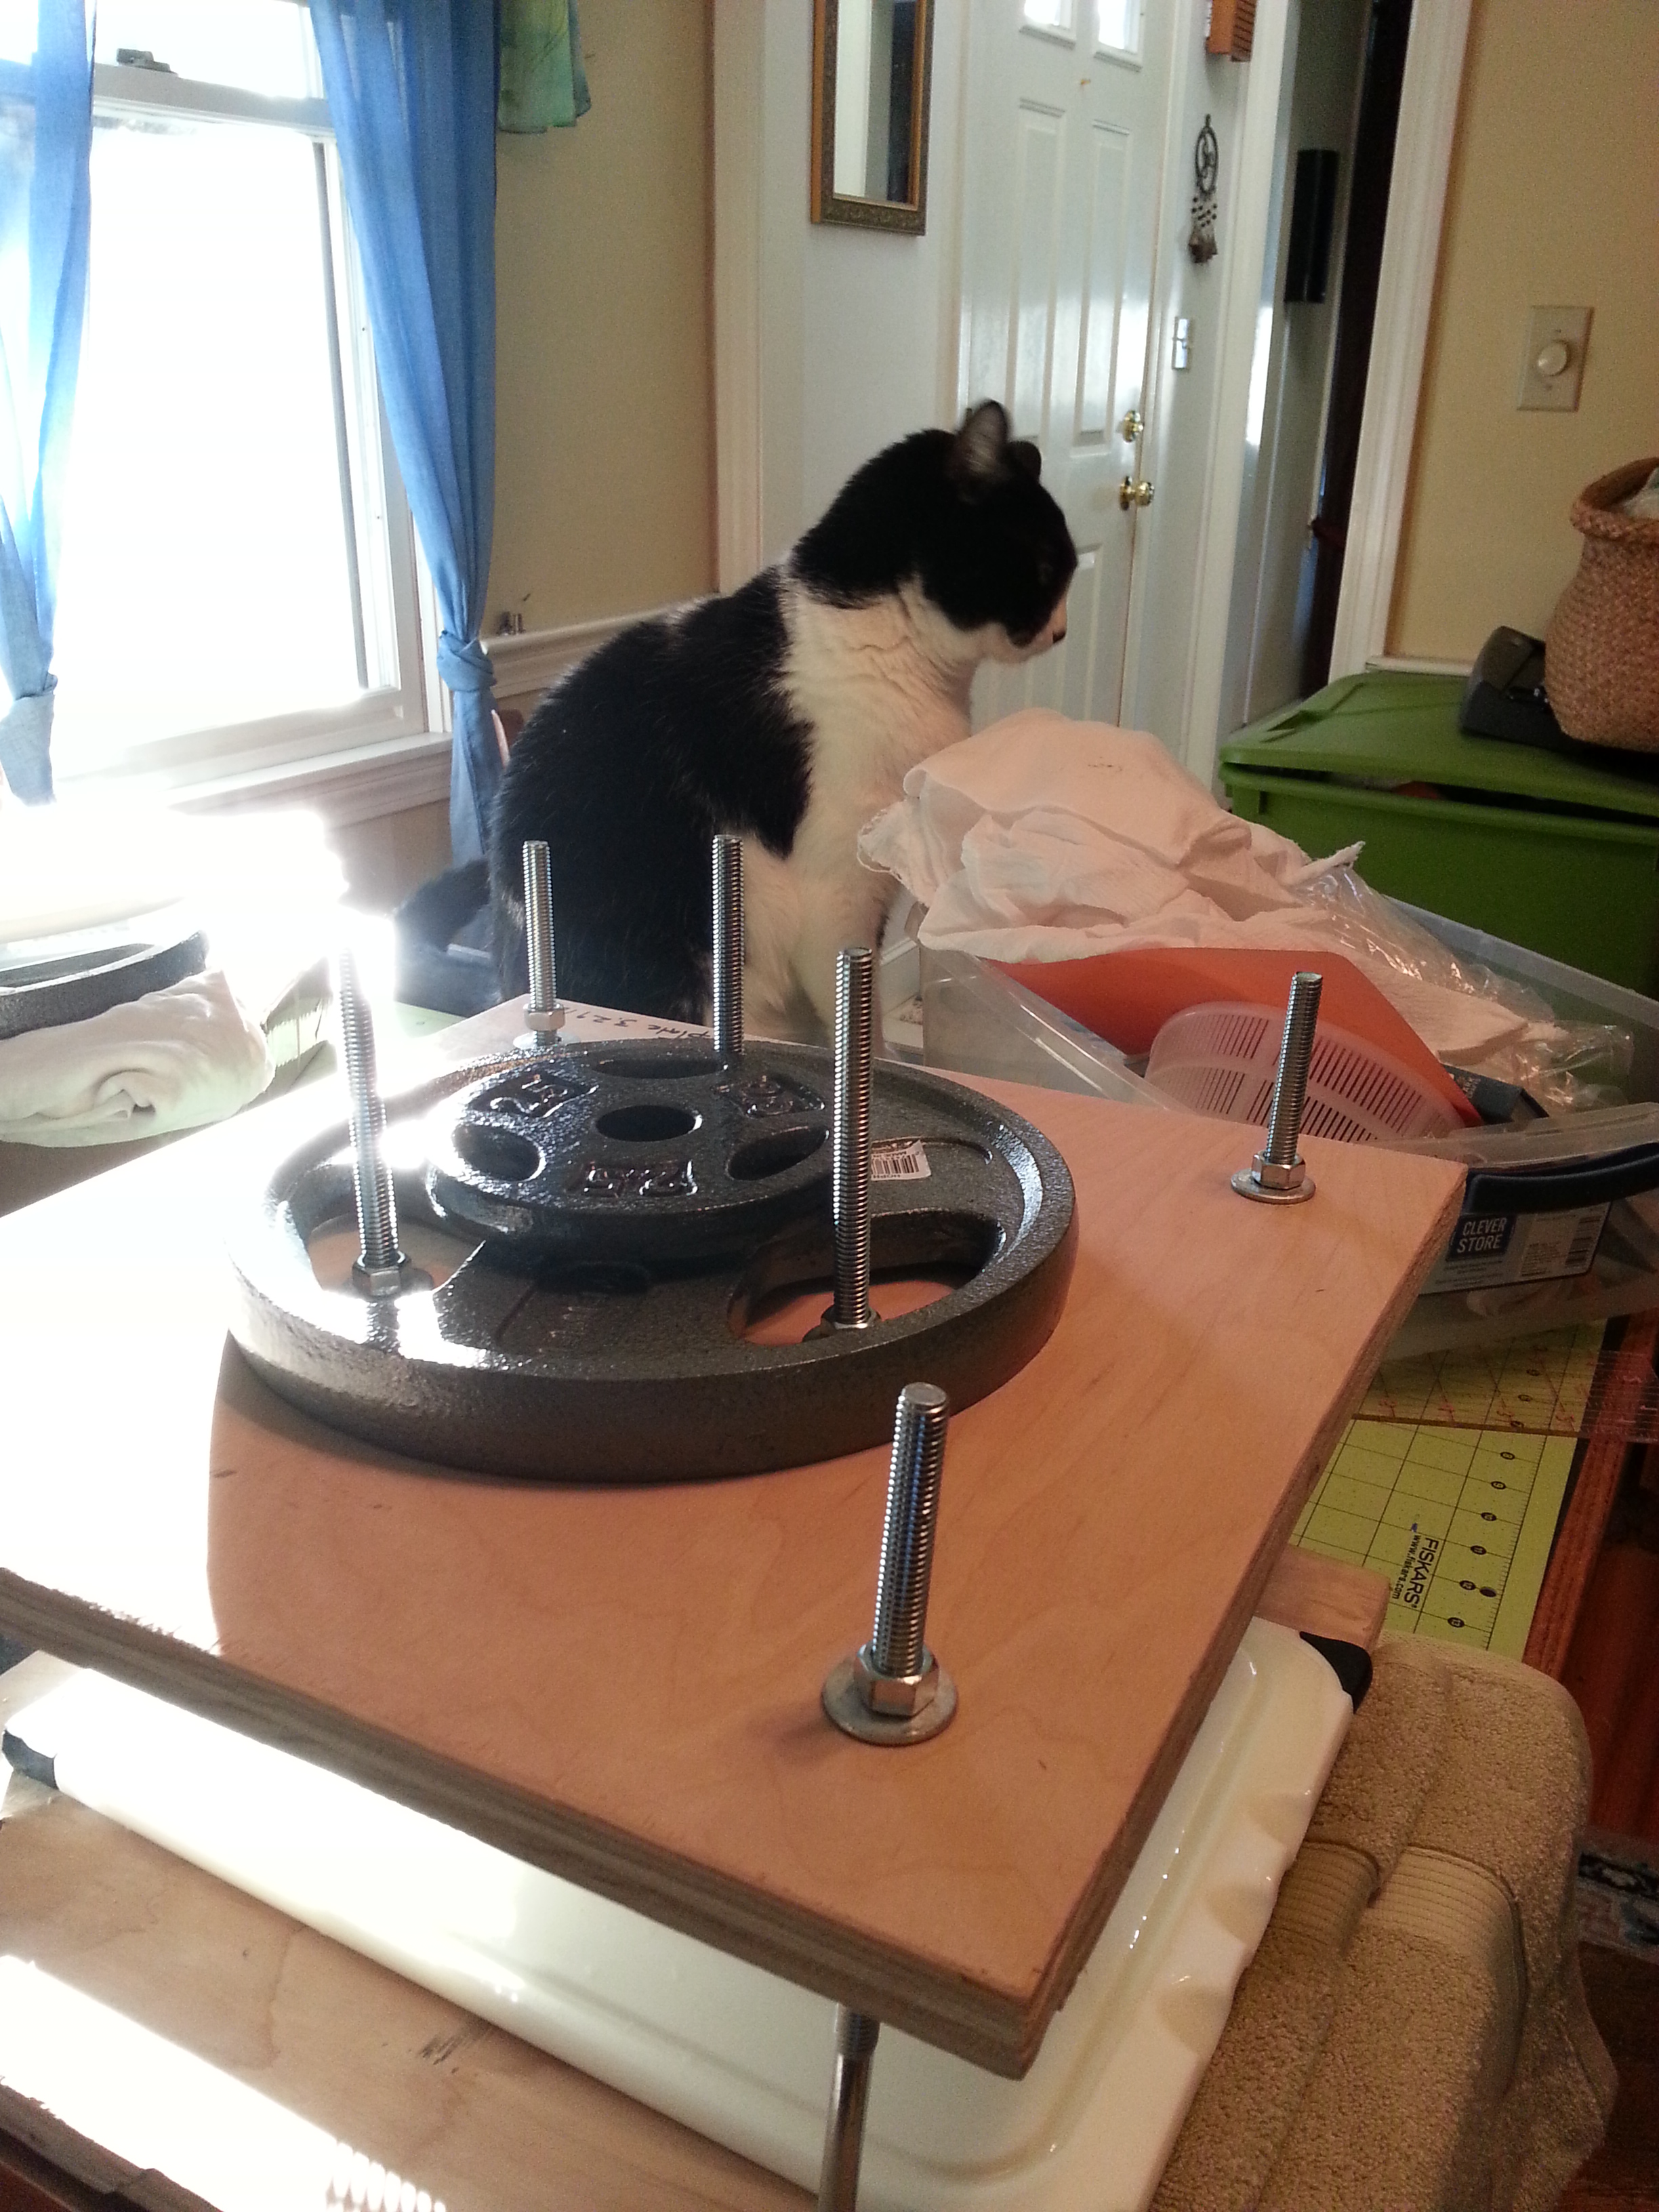
Then I pressed the cheese with an increasing series of weights, eventually doing 40 lbs. overnight:

romano-press

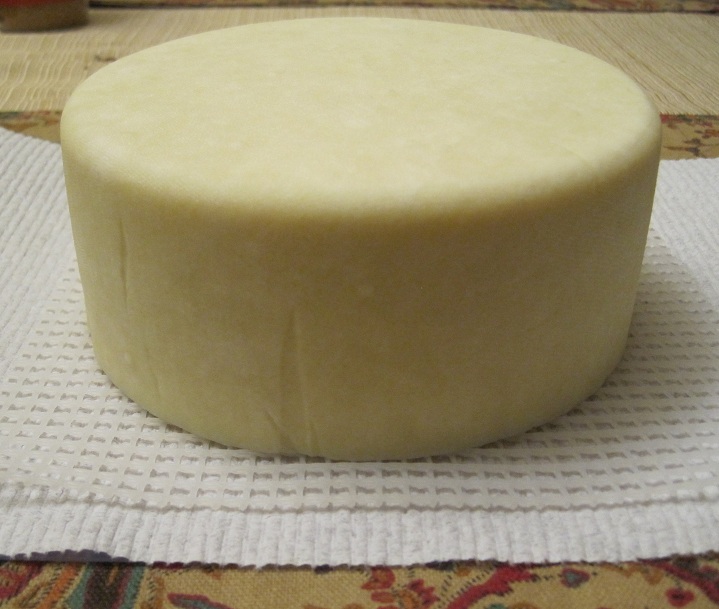
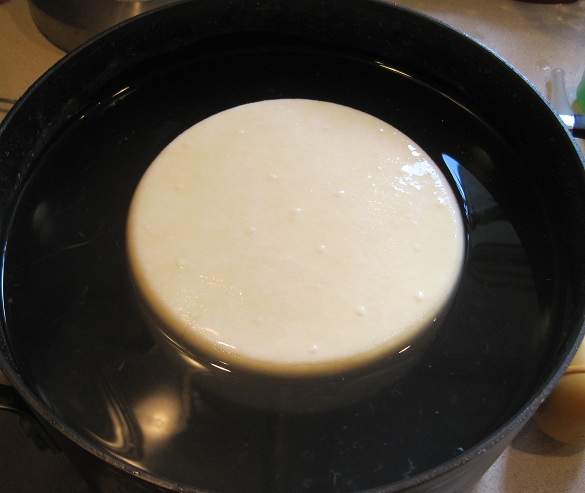
The next day, the cheese looked very different:

romano-pressed

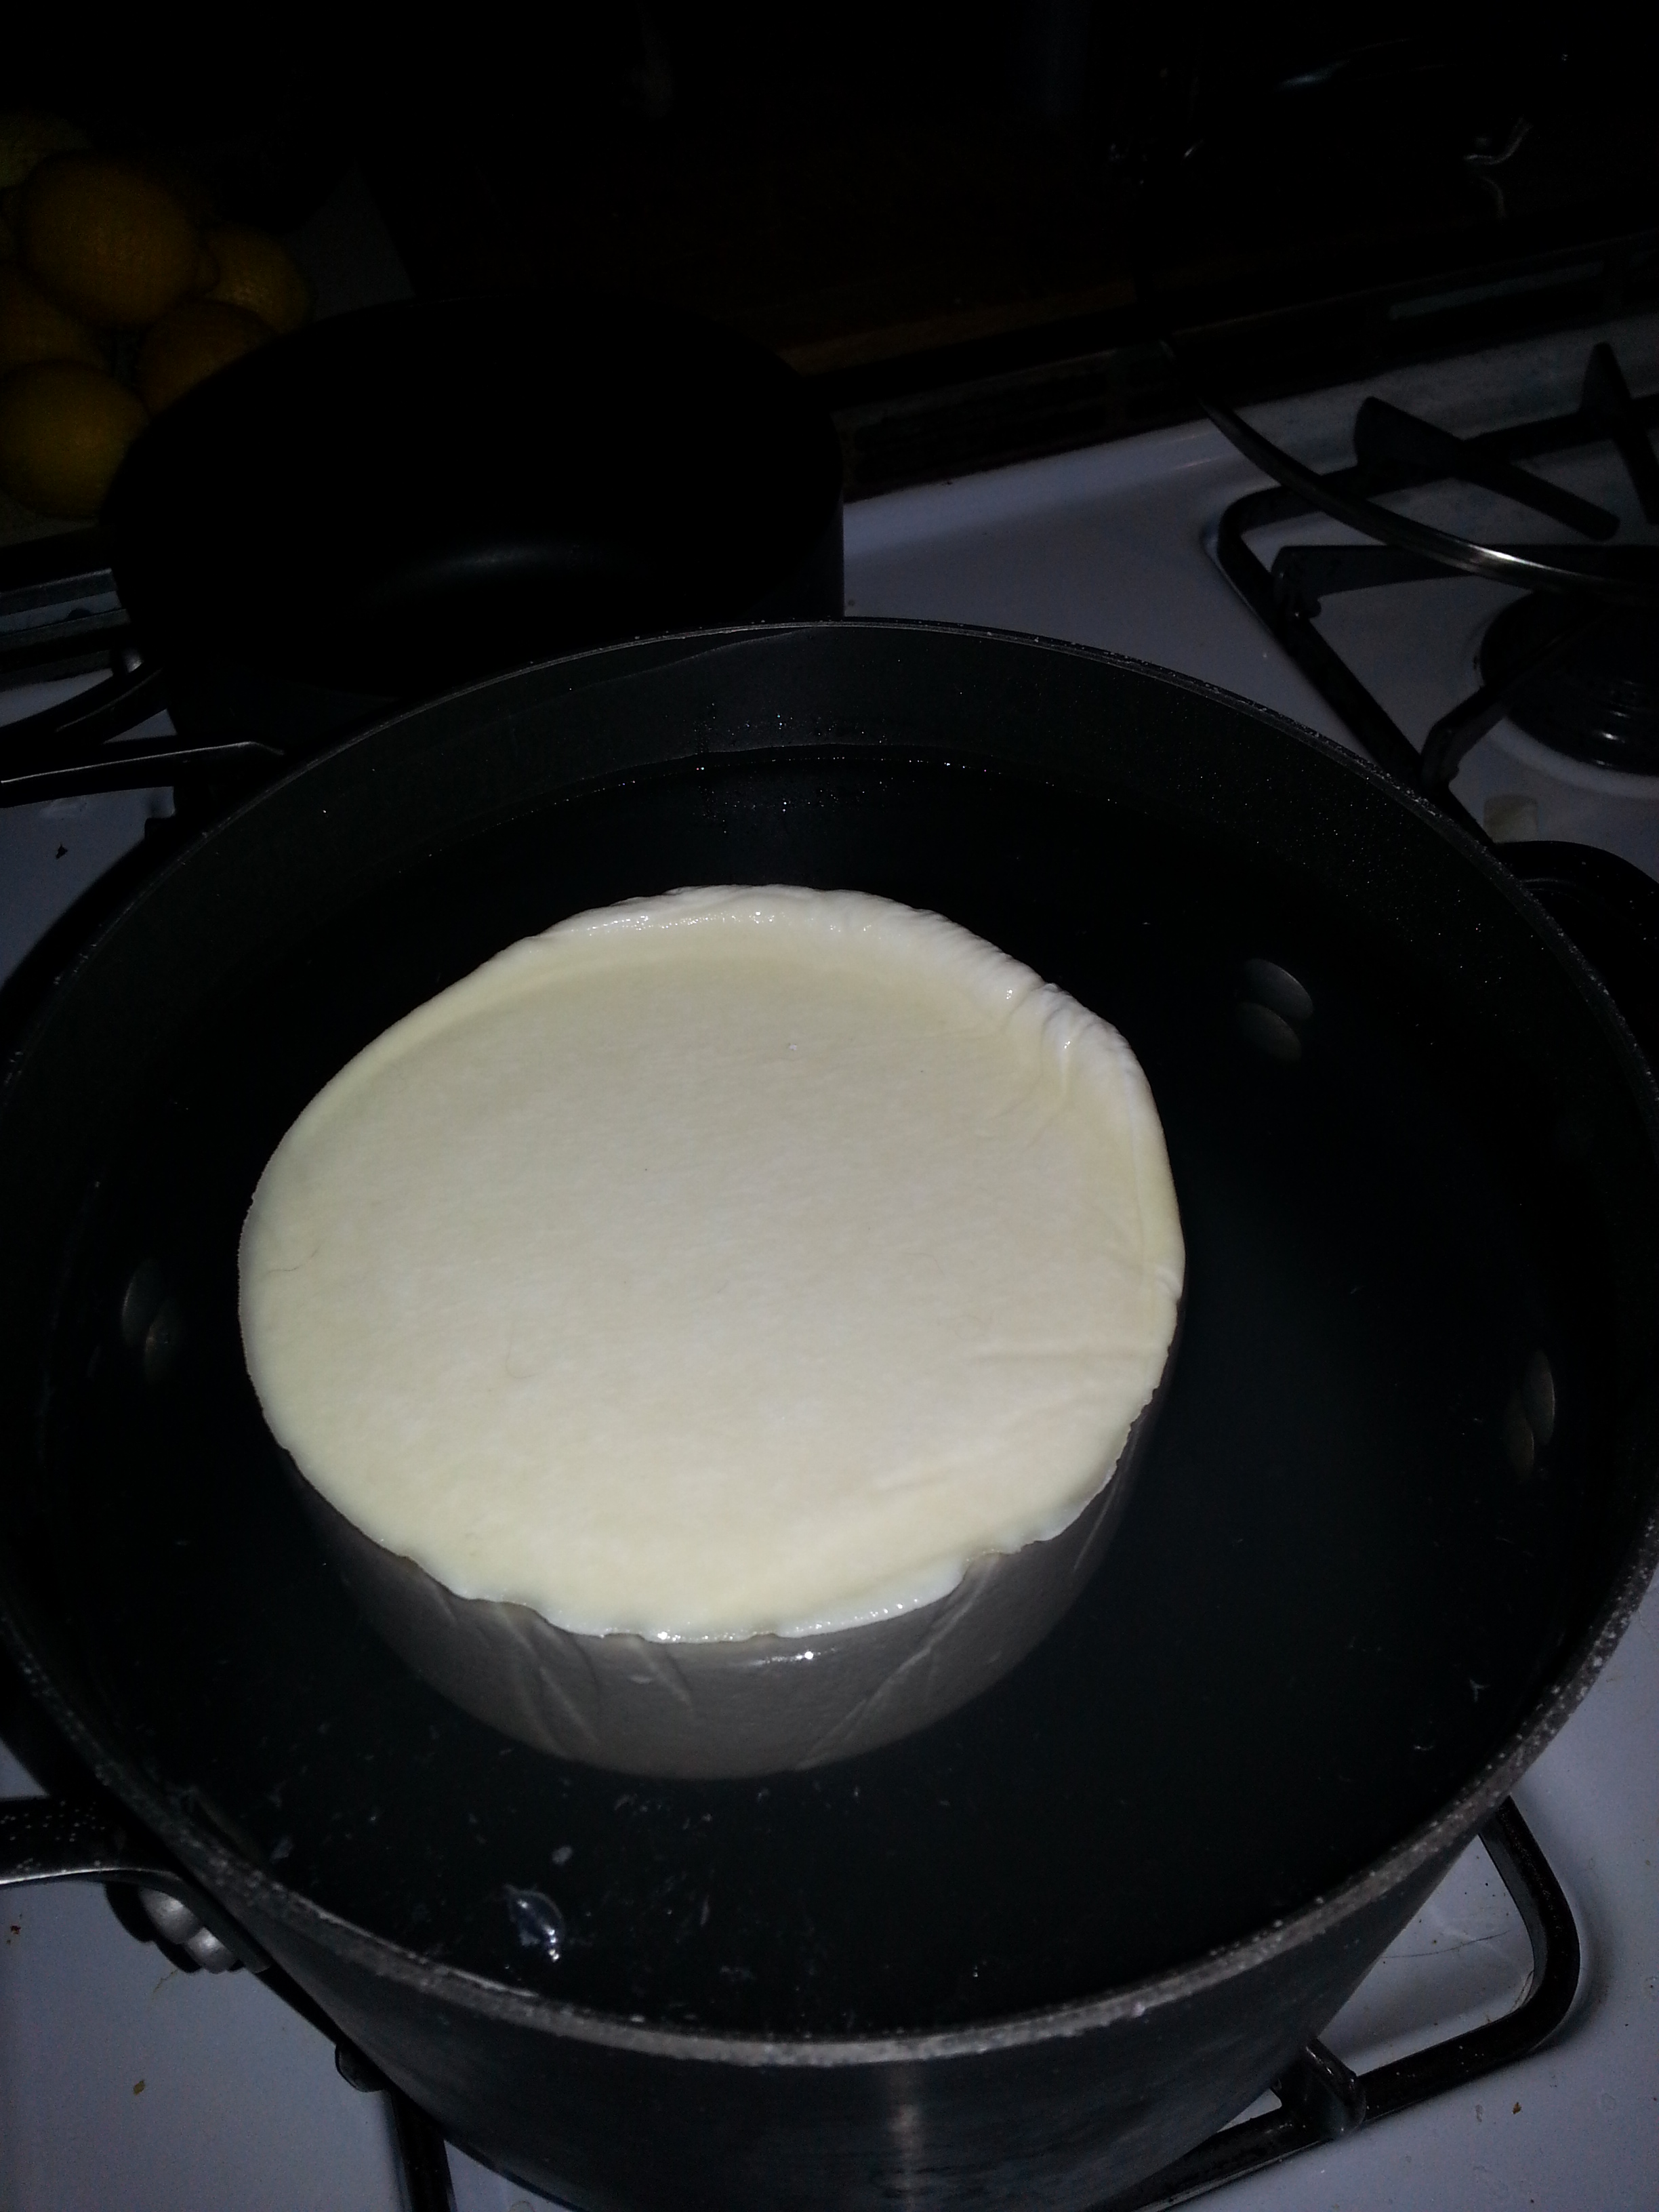
It was brining time. We already had a brine solution (essentially, non-chlorinated water saturated with cheese salt) so I boiled it to kill off any bacteria, then chilled it back down to fridge temperature before plopping the cheese into it.

romano-brine

After 12 hours in the brine, I took the cheese out and patted it dry.

romano-finished2

Now it needs to be flipped every day for a few weeks and occasionally after that. In two months, it will get rubbed with olive oil. Then it should age 4 months or more before we try it. I can’t wait!

Here it is nestled in our tiny cheese fridge with Stephanie’s manchego:

romano-fridge

Manchego Cheese at 1 week

Manchego Cheese at 1 week

it’s beginning to develop a nice rind

Image

2-Hour “30 Minute” Mozzarella

2013-08-13-20-29-19

I used a recipe very similar to Ricki’s 30 Minute Mozzarella, written by the same person, but in a printed book without photos.

This cheese came out surprisingly well given my lack of precision in making it. It produced about a pound of mozzarella, which was just enough for four adults who really enjoy caprese salad. I was happy to try a recipe that only made one pound of cheese — most recipes make two — as the resulting cheese is only good for a couple of days, and I didn’t want any to go to waste. Plus, the smaller batch meant only one gallon of milk and a smaller pot.

Compared to aged cheeses, this was utterly simple. Not quite as simple as a quick cheese of milk and lemon juice, but pretty close.

The reason it took an hour and a half longer than advertised was mostly due to the fact that I heated the milk too much on the first step, then had to cool it down again before I could add the citric acid. Apparently milk heats up really quickly on the stove. Further delays occurred because I then switched to heating it in a water bath — having gone too far once, I was concerned about using the stove for the rest of the process — but the water bath method takes longer to effect temperature change.

First step, gathering the ingredients (including rescuing the citric acid from the hidden depths of the pantry):

2013-08-13 18.21.10

Heat the milk to 55*, or if you’re me, accidentally heat it to 75* on the stove and then cool it back down to 55* in the water bath.

2013-08-13 18.33.02

Add dilute citric acid while stirring so the milk doesn’t immediately curdle.

Add hot water to the water bath until the milk reaches 90*, then take off heat and add rennet, stir for 30 seconds, and let sit for 5 minutes. When I checked it at that point, I didn’t see much curd formation, so I let it sit for another 3 minutes or so.

Cut the curd and put back into the water bath to heat to 105* while stirring. After this stirring, my curds were significantly more broken up than the pictures in the recipe. I’m not sure why; it could have been temperature differences, milk differences, the slower heating rate, all sorts of things. I’m actually kind of glad I wasn’t looking at the pictures from the recipe, because I would have been worried, and it turned out fine.

Scoop out the curds with a wire basket and put them into a microwave-save bowl.

2013-08-13 20.10.56

Attempt to press more whey out of the curds in the bowl. I discovered a convenient synergy between the bowl and the wire basket such that I could press the curds with the basket while I poured out the whey.

Microwave the curds for a minute, then fold/knead them with a spoon to distribute the heat. Add salt to taste if you want. At this point, my curds were melding together and suddenly started looking like mozzarella. Microwave and knead a few more 30-second times as necessary. When it stretches like taffy, it’s done. Magic!

2013-08-13 20.16.56

Knead to evenly distribute the heat and watch it become more uniformly shiny. I suspect I didn’t quite do this part right, as my cheese log had some issues staying together. However, it was dinner time, and the cheese was cheese, so I sliced it into 1/4″ slices and plated it. We assembled our delicious morsels of fresh mozzarella, CSA tomatoes, and basil from our garden — with a dab of olive oil and a sprinkle of kosher salt — and dug in.

Oiled and aging

Next step for the cheese, a brush of olive oil and then sitting in the cleaned cheese fridge.

ImageImage

And the perpetual problem of remembering to oil and flip it every day.

And into the brine we go!

So the cheese looks pretty good this morning after its long night in the press. And the brine (left over from last time, reboiled, skimmed, a little salt added) got to rest all night waiting for the cheese. Ideally the cheese should brine in 55 degrees, but there’s no place my house cool enough(and warm enough)* for that, so we’ll see how it goes.

ImageImage


2013-08-12 07.15.54

*The cheese fridge is actually made for 55 degrees, but it’s not big enough to handle the pot and the cheese brining. But if this fails, or has unexpected results, perhaps I’ll build a brining bath that will fit in the fridge.

It’s like the cheese press and cheese fridge were made for each other!

Image

Cat free pantry accommodations

Tomorrow’s project (since I didn’t get to it today) Preserved lemons!

Image

The pressing issue – does it work?

Finally time to put the press through its paces.

First thing I’ll fix, make the holes on the weight plate bigger, as they get moved a lot.

But all and all it seems to work well:

This is the first press, so it’s still really thick, it’s on its final press right now and it’s actually inside the mold now.

I created a drain plate using a meat cutting board (yay for drainage channels!) and a towel to sop up the whey as it comes out. There’s also a plastic drying sheet between the mold and the cutting board which is supposed to help with the draining. It’s what it will dry on once it’s out of the mold as well. I put one of the extra weights behind to raise it up a little to help the whey drain in the direction of the towel. Manchego doesn’t drain terribly much after the first pressing because the curds are so small and packed in, I’ll probably need a more robust drainage system for other cheeses.

Image

Top view, 15, well actually 15.79 lbs but close enough. Image

We need a cat proofing plan though… I think the press will go in the pantry for the night.

2013-08-11 18.43.09

The last press is 30 pounds for 6 hours, but considering it started at 7pm and I plan to be in bed by 10pm, It’s going to get about 10 hours at 30 pounds and then tomorrow when I wake up, I’ll toss it in the brine.

Now for the fun part, do my new inventions work?

So I decided to try the cider press to see how the drain worked when I separated the curds from the whey. We like to save some of the whey to use in other things, like bread or pickles. (Which is strange as it makes foods that are normally lactose free, suddenly problematic, but tasty, that’s a hard trade off, it doesn’t seem to effect me quite as much as drinking straight milk though, even if it is 99% of the lactose in the milk)

Also check out the adorable clamps we found at target

First lesson learned, I need a slightly longer hose if I want to put the gallon jugs on the floor, my hose was about 6 inches too short, luckily I have a ton left over.

Image

Also it makes a really weird disconcerting noise when it gets to the end and there are air bubbles, but it worked well. I may also add in a knob to regulate the flow as once one jug was nearly full it was a bit of a trick to stop and get the next jug. (And really felt like making bath tub gin)

But look! Curds! And we didn’t lose any of them to the sink as in times past.

Image

It always amazes me how much whey is left after cheese making. There’s probably another 6 ounces in the bucket that I didn’t bother pouring into the jugs since we are only keeping one for making more stuff with this week. Milk = mostly water and lactose.

Image

The next logical step – make cheese

Using the book Home Cheese Making by Ricki Carroll I decided to make a cheese we’ve had some success with in the past: Manchego.

Manchego is a nice forgiving cheese, that allows for instant gratification or patience, in my experience mostly dependent on how the aging process is going. It can be eaten as early as days 2-5 for Manchego fresco, or cured another 3-12 weeks for manchego curado, and i things are going really well, 3-12 months and you get manchego viejo. It’s also of the washed rind variety, which takes out the annoying waxing step. But it does need to be brined over night, which is a little nerve wracking (particularly after our last feta dissolved in the brine).

I started with Garelick Farm’s Pure milk, which claims to be:

  • Our farmers pledge not to use artificial growth hormones
  • We test all milk for antibiotics
  • Continuously quality tested to ensure purity
  • Only from cows fed a nutritious diet
  • Cold shipped fresh from your trusted dairy within hours

Which who knows if that’s better than Hood or any other non-ultrapasterized milk, but I didn’t feel like driving to Framingham to get raw milk, and I doubt the organic variety is terribly different.

I used 1/2 a packet of both mesophillic and thermophillic starter, both sold to us by the makers of the cheese book.

I recommend the book with some hesitations, it’s very hard to follow and often skips steps or doesn’t go over the steps each time, so if you are starting with recipe 35, you pretty much don’t get the correct directions. It is a great book if you read it from page 1 to 277, and remember all of it, but I constantly find myself having to note down in the margins parts that she neglected to reprint in each recipe (Like, add calcium chloride to your milk before you start, I forget that every time) And often the sidebars and recipes conflict with each other, so it’s a bit of guess work and trial and error each time to figure out what you are supposed to do. There is a 1-800 number for help, but I’m not one to call and ask questions.

First step, warm up the milk. I tend to leave mine in the jugs in some warm water while I get everything ready

Image

Sterilize all things

Image

set up water bath in the sink, we use the top of a  tupperware cake carrier

ImageImage

Manchego has a very fine curd, so there’s a lot of stirring and cutting of the curd

Image

And new to this process this time, an instant read thermometer. We had been using an oven probe (actually three) but they’ve all proven broken or unreliable, so I actually drove out to wegman’s while the cheese was inoculating.

Previous Older Entries