
I finally got around to making a hook board for my necklace collection. I’ve had everything for it for months now, but I just kept putting it off. This will vastly improve the likelihood of me wearing a necklace, like ever.
Adventures in creating and exploration
31 Aug 2013 Leave a comment
I finally got around to making a hook board for my necklace collection. I’ve had everything for it for months now, but I just kept putting it off. This will vastly improve the likelihood of me wearing a necklace, like ever.
31 Aug 2013 2 Comments
in Usables Tags: cookie mold, wood carving
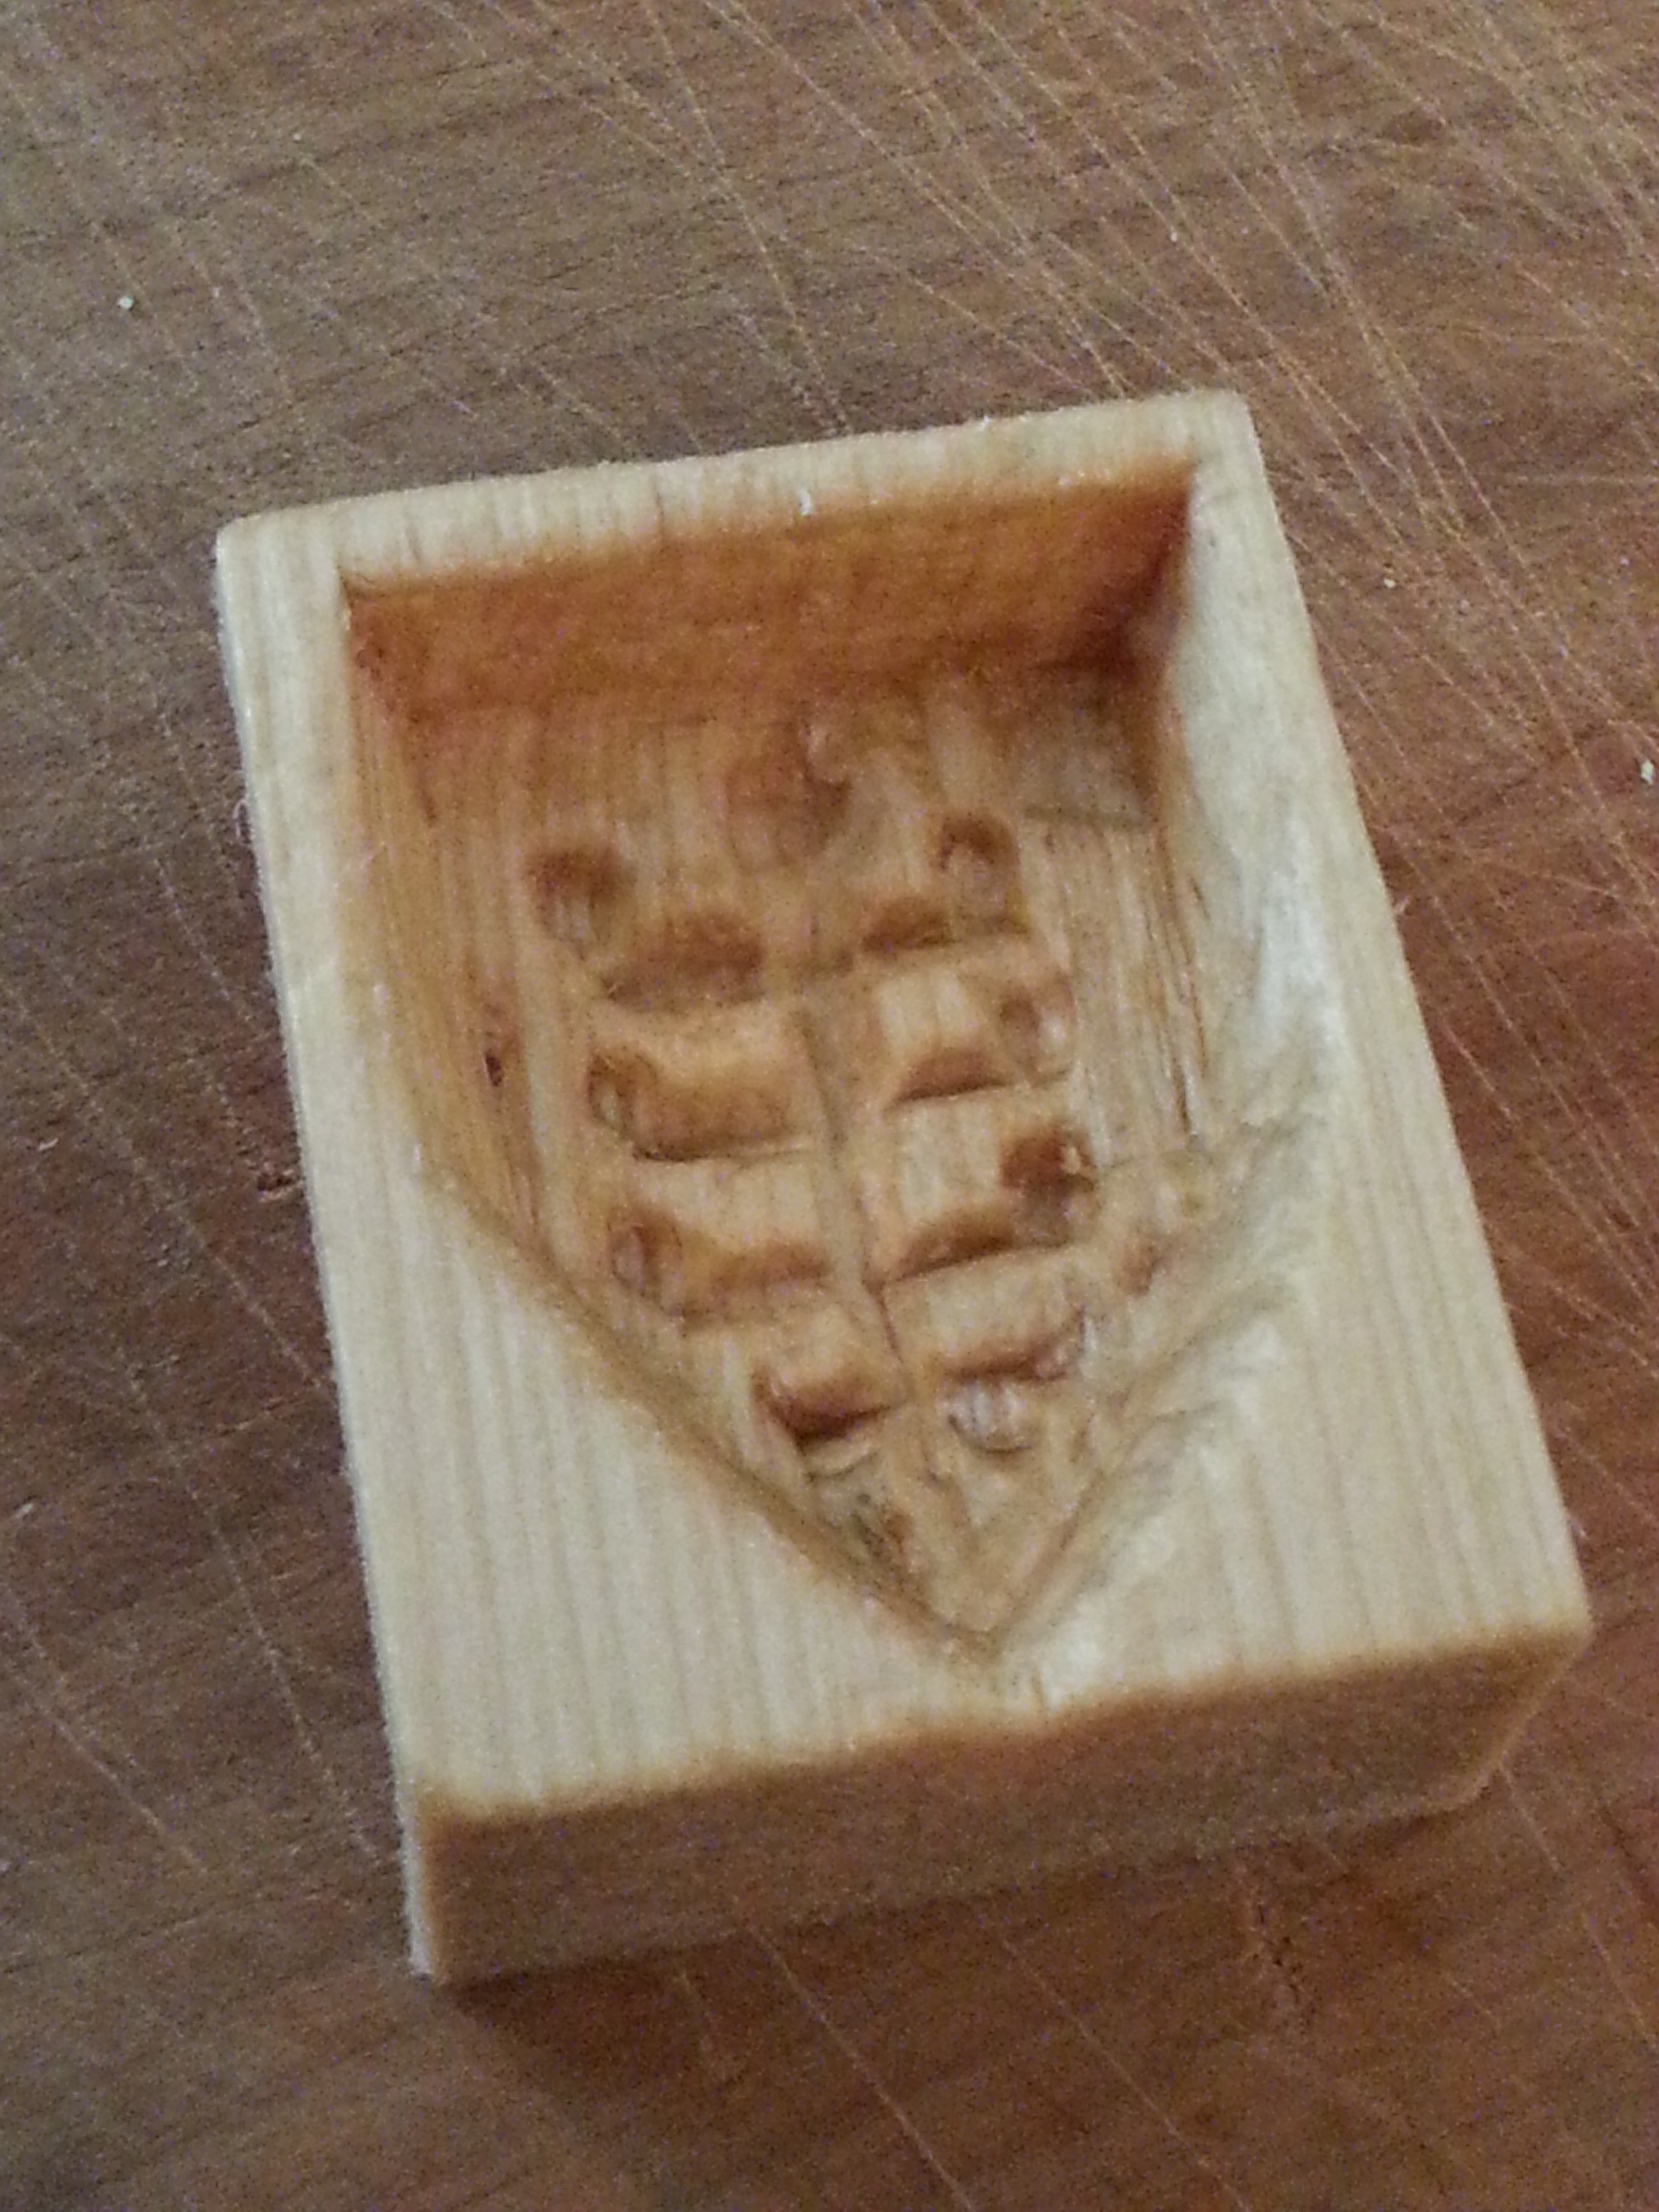
So we’ve been contemplating making savory short bread cookies, and then thought, hey it’d be cool to make them with a cookie press mold with a crequier on them as it’s Caitrin’s device (all the more reason I need to get my device registered)
I looked up the history of them and found this great website straight out of the early 2000s. And I thought, hey, I can make that! I happen to have a ton of wood carving tools and supplies from an earlier time when I thought I might take up wood carving but never did. So I got some books from the library, though really my main learning was done on Wednesday at pewter class, where I carved cedar for the first time, and used a dremel on wood for the first time. After that difficult experience, carving on bass wood today was a piece of cake!

It cuts so smoothly and easily! In fact, I was having so much fun, I think I may have made it a bit too deep!

I edged around it first with a flat tool, and then chiseled out the inside. I did the design using a small V tool, though I then went back and cut it with the straight one for better lines. And the leaves I used the small U tool to cut little circles. I then used the dremel to sand the surface, which I need a smaller tip for! But it worked pretty well for a first try. I only screwed up one of the leaf things (it merged into the one under it)
Now it’s soaking in olive oil to close up the pores in the wood so the cookie dough doesn’t stick too badly to the wood.

Post oil:
28 Aug 2013 2 Comments
in Usables Tags: pewter, wood carving
So tonight I was introduced to using wood as a mold for pewter and got to try my hand at carving some cedar, which had a very prominent and pretty grain that added a lot of character to the piece I was making.
The first suggestion was, make a feather, so I started sketching feathers but they all just looked wrong with the grain, so I decided to go with a leaf, my old standby…
However the wood was significantly harder than expected and so carving was a much less detailed process than I am used to (which is to be expected with wood, I just didn’t expect quite this much lack of detail). I finally made some progress using a dremel to essentially burn out the wood, first with a round tip, but that gouged more than I wanted, then with a large burr like tip, which worked pretty well but I was having trouble controlling it. I went to the sanding tip, and that allowed for a lot more control, but made it very slow going. Finally I had a general shape of a leaf cut so I went to pour some pewter into it, and it looked really rough, mostly from air bubbles, so it was suggested I make a channel to pour the pewter in (like we’ve been doing with the soap stone) and that was when I finally figured out how to use the dremel with control! So with that newly gained knowledge I smoothed out the mold and tried again.

I then went to work trying to make the sprue larger, and accidentally caught the paper towel in the dremel, sending my mold flying across the room, and the dremel wrapped tightly in the towel. I was kind of amazed I had the good sense to hold it away from me, and then turn it off within a second of it happening instead of panicking at all.
Now with a larger sprue, and with the mold clamped together in two places, we poured again

It kinda looks like a whale to me! or maybe a fish.. I’m going to take some of this upcoming long weekend to try carving with my own dremel and wood working tools on some bass wood and see how that works instead. (Purely by coincidence, I had interlibraryloan send me 2 books on beginning wood carving that I picked up today, so I should be good for a little bit)
23 Aug 2013 3 Comments
in Usables, Wearables Tags: chicken, leaf, pewter, weekly progress
Monday night I made the rough base of Caitrin’s costume for Shadows of Amun, which is basically a large black underdress. The linen was bought at pennsic from Carolina Cottons, and is so soft and drapes wonderfully. I’m very jealous of her costume.
Tuesday night I went to Alex and Joy’s for dinner and worked on my tiny populous badge, which should be done by tonight. I am so eager for that to be done with!
Wednesday night I went to Rozi’s for pewter class. Last week’s class was pretty much a disaster of soapstone breakage. This week Rozi made a back for my mold before I got there, so I only had to finish the backside of my chicken tokens. 
You can see which ones came before the others by the styling of the wings and the speckledness. I haven’t had a chance to clean them up yet, perhaps on Sunday if the weather is nice.
Once those were at a point where I liked them I decided to quickly make a button for Caitrin based on the crequier that is on her device:

The one on the left was the first one, which is why it has more texture – the mold wasn’t hot enough yet for a nice smooth finish. The one on the right shows much more of the detail. I hope to clean it up a little and make the leaves more distinct this weekend, but not too bad for about 30 minutes of work.
And by pure luck I happened to cast two perfect leaf buttons that were on the same mold. I wasn’t trying to get these, but they came out so well I decided to keep them:

Tonight I’m going to see Great Big Sea in Lowell, and I’m going early to try to get a good blanket space, so I’ll have plenty of time to finish my populace badge and perhaps start on the drawn/cut work pincushion I am planning on making.
18 Aug 2013 Leave a comment

They got to enjoy some quality time out in the yard, until the big yellow lab came over and wanted to play and they ran into the coop for safety. Smart little chickens.
18 Aug 2013 Leave a comment
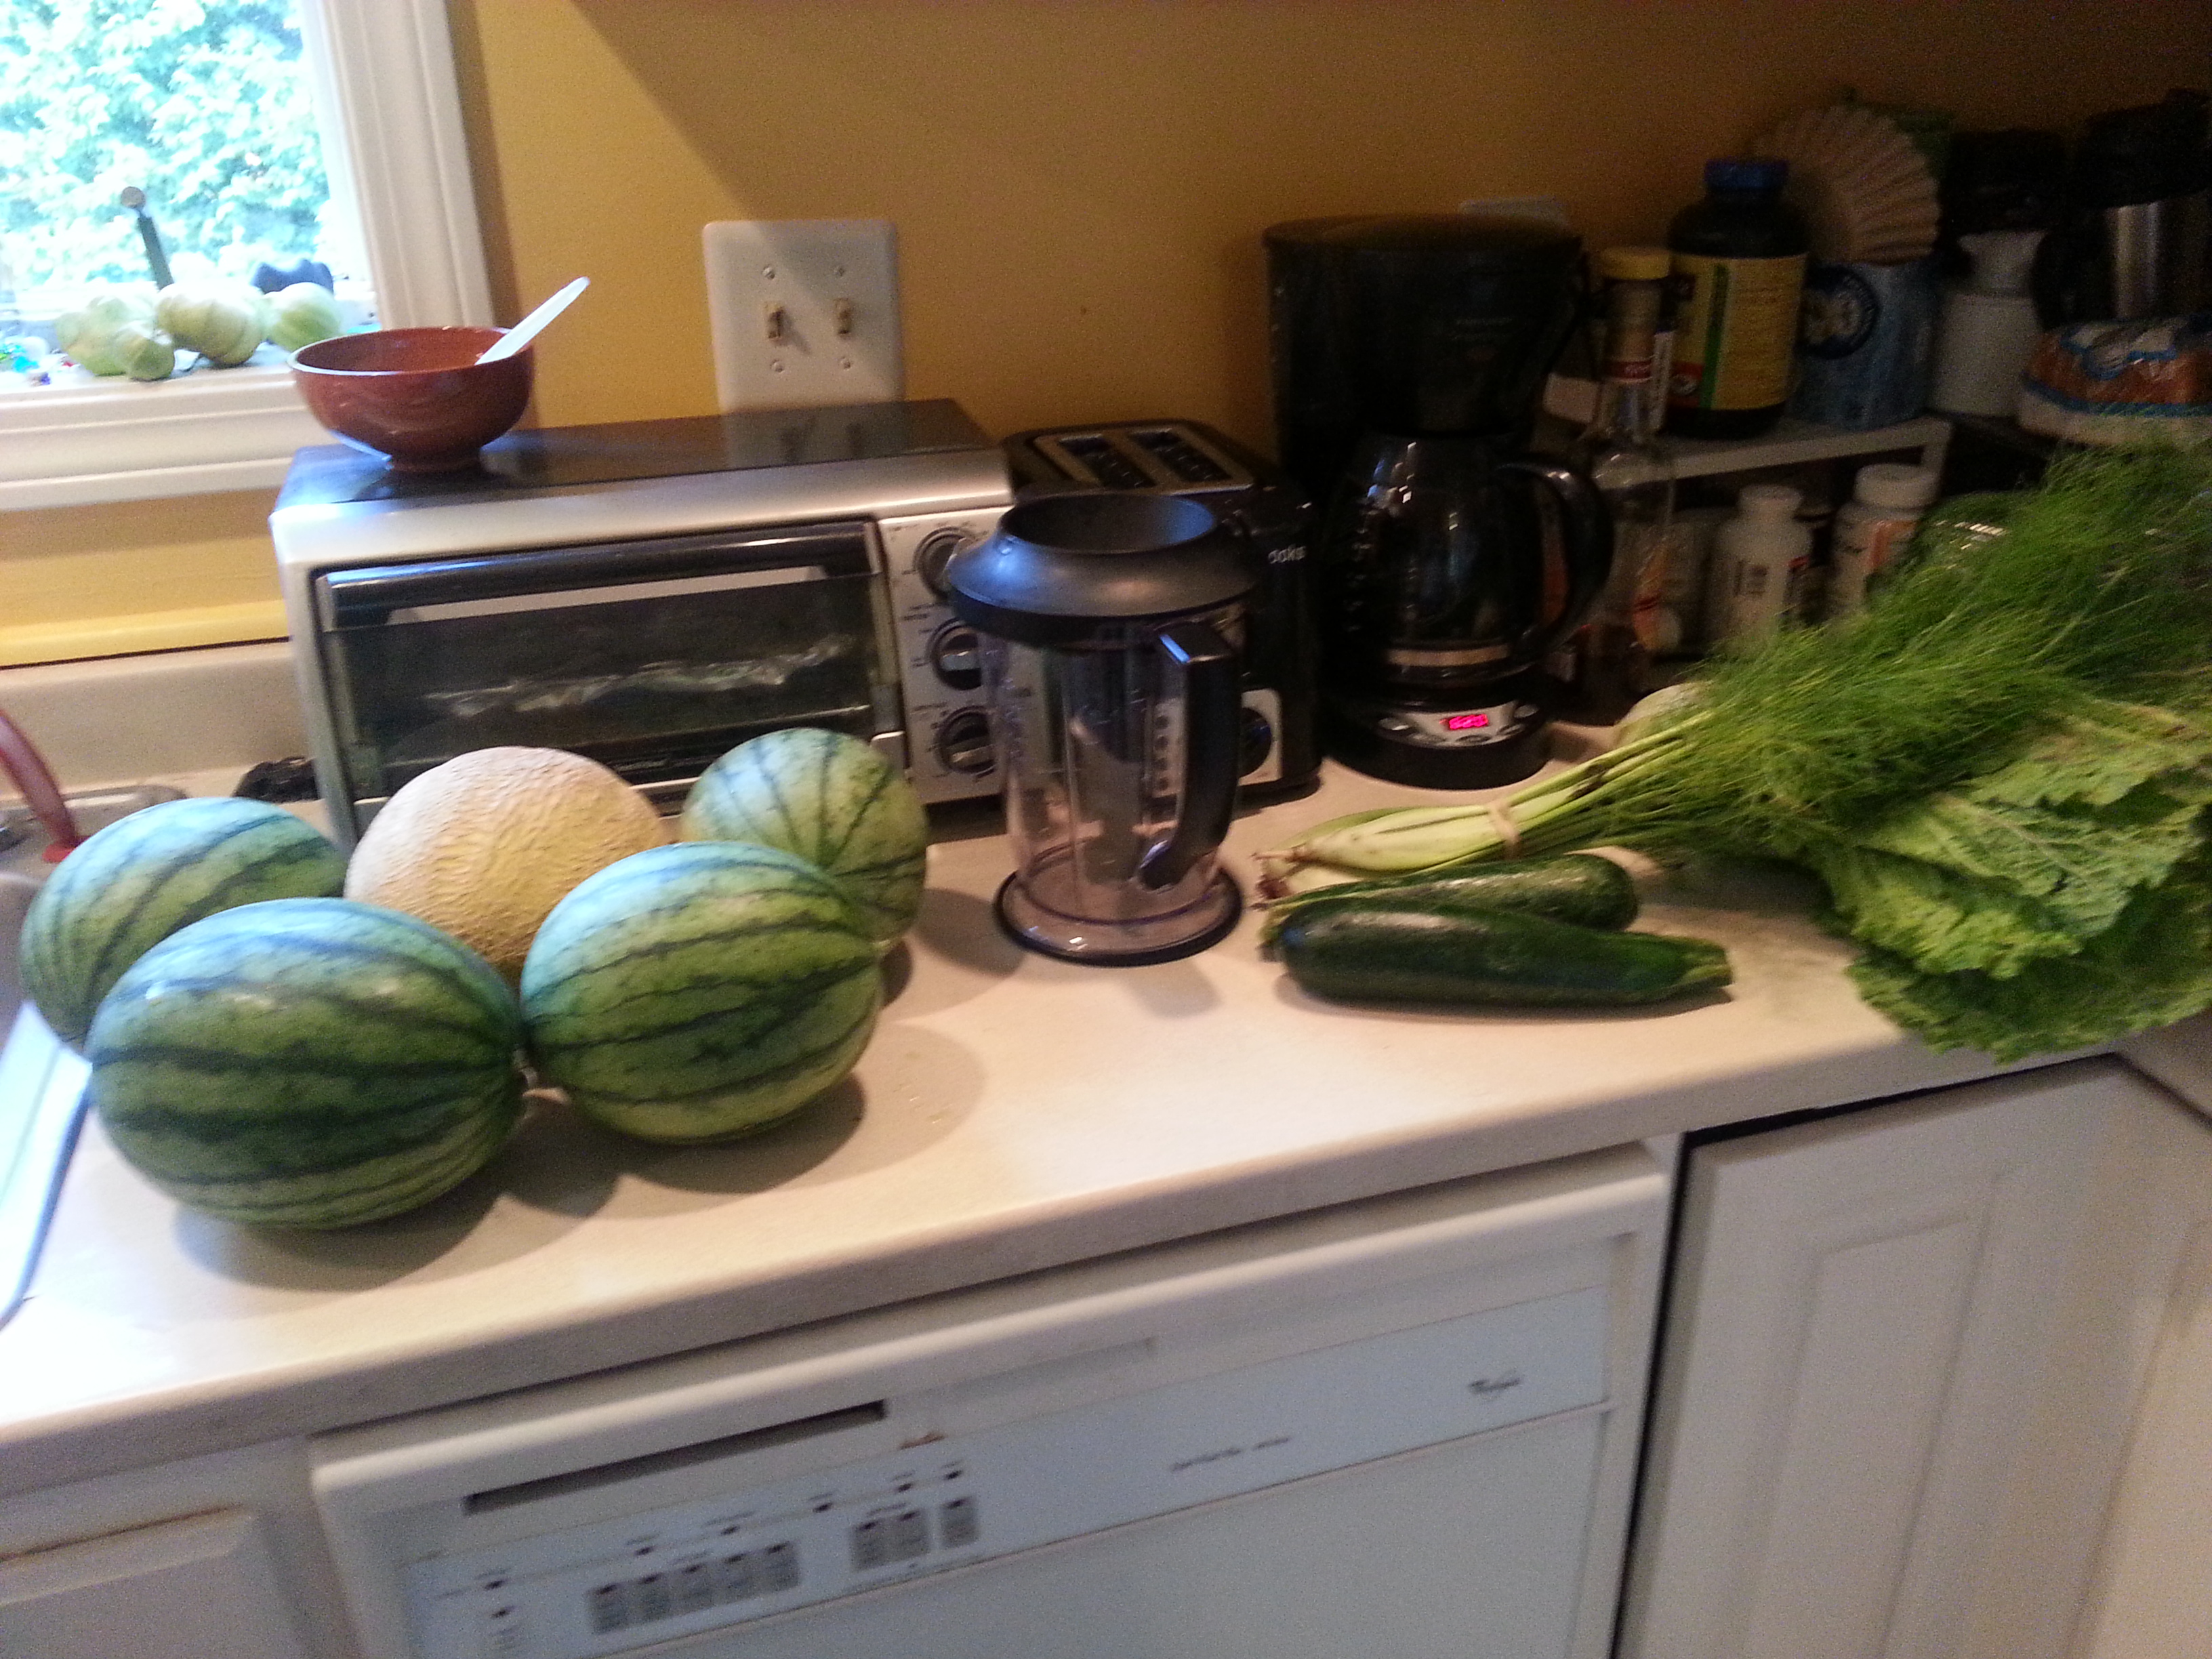
A few weeks ago I thinned out the carrots and beets and roasted them up, and today I pulled the rest of them, along with the swiss chard and the collards out to make room for the squash that are trying to take over the garden and to start the fall planting.
These are the collards, or maybe kale, it’s hard to tell after the bugs got most of them. There were lessons learned here…

Next up the swiss chard, which I had actually forgotten about since it looks so much like the beets, except there’s no beet. It did surprisingly well. I think I’ll definitely plant some next year, but I won’t put it next to the beets this time. I am also trying a fall harvest of this one. 
These are the last of my tiny carrots. I really should have harvested them a few weeks ago as bugs got in and chewed up the top half of most of them, but they are very cute. I’ve also put in a new batch of these since they seem to grow fast.

And of course the beets. These I am most happy about. They grew perfectly except for where I planted them too close together and they are delicious. I’ve put in a second crop of these as well.
Left in garden are four squash like plants. They are either gourds, watermelons, butternut squash or pumpkins. For the most part they are just starting to fruit now, so I don’t have much hope for them, but perhaps their trellising (pipe cleaners) will help. We have a few small green things growing, which look like gourds to me, but I’m not sure. And one tiny cucumber. Also tiny green onions which we’ve been using as needed.
I also left the basil in as we are using straight from the garden. In the back there are also some eggplants that are flowering and might perhaps produce some tiny eggplants before it gets too cold. 
Little tiny gourds?
Also included in the fall planting, cilantro, radishes (all mine got too hot too quickly and died this spring) and some snap peas that I need to get another cage for. I’m not going to be heart broken if this batch doesn’t make it, but we had so many left over seeds I figured I might as well plant them!

15 Aug 2013 Leave a comment

I added in an aloe that I found at walmart the other day. They seem to be doing quite well, even starting to grow and sprout!
14 Aug 2013 2 Comments
in Edibles Tags: Cheese, cheesemaking, mozzarella
I used a recipe very similar to Ricki’s 30 Minute Mozzarella, written by the same person, but in a printed book without photos.
This cheese came out surprisingly well given my lack of precision in making it. It produced about a pound of mozzarella, which was just enough for four adults who really enjoy caprese salad. I was happy to try a recipe that only made one pound of cheese — most recipes make two — as the resulting cheese is only good for a couple of days, and I didn’t want any to go to waste. Plus, the smaller batch meant only one gallon of milk and a smaller pot.
Compared to aged cheeses, this was utterly simple. Not quite as simple as a quick cheese of milk and lemon juice, but pretty close.
The reason it took an hour and a half longer than advertised was mostly due to the fact that I heated the milk too much on the first step, then had to cool it down again before I could add the citric acid. Apparently milk heats up really quickly on the stove. Further delays occurred because I then switched to heating it in a water bath — having gone too far once, I was concerned about using the stove for the rest of the process — but the water bath method takes longer to effect temperature change.
First step, gathering the ingredients (including rescuing the citric acid from the hidden depths of the pantry):

Heat the milk to 55*, or if you’re me, accidentally heat it to 75* on the stove and then cool it back down to 55* in the water bath.

Add dilute citric acid while stirring so the milk doesn’t immediately curdle.
Add hot water to the water bath until the milk reaches 90*, then take off heat and add rennet, stir for 30 seconds, and let sit for 5 minutes. When I checked it at that point, I didn’t see much curd formation, so I let it sit for another 3 minutes or so.
Cut the curd and put back into the water bath to heat to 105* while stirring. After this stirring, my curds were significantly more broken up than the pictures in the recipe. I’m not sure why; it could have been temperature differences, milk differences, the slower heating rate, all sorts of things. I’m actually kind of glad I wasn’t looking at the pictures from the recipe, because I would have been worried, and it turned out fine.
Scoop out the curds with a wire basket and put them into a microwave-save bowl.

Attempt to press more whey out of the curds in the bowl. I discovered a convenient synergy between the bowl and the wire basket such that I could press the curds with the basket while I poured out the whey.
Microwave the curds for a minute, then fold/knead them with a spoon to distribute the heat. Add salt to taste if you want. At this point, my curds were melding together and suddenly started looking like mozzarella. Microwave and knead a few more 30-second times as necessary. When it stretches like taffy, it’s done. Magic!

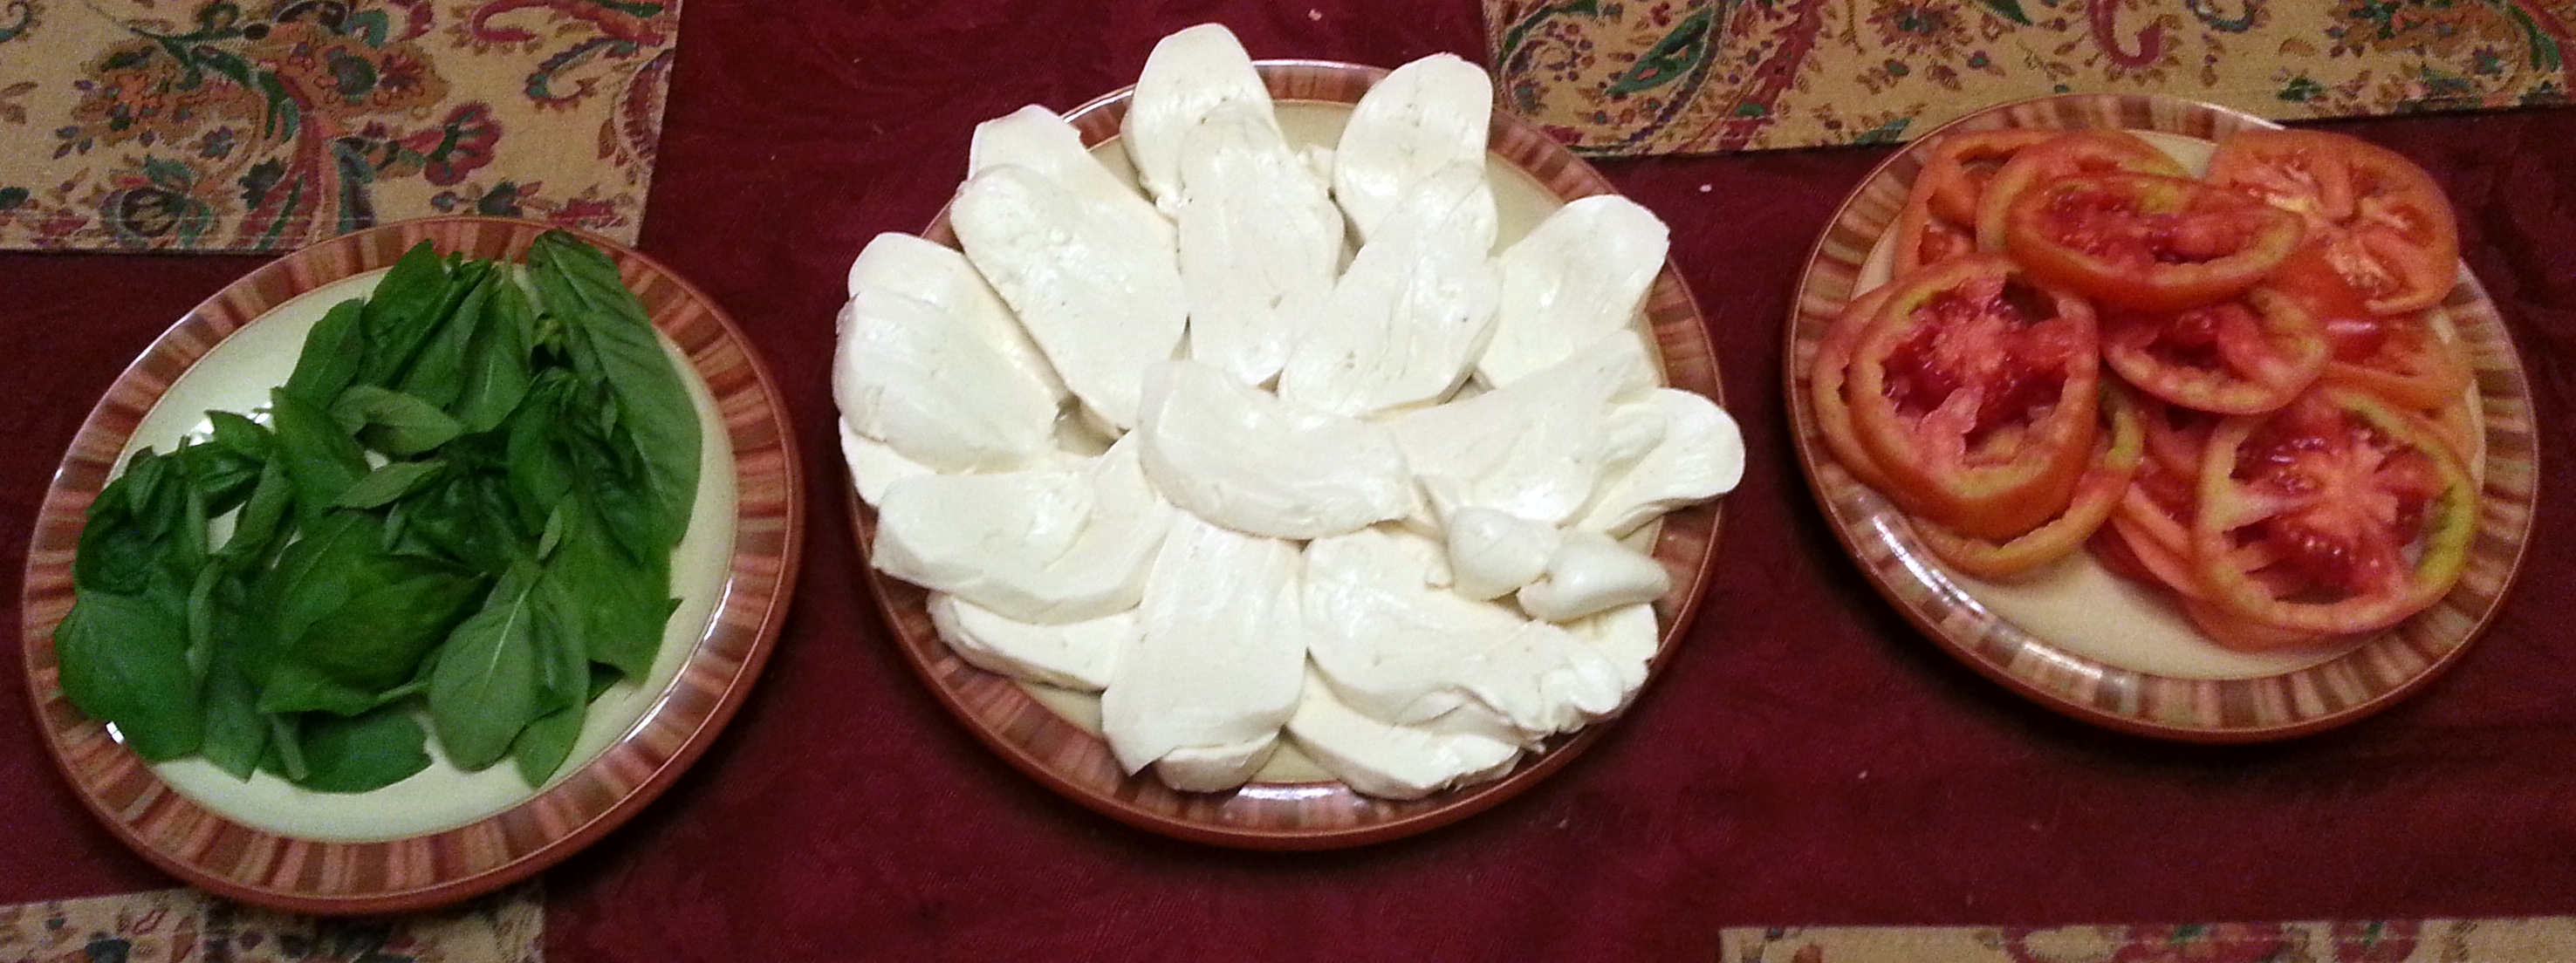
Knead to evenly distribute the heat and watch it become more uniformly shiny. I suspect I didn’t quite do this part right, as my cheese log had some issues staying together. However, it was dinner time, and the cheese was cheese, so I sliced it into 1/4″ slices and plated it. We assembled our delicious morsels of fresh mozzarella, CSA tomatoes, and basil from our garden — with a dab of olive oil and a sprinkle of kosher salt — and dug in.
13 Aug 2013 1 Comment
We also have an over abundance of watermelon… so if anyone has any ideas…
And the cheese was flipped and oiled. And the kimchi is starting to taste like kimchi, but I think it needs another day.


Recent comments