
They got to enjoy some quality time out in the yard, until the big yellow lab came over and wanted to play and they ran into the coop for safety. Smart little chickens.
Adventures in creating and exploration
18 Aug 2013 Leave a comment
They got to enjoy some quality time out in the yard, until the big yellow lab came over and wanted to play and they ran into the coop for safety. Smart little chickens.
18 Aug 2013 Leave a comment
A few weeks ago I thinned out the carrots and beets and roasted them up, and today I pulled the rest of them, along with the swiss chard and the collards out to make room for the squash that are trying to take over the garden and to start the fall planting.
These are the collards, or maybe kale, it’s hard to tell after the bugs got most of them. There were lessons learned here…

Next up the swiss chard, which I had actually forgotten about since it looks so much like the beets, except there’s no beet. It did surprisingly well. I think I’ll definitely plant some next year, but I won’t put it next to the beets this time. I am also trying a fall harvest of this one. 
These are the last of my tiny carrots. I really should have harvested them a few weeks ago as bugs got in and chewed up the top half of most of them, but they are very cute. I’ve also put in a new batch of these since they seem to grow fast.

And of course the beets. These I am most happy about. They grew perfectly except for where I planted them too close together and they are delicious. I’ve put in a second crop of these as well.
Left in garden are four squash like plants. They are either gourds, watermelons, butternut squash or pumpkins. For the most part they are just starting to fruit now, so I don’t have much hope for them, but perhaps their trellising (pipe cleaners) will help. We have a few small green things growing, which look like gourds to me, but I’m not sure. And one tiny cucumber. Also tiny green onions which we’ve been using as needed.
I also left the basil in as we are using straight from the garden. In the back there are also some eggplants that are flowering and might perhaps produce some tiny eggplants before it gets too cold. 
Little tiny gourds?
Also included in the fall planting, cilantro, radishes (all mine got too hot too quickly and died this spring) and some snap peas that I need to get another cage for. I’m not going to be heart broken if this batch doesn’t make it, but we had so many left over seeds I figured I might as well plant them!

14 Aug 2013 2 Comments
in Edibles Tags: Cheese, cheesemaking, mozzarella
I used a recipe very similar to Ricki’s 30 Minute Mozzarella, written by the same person, but in a printed book without photos.
This cheese came out surprisingly well given my lack of precision in making it. It produced about a pound of mozzarella, which was just enough for four adults who really enjoy caprese salad. I was happy to try a recipe that only made one pound of cheese — most recipes make two — as the resulting cheese is only good for a couple of days, and I didn’t want any to go to waste. Plus, the smaller batch meant only one gallon of milk and a smaller pot.
Compared to aged cheeses, this was utterly simple. Not quite as simple as a quick cheese of milk and lemon juice, but pretty close.
The reason it took an hour and a half longer than advertised was mostly due to the fact that I heated the milk too much on the first step, then had to cool it down again before I could add the citric acid. Apparently milk heats up really quickly on the stove. Further delays occurred because I then switched to heating it in a water bath — having gone too far once, I was concerned about using the stove for the rest of the process — but the water bath method takes longer to effect temperature change.
First step, gathering the ingredients (including rescuing the citric acid from the hidden depths of the pantry):

Heat the milk to 55*, or if you’re me, accidentally heat it to 75* on the stove and then cool it back down to 55* in the water bath.

Add dilute citric acid while stirring so the milk doesn’t immediately curdle.
Add hot water to the water bath until the milk reaches 90*, then take off heat and add rennet, stir for 30 seconds, and let sit for 5 minutes. When I checked it at that point, I didn’t see much curd formation, so I let it sit for another 3 minutes or so.
Cut the curd and put back into the water bath to heat to 105* while stirring. After this stirring, my curds were significantly more broken up than the pictures in the recipe. I’m not sure why; it could have been temperature differences, milk differences, the slower heating rate, all sorts of things. I’m actually kind of glad I wasn’t looking at the pictures from the recipe, because I would have been worried, and it turned out fine.
Scoop out the curds with a wire basket and put them into a microwave-save bowl.

Attempt to press more whey out of the curds in the bowl. I discovered a convenient synergy between the bowl and the wire basket such that I could press the curds with the basket while I poured out the whey.
Microwave the curds for a minute, then fold/knead them with a spoon to distribute the heat. Add salt to taste if you want. At this point, my curds were melding together and suddenly started looking like mozzarella. Microwave and knead a few more 30-second times as necessary. When it stretches like taffy, it’s done. Magic!

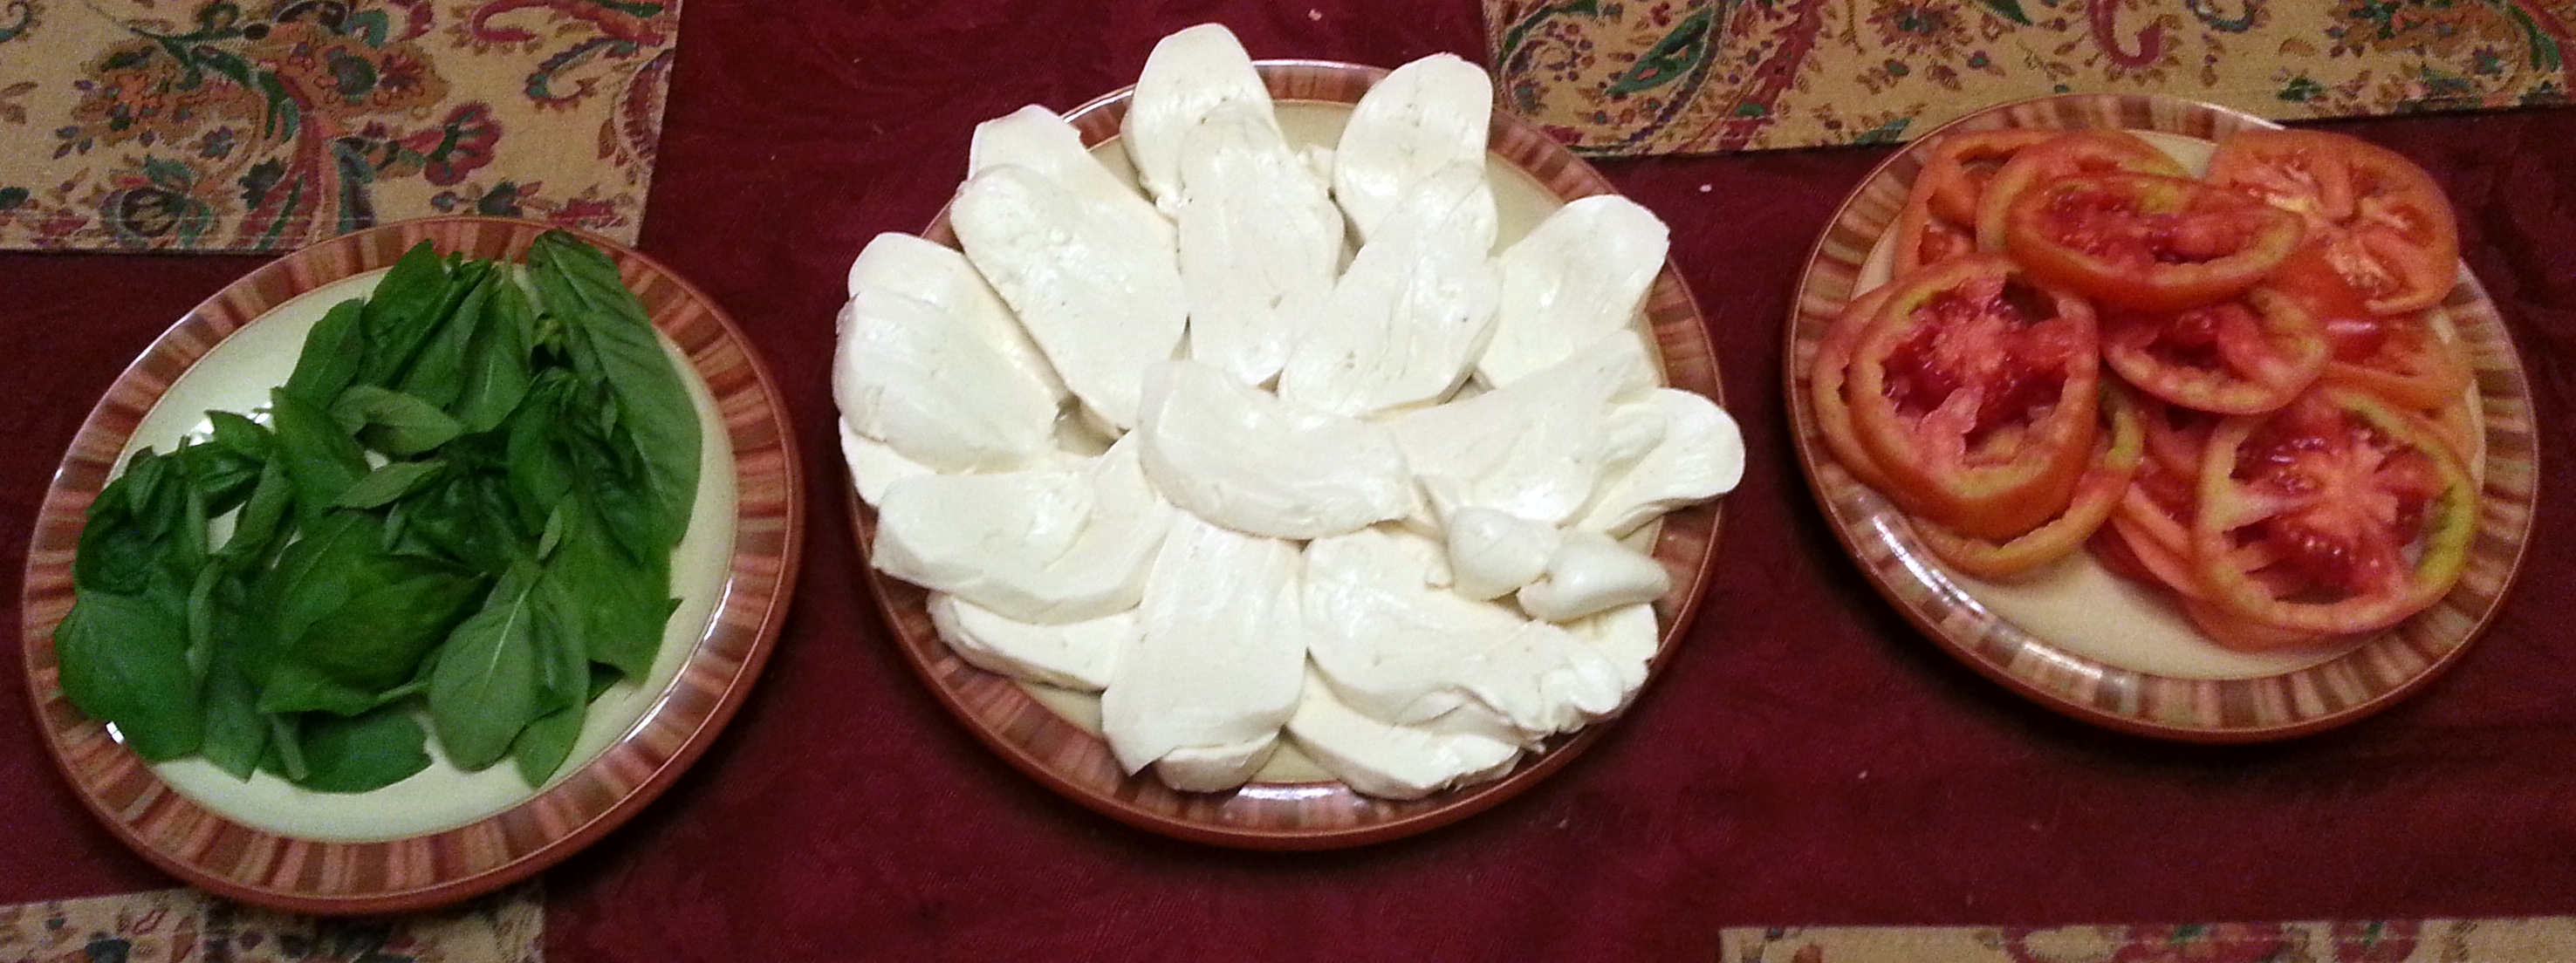
Knead to evenly distribute the heat and watch it become more uniformly shiny. I suspect I didn’t quite do this part right, as my cheese log had some issues staying together. However, it was dinner time, and the cheese was cheese, so I sliced it into 1/4″ slices and plated it. We assembled our delicious morsels of fresh mozzarella, CSA tomatoes, and basil from our garden — with a dab of olive oil and a sprinkle of kosher salt — and dug in.
13 Aug 2013 1 Comment
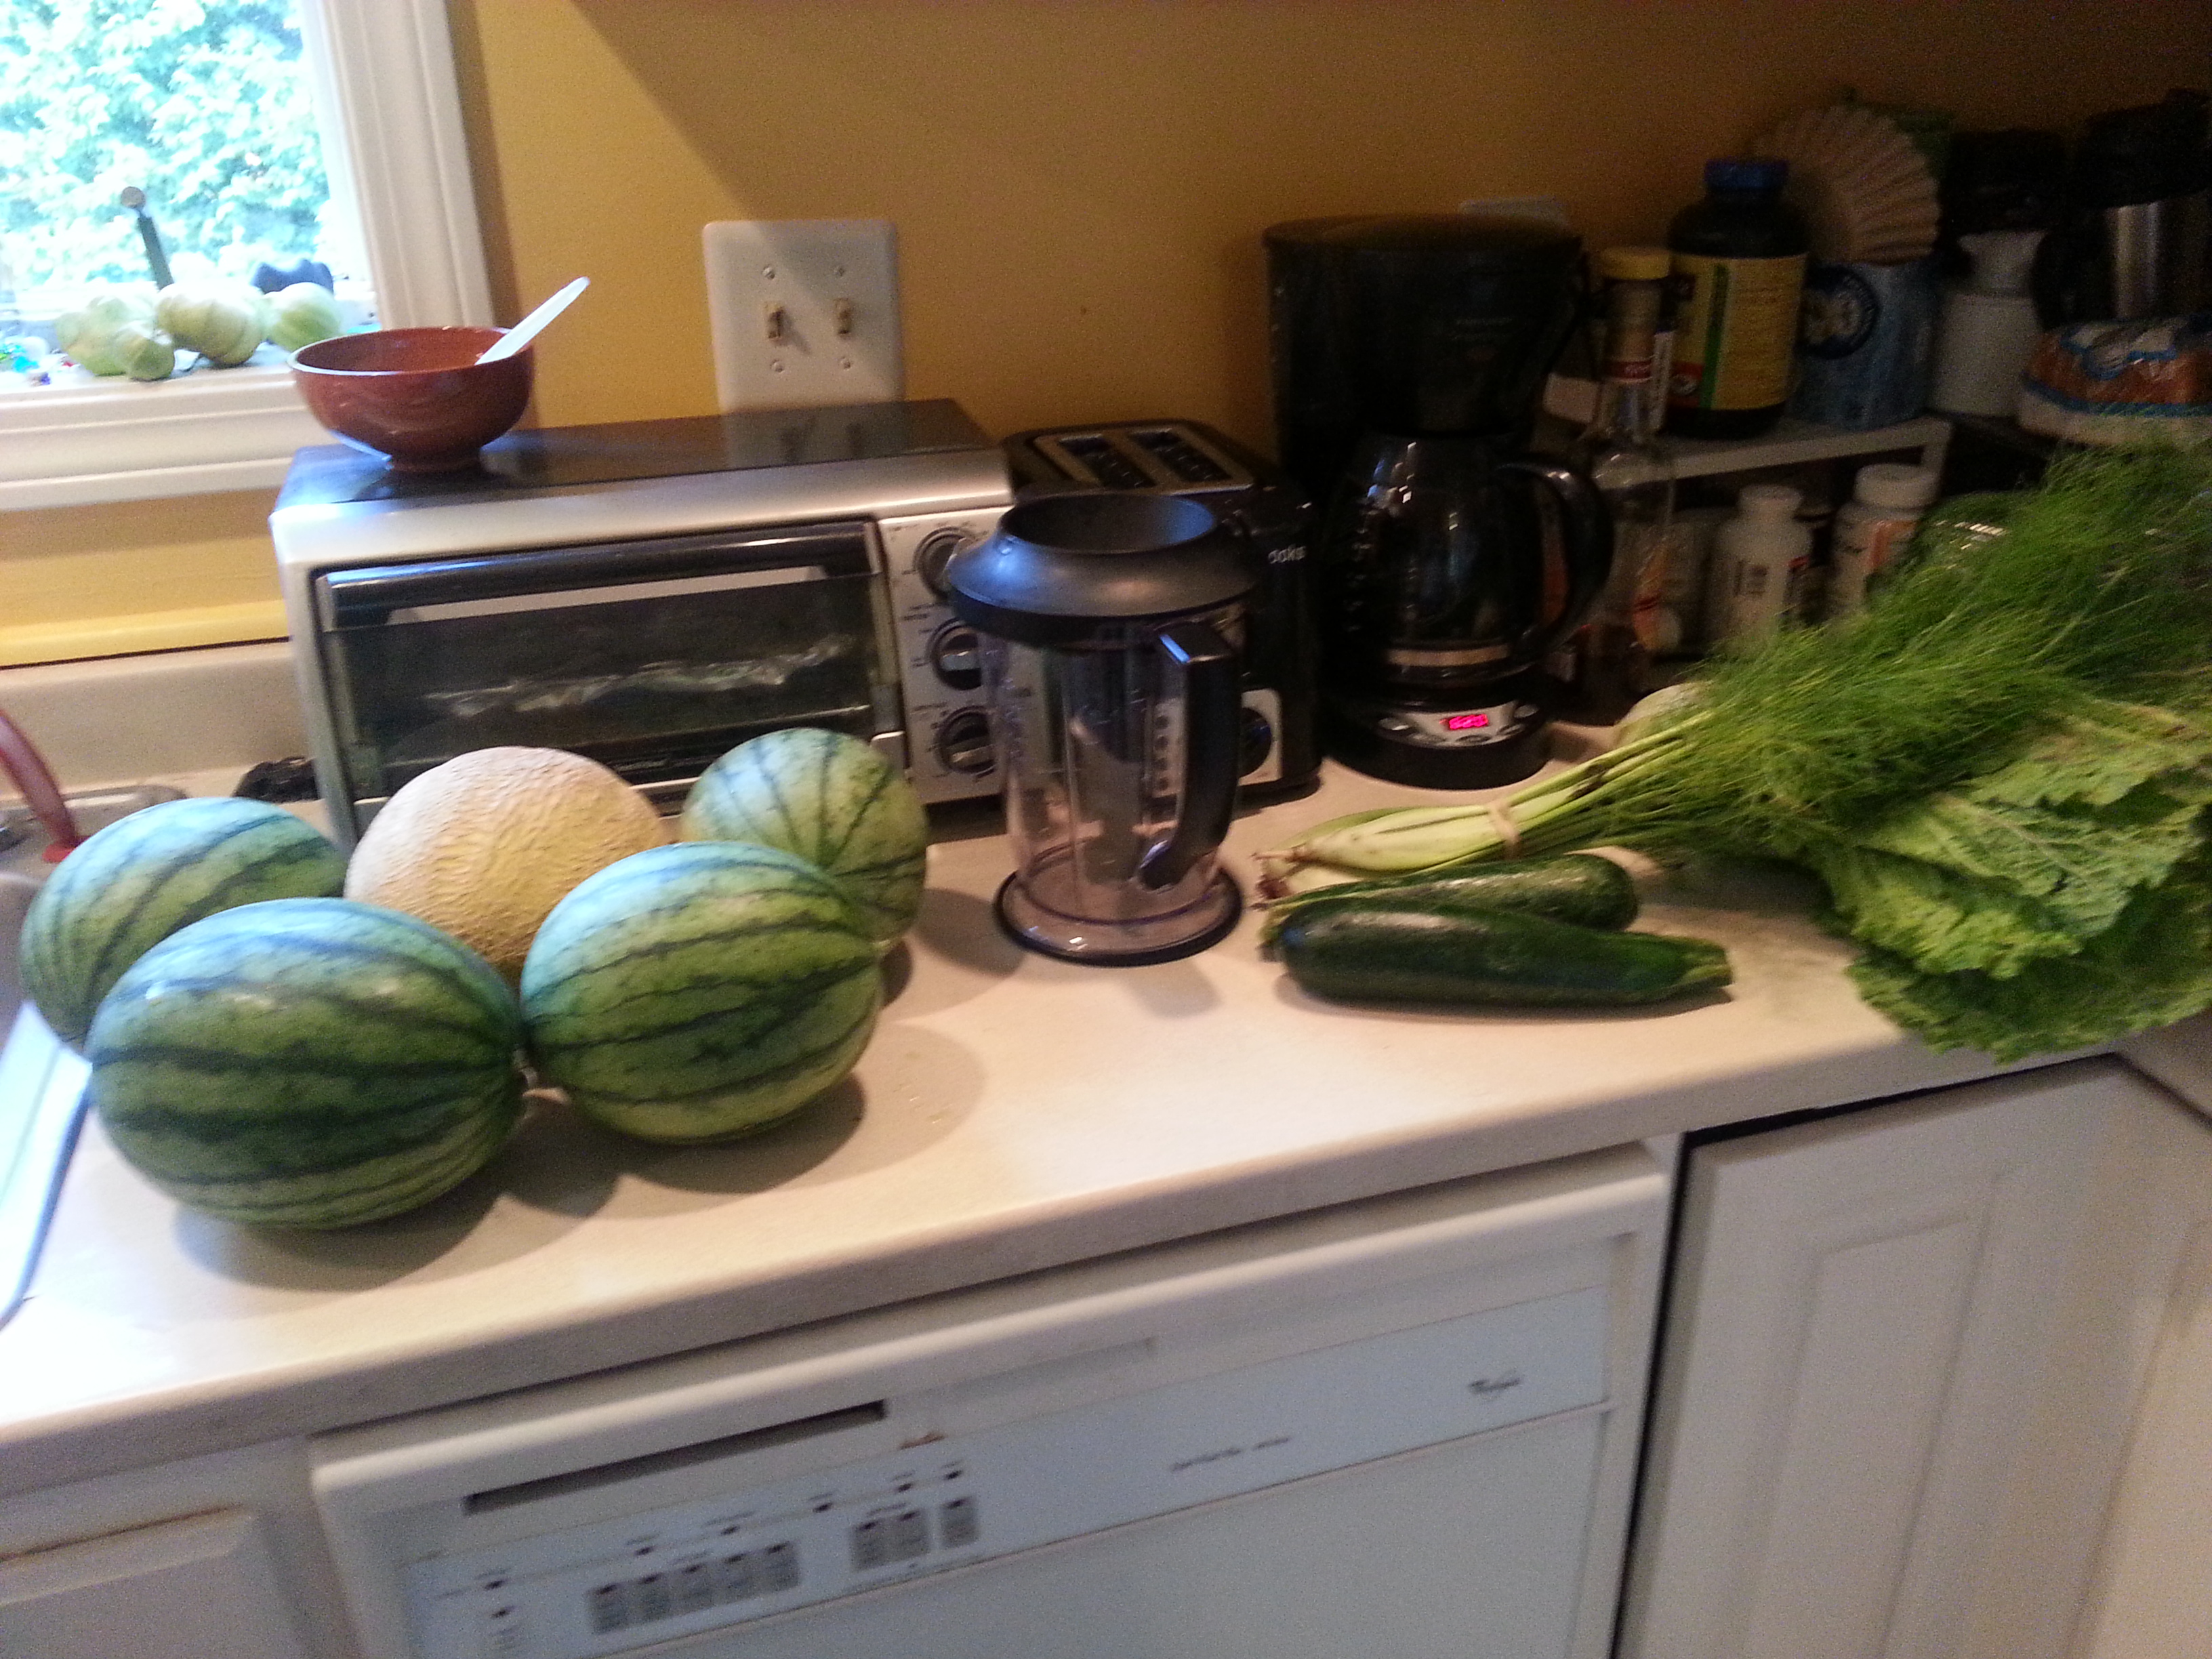
We also have an over abundance of watermelon… so if anyone has any ideas…
And the cheese was flipped and oiled. And the kimchi is starting to taste like kimchi, but I think it needs another day.
12 Aug 2013 Leave a comment
in Edibles Tags: fermentation, kimchi, lemons
The idea behind preserved lemons sort of mystifies me. Apparently they turn into something magical when they are compressed in pickling spices and salt. So basically you take washed lemons and cut them in half, then nearly cut the half into quarters and layer them with sea salt and pickling spices… and let them sit. periodically pushing them down if they emerge above the juice line. The recipe for this comes once again from Real Food Fermentation.


You can see the kimchi on day 2/3? sitting next to it. We added a cucumber to it to see what would happen.
12 Aug 2013 Leave a comment
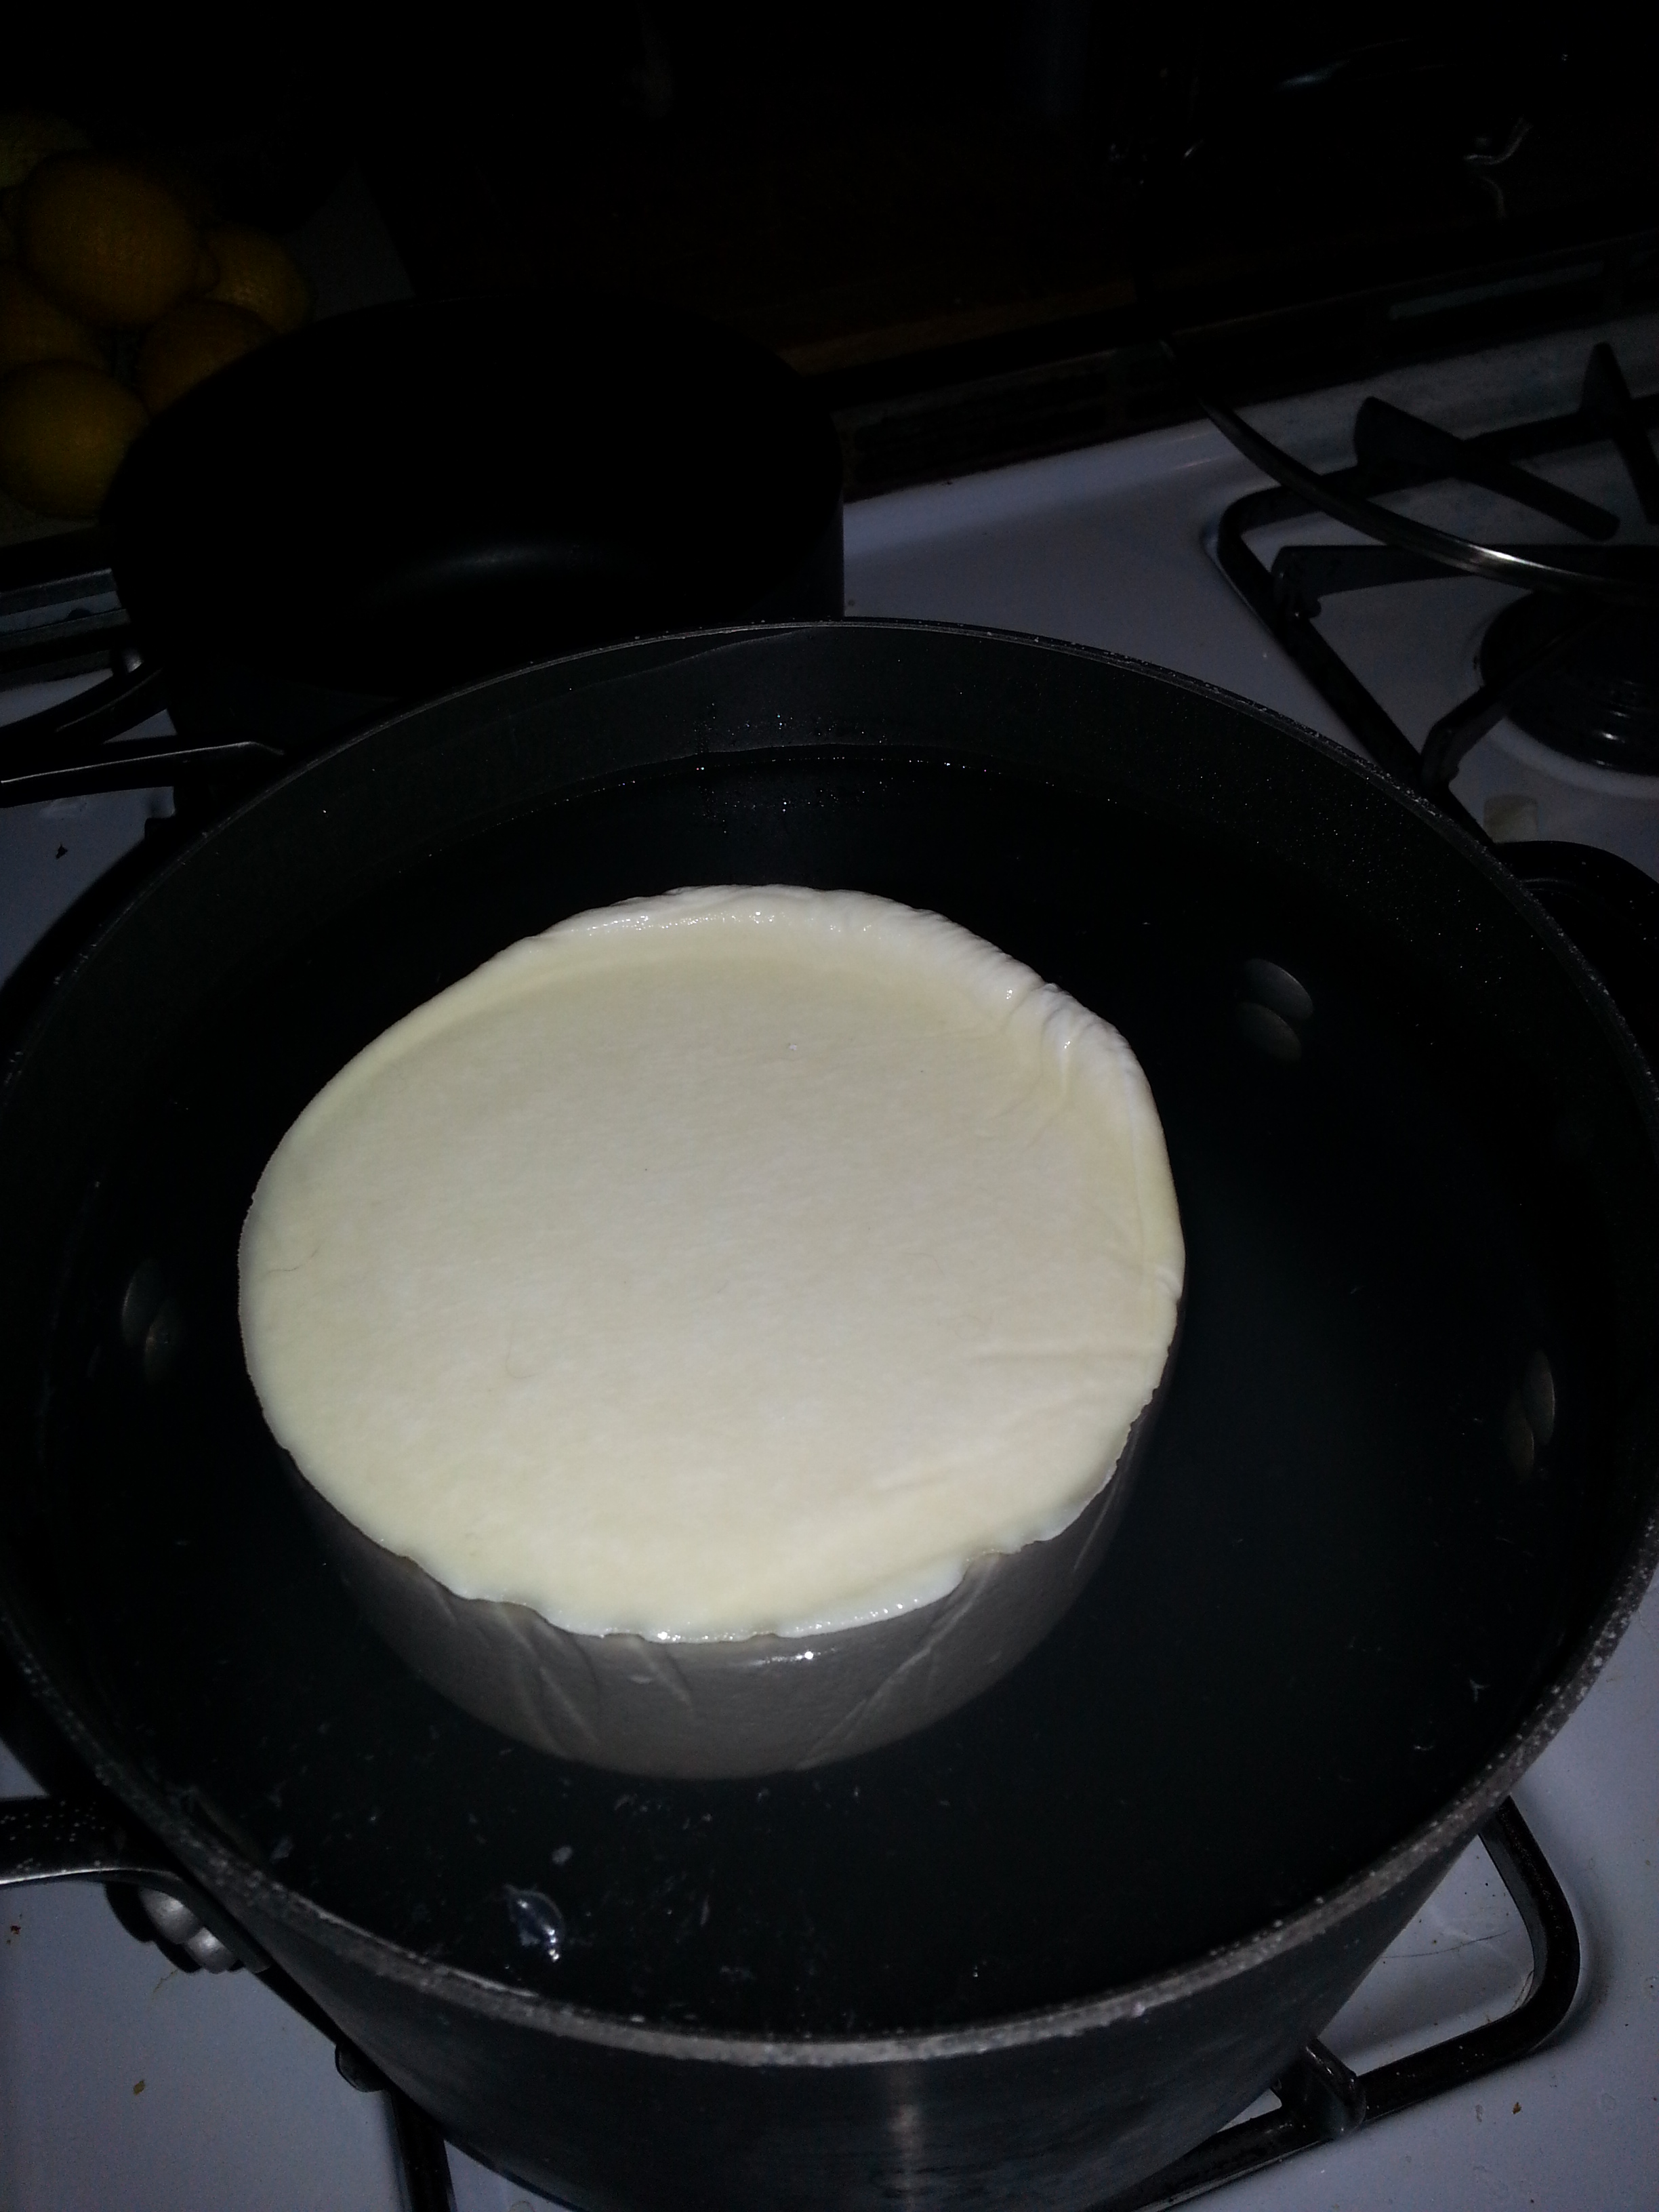
Next step for the cheese, a brush of olive oil and then sitting in the cleaned cheese fridge.


And the perpetual problem of remembering to oil and flip it every day.
12 Aug 2013 Leave a comment
in Edibles Tags: brine, Cheese
So the cheese looks pretty good this morning after its long night in the press. And the brine (left over from last time, reboiled, skimmed, a little salt added) got to rest all night waiting for the cheese. Ideally the cheese should brine in 55 degrees, but there’s no place my house cool enough(and warm enough)* for that, so we’ll see how it goes.


*The cheese fridge is actually made for 55 degrees, but it’s not big enough to handle the pot and the cheese brining. But if this fails, or has unexpected results, perhaps I’ll build a brining bath that will fit in the fridge.
11 Aug 2013 Leave a comment
in Edibles, Usables Tags: Cheese, cheese fridge, Cheese press, pantry, press

Cat free pantry accommodations
Tomorrow’s project (since I didn’t get to it today) Preserved lemons!

11 Aug 2013 1 Comment

seems to be doing well, Caitrin says it’s a bit spicy. I haven’t tasted it yet.
11 Aug 2013 Leave a comment
in Edibles, Usables Tags: Cheese, Cheese press, press
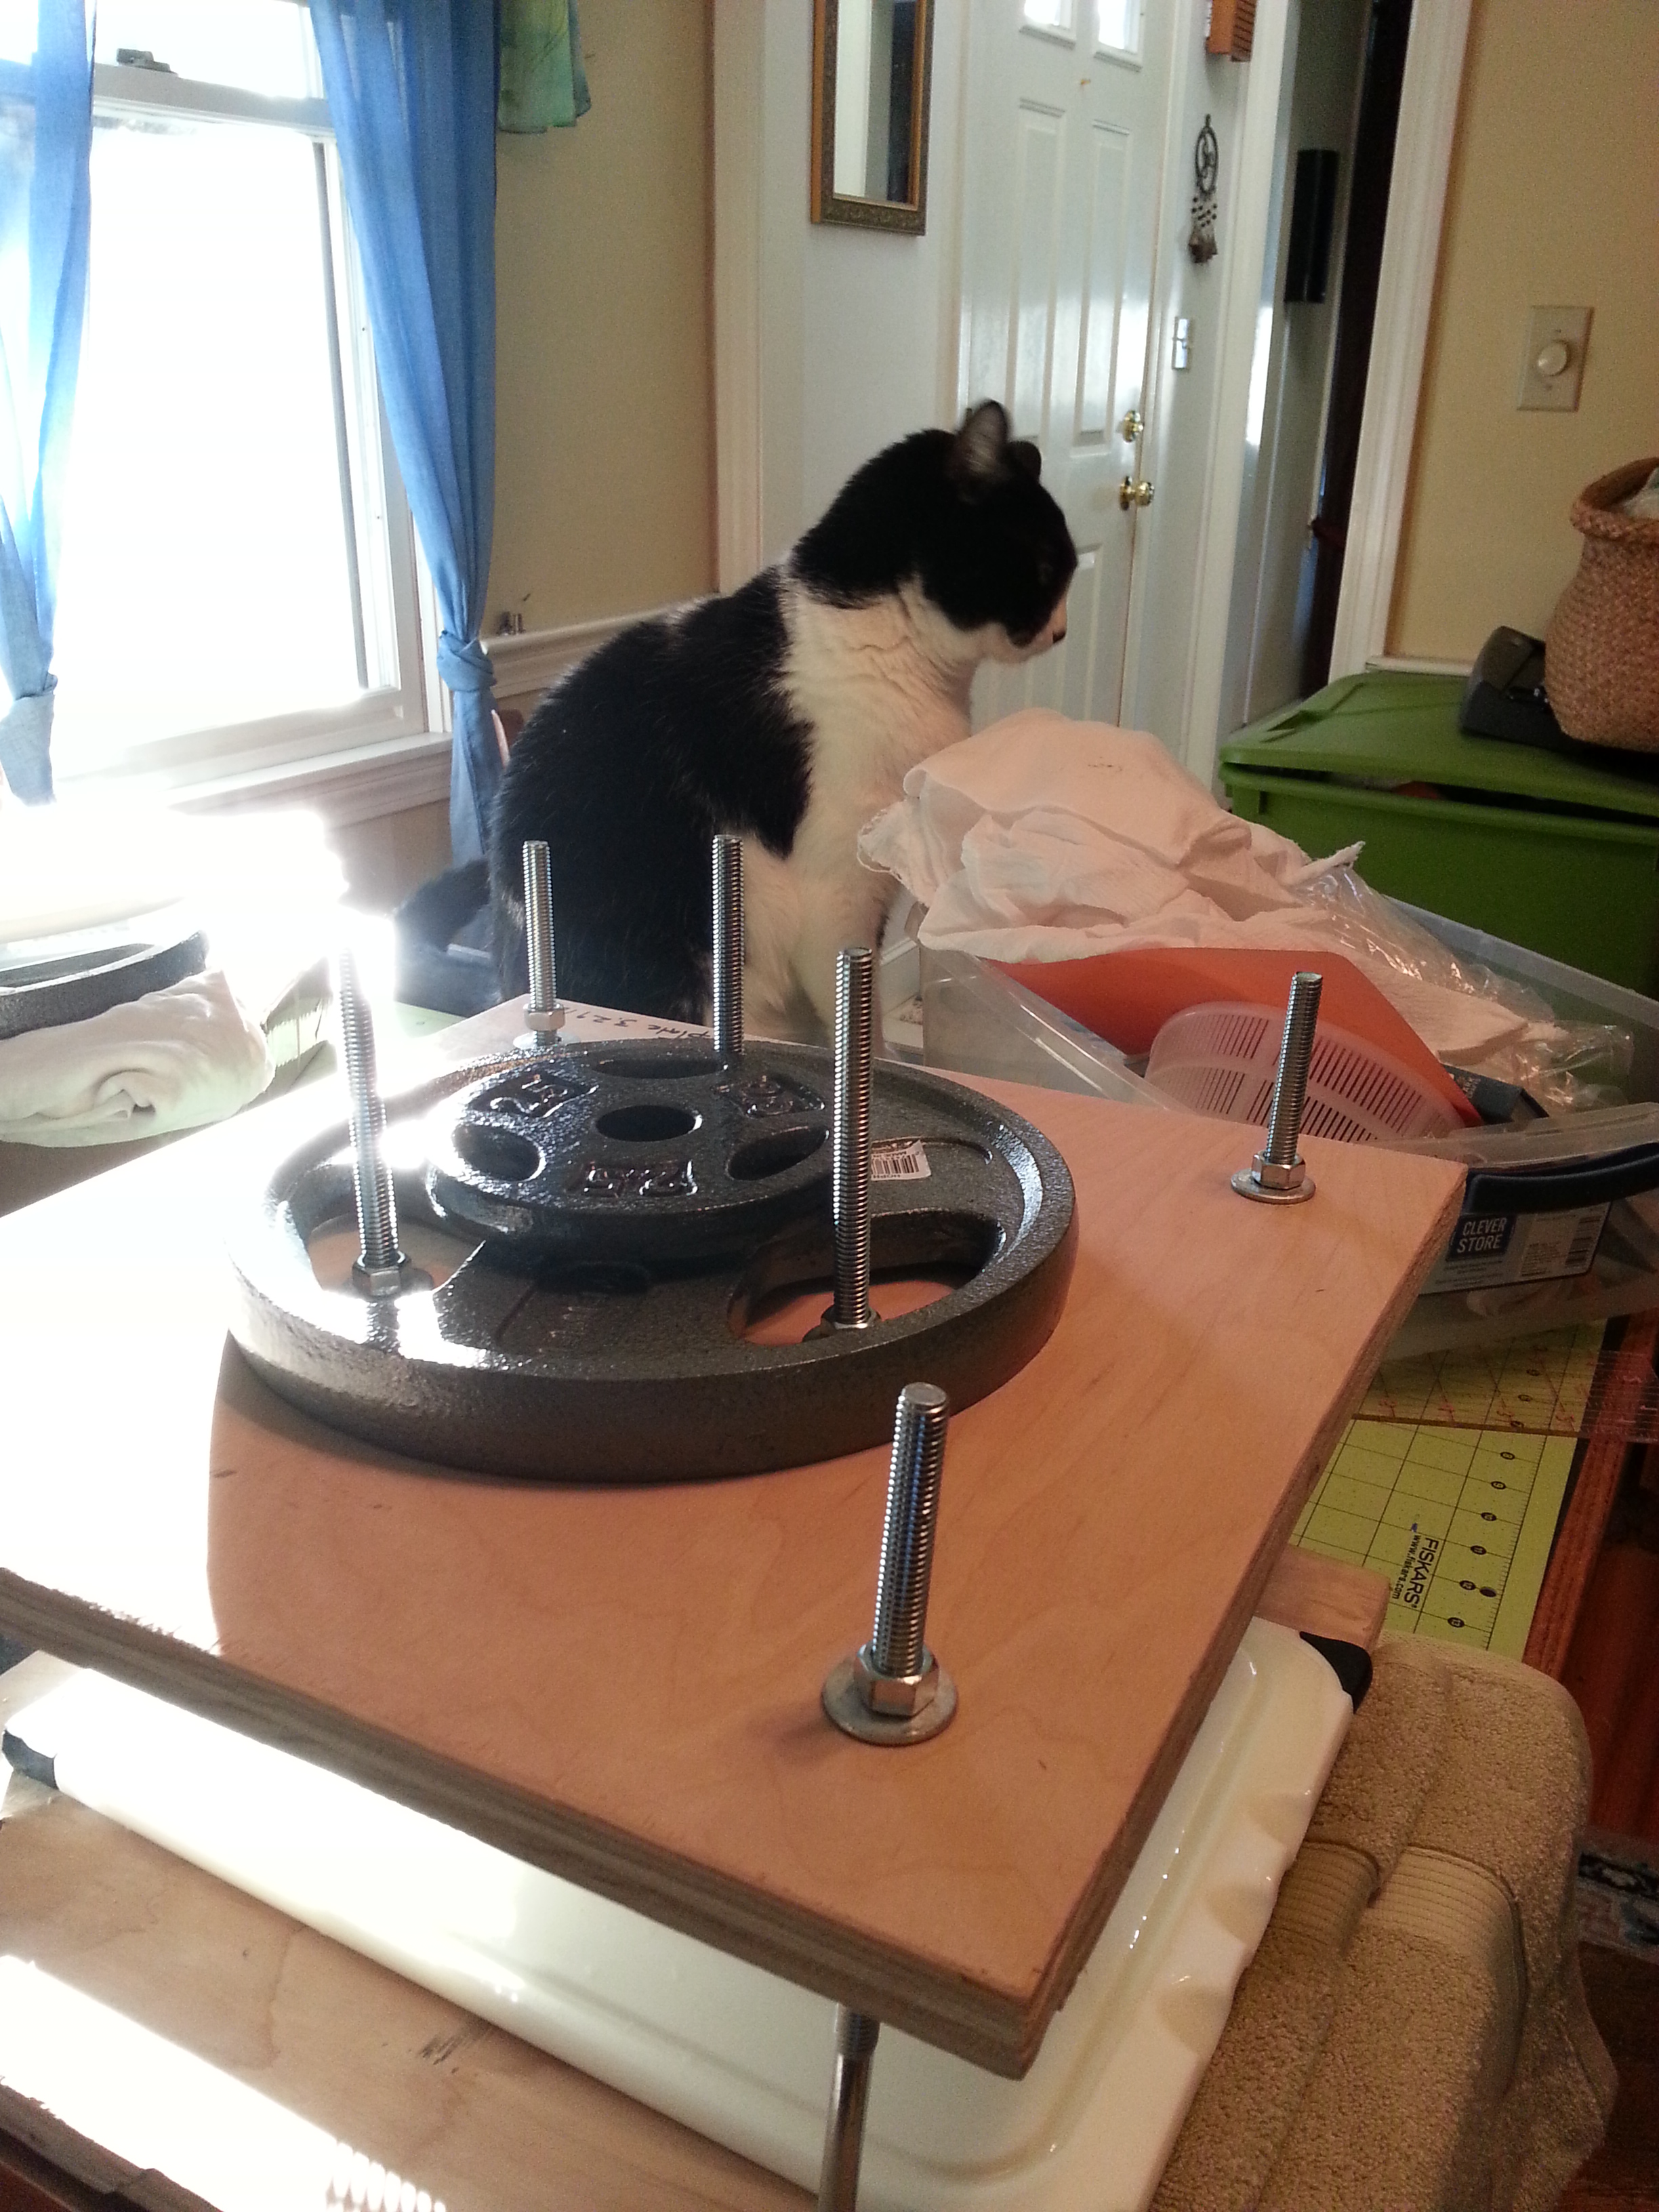
Finally time to put the press through its paces.
First thing I’ll fix, make the holes on the weight plate bigger, as they get moved a lot.
But all and all it seems to work well:
This is the first press, so it’s still really thick, it’s on its final press right now and it’s actually inside the mold now.
I created a drain plate using a meat cutting board (yay for drainage channels!) and a towel to sop up the whey as it comes out. There’s also a plastic drying sheet between the mold and the cutting board which is supposed to help with the draining. It’s what it will dry on once it’s out of the mold as well. I put one of the extra weights behind to raise it up a little to help the whey drain in the direction of the towel. Manchego doesn’t drain terribly much after the first pressing because the curds are so small and packed in, I’ll probably need a more robust drainage system for other cheeses.

Top view, 15, well actually 15.79 lbs but close enough. 
We need a cat proofing plan though… I think the press will go in the pantry for the night.
The last press is 30 pounds for 6 hours, but considering it started at 7pm and I plan to be in bed by 10pm, It’s going to get about 10 hours at 30 pounds and then tomorrow when I wake up, I’ll toss it in the brine.


Recent comments